3 Receta de tres leches esponjoso: postre tradicional

receta de tres leches esponjoso

El aroma dulce del tres leches esponjoso me recuerda a mi infancia en la cocina de mi abuela. Este postre es el corazón de nuestras celebraciones familiares. Te voy a enseñar cómo hacer esta torta esponjosa que encanta a todos.

El tres leches es más que un pastel. Es una experiencia que mezcla la suavidad de un bizcocho con la riqueza de tres leches. Esta receta de tres leches esponjoso te enseñará a hacer un postre que encantará a todos y te hará el mejor anfitrión.

pastel tres leches

Puntos Clave

  • El tres leches es un postre emblemático de la cocina latinoamericana
  • La receta combina un bizcocho esponjoso con tres tipos de leche
  • Aprenderás a preparar el bizcocho base, la mezcla de leches y la decoración
  • Este postre es ideal para celebraciones y reuniones familiares
  • La textura única del tres leches lo hace irresistible para todos los paladares

Historia y origen del pastel tres leches tradicional

El pastel tres leches es un postre muy querido en América Latina. Su historia es tan rica como su sabor. Se originó en varios países de la región.

Orígenes latinoamericanos del postre

La receta del pan tres leches comenzó en la década de 1940. México, Nicaragua y Perú dicen que lo inventaron. Pero lo cierto es que se hizo muy popular en toda América Latina.

bizcocho tres leches

Evolución del tres leches a través del tiempo

Con el tiempo, el pastel tres leches ha cambiado mucho. Cada país ha añadido su toque especial. Ahora hay versiones con cuatro leches, frutas tropicales o chocolate.

Importancia cultural en la gastronomía hispana

El bizcocho tres leches es un símbolo de la repostería hispana. Es un postre que siempre está presente en celebraciones. Su presencia en la mesa significa fiesta y tradición.

“El pastel tres leches es más que un postre, es parte de nuestra identidad culinaria”

Este postre es muy popular en todo el mundo. Ahora puedes encontrar la receta en restaurantes de cualquier lugar. Así, la cultura latinoamericana llega a cada rincón del planeta.

Receta de tres leches esponjoso: ingredientes esenciales

Para hacer un postre tres leches, necesitas los ingredientes correctos. La receta de bizcocho esponjoso y la mezcla de tres leches son clave. Aquí te mostramos lo que necesitas para hacer una auténtica torta tres leches.

Ingredientes para el bizcocho base

El secreto de un buen bizcocho para tres leches está en sus ingredientes. Te pedimos:

  • 2 tazas de harina de trigo
  • 6 huevos
  • 1 taza de azúcar
  • 2 cucharaditas de polvo de hornear
  • 1 cucharadita de esencia de vainilla

Mezcla especial de las tres leches

Lo que hace especial la receta de tres leches es su mezcla láctea. Prepara:

IngredienteCantidad
Leche evaporada1 lata (370 ml)
Leche condensada1 lata (397 g)
Crema de leche1 taza (240 ml)

Elementos para la decoración y cobertura

Para terminar tu torta tres leches, usa estos ingredientes:

  • 2 tazas de crema para batir
  • 2 cucharadas de azúcar glass
  • Fresas frescas o frutas de temporada
  • Canela en polvo (opcional)
postre tres leches

Con estos ingredientes, podrás hacer un postre tres leches esponjoso y sabroso. ¡Te aseguramos que todos se van a encantar!

Preparación paso a paso del postre tradicional

La receta de tres leches esponjoso es un clásico que requiere atención a los detalles. Aquí te presentamos una guía detallada para crear este delicioso postre desde cero.

Elaboración del bizcocho esponjoso

Para lograr una receta pastel esponjoso perfecta, comienza batiendo los huevos con azúcar hasta obtener una mezcla cremosa. Luego, incorpora la harina tamizada con suavidad. Este paso es crucial para lograr la esponjosidad característica del tres leches.

Proceso de horneado y enfriamiento

Hornea el bizcocho a 180°C por aproximadamente 30 minutos. Una vez listo, déjalo enfriar completamente antes de proceder. Este paso es esencial para que el pastel absorba adecuadamente la mezcla de leches.

Técnica de empapado con las tres leches

Prepara la mezcla de tres leches combinando leche evaporada, leche condensada y crema. Perfora el bizcocho con un tenedor y vierte la mezcla gradualmente. Esta técnica garantiza un empapado uniforme en toda la torta esponjosa.

Decoración y presentación final

Para finalizar tu receta torta esponjosa, cubre el pastel con crema batida y decora con frutas frescas o ralladura de chocolate. Refrigera por unas horas antes de servir para que los sabores se integren perfectamente.

PasoTiempoTemperatura
Preparación del bizcocho15 minutosAmbiente
Horneado30 minutos180°C
Enfriamiento1 horaAmbiente
Empapado20 minutosRefrigeración
Decoración10 minutosRefrigeración

Conclusión

El postre tres leches es una joya de la gastronomía latinoamericana. Ha conquistado paladares en todo el mundo. Esta receta te permite crear un pastel suave y lleno de sabor en tu cocina.

La clave está en usar ingredientes frescos y seguir cada paso con atención. Preparar este pastel tres leches es una experiencia gratificante. Desde batir el bizcocho hasta verter la mezcla de leches, cada etapa es importante.

La textura esponjosa y el dulce equilibrado hacen de este postre una opción perfecta para cualquier celebración. Recuerda que la práctica lleva a la perfección. No te desanimes si tu primer intento no sale exactamente como esperabas.

Con el tiempo, dominarás esta receta y podrás compartir este delicioso postre con orgullo. ¡Anímate a probar y disfruta del proceso!

FAQ

¿Cuál es el origen del pastel tres leches?

El pastel tres leches proviene de América Latina. Su historia comienza en la mitad del siglo XX. Ahora, es un clásico en muchas fiestas familiares.

¿Qué ingredientes se necesitan para hacer un tres leches esponjoso?

Para el bizcocho, necesitas harina, huevos, azúcar y levadura. La mezcla de tres leches incluye leche evaporada, leche condensada y crema. Para decorar, se usa crema batida y frutas.

¿Cómo se prepara el bizcocho para el tres leches?

Primero, bate los huevos con azúcar hasta que estén espumosos. Luego, añade la harina y la levadura con movimientos suaves. Esto hace que el bizcocho sea ligero y perfecto para empapar.

¿Cómo se empapa el bizcocho con las tres leches?

Después de hornear y enfriar el bizcocho, empápalo con las tres leches. Es clave hacerlo de forma uniforme para que quede suave y no se desmorone.

¿Cuánto tiempo debe reposar el pastel después de agregar las tres leches?

Deja reposar el pastel en el refrigerador por 2-3 horas después de empaparlo. Así, se distribuirá bien y adquirirá la textura ideal.

¿Se puede congelar el pastel tres leches?

Sí, puedes congelar el pastel tres leches. Envuélvelo bien en plástico y durará hasta 3 meses. Descongélalo en el refrigerador antes de decorar y servir.

¿Qué variaciones existen del pastel tres leches tradicional?

Hay muchas variaciones, como el pastel cuatro leches o tres leches de chocolate. También existen versiones con frutas tropicales. Algunas recetas añaden licor para un toque especial.

Flan de Queso Receta Fácil | Postre Suave y Delicioso

flan de queso

Imagina una textura cremosa que se deshace suavemente en tu boca. Un sabor delicado que recuerda los postres caseros de tu infancia. Bienvenido al flan de queso receta, un postre tradicional de la cocina española.

Este dulce y sencillo postre de huevo y leche es perfecto para cualquier ocasión. Ya sea una cena familiar, una celebración especial o un momento de indulgencia personal.

Clave Para Recordar

  • El flan de queso es un postre clásico de la cocina española
  • Tiene una textura cremosa y un sabor delicado
  • Es fácil de preparar y puede ser disfrutado en cualquier ocasión
  • Combina los ingredientes tradicionales de huevo y leche
  • Ofrece una experiencia culinaria nostálgica y reconfortante

Todo lo Que Necesitas Saber Sobre el Flan de Queso

El flan de queso es un postre tradicional muy querido. Se conoce también como crema pastelera horneada o natillas de horno. Este postre tiene un origen fascinante y muchos beneficios para la salud. Además, hay muchas formas de prepararlo que puedes probar.

Historia y Origen del Postre Tradicional

El flan de queso proviene de la cocina española. Ha sido un favorito durante siglos. Se hace con queso fresco, huevos, leche y azúcar, lo que da una textura suave y cremosa.

Con el tiempo, se han creado muchas versiones diferentes. Algunas incluyen vainilla, queso crema y otros ingredientes.

Beneficios y Valor Nutricional

El flan de queso es más que un postre delicioso. Es una fuente importante de proteínas, calcio y vitaminas. El azúcar le da energía, siempre que se coma con moderación.

Es una opción saludable y saciante. Perfecto para quienes buscan un postre suave y nutritivo.

Variaciones Populares del Flan de Queso

  • Flan de queso crema: Una versión más cremosa y suave, con la adición de queso crema en la mezcla.
  • Flan de queso y vainilla: Una combinación clásica que incorpora esencia de vainilla para realzar el sabor.
  • Flan de queso y caramelo: Un postre con una capa de caramelo en la parte superior, que aporta un delicioso contraste.
  • Flan de queso con frutas: Versiones del flan que incluyen frutas frescas, como fresas, melocotones o mango, para añadir frescura y acidez.

El flan de queso, en su versión tradicional o en sus variaciones, sigue siendo un postre amado. Su textura suave y sabor irresistible lo hacen especial.

Flan de Queso Receta: Ingredientes y Preparación

¿Listo para hacer un postre cremoso y delicioso? El flan de queso receta es un clásico que te encantará. Te mostramos cómo hacerlo fácilmente en casa.

Ingredientes Necesarios

  • 4 huevos
  • 1 lata (14 oz) de leche condensada
  • 1 lata (12 oz) de leche evaporada
  • 1 cucharada de vainilla
  • 1 paquete (8 oz) de queso crema, a temperatura ambiente
  • 1/2 taza de azúcar

Instrucciones Paso a Paso

  1. Precalienta el horno a 350°F (175°C).
  2. En un tazón grande, bate los huevos hasta que estén bien combinados.
  3. Agrega la leche condensada, la leche evaporada y la vainilla. Mezcla hasta que quede suave.
  4. En otro tazón, bate el queso crema y el azúcar hasta que estén cremosos.
  5. Incorpora la mezcla de queso crema a los huevos, revolviendo con cuidado.
  6. Vierte la mezcla en un molde de 9 pulgadas previamente engrasado.
  7. Hornea durante 50-60 minutos, o hasta que esté casi firme.
  8. Retira del horno y deja enfriar. Luego, refrigera durante al menos 2 horas antes de servir.

¡Listo! Ahora puedes disfrutar de tu flan de queso casero. Sirve frío, con salsa de caramelo, fruta o chantilly. Es perfecto para cualquier ocasión.

¡Recuerda que la clave para un flan de queso perfecto es tener paciencia y seguir cuidadosamente cada paso de la receta!

Conclusión

El flan de queso es un postre tradicional y delicioso. Combina la suavidad del huevo con la riqueza de la leche. Ahora sabes sobre sus orígenes y beneficios nutricionales.

Además, has aprendido sobre las variaciones populares. Ahora es el momento de hacerlo tú mismo. Disfruta de la experiencia del flan cremoso, un postre de huevo y leche que cautivará a todos.

La presentación es clave para realzar este postre. Puedes servirlo en copas individuales. Decorarlo con caramelo o fruta fresca lo hace aún más especial.

Además, combina perfectamente con café o té. Será el cierre ideal para cualquier comida o reunión.

Disfruta de este delicioso manjar y comparte la receta. El flan cremoso y el postre de huevo y leche serán un clásico en tu cocina.

FAQ

¿Qué es el flan de queso?

El flan de queso es un postre español famoso. Tiene una textura cremosa y suave. Se hace con huevos, leche y queso, lo que le da un sabor especial.

¿Cuáles son los ingredientes básicos para hacer flan de queso?

Para hacer flan de queso, necesitas: huevos, leche, queso (como queso crema o mascarpone), azúcar y vainilla.

¿Cómo se hace el flan de queso?

Primero, bates los huevos y mezclas la leche, el queso, el azúcar y la vainilla. Luego, pon la mezcla en un molde y hornea hasta que esté cremoso y firme.

¿Cuáles son las variaciones más populares del flan de queso?

Variaciones populares incluyen flan de vainilla, caramelo y chocolate. También puedes añadir frutas, nueces o especias para darle un toque personal.

¿Cuáles son los beneficios de comer flan de queso?

El flan de queso es rico en proteínas y calcio. Su textura suave y cremosa lo hace un postre delicioso y satisfactorio.

¿Cómo se puede servir y presentar el flan de queso?

Se puede servir frío, a temperatura ambiente o caliente. Suele darse en porciones individuales o en un plato grande para compartir. Algunos toques finales populares son salsa de caramelo, fruta fresca o galletas.

Best-Ever Almond Cookies Recipe | Easy, Crunchy & Irresistible Treats

almond cookies recipe

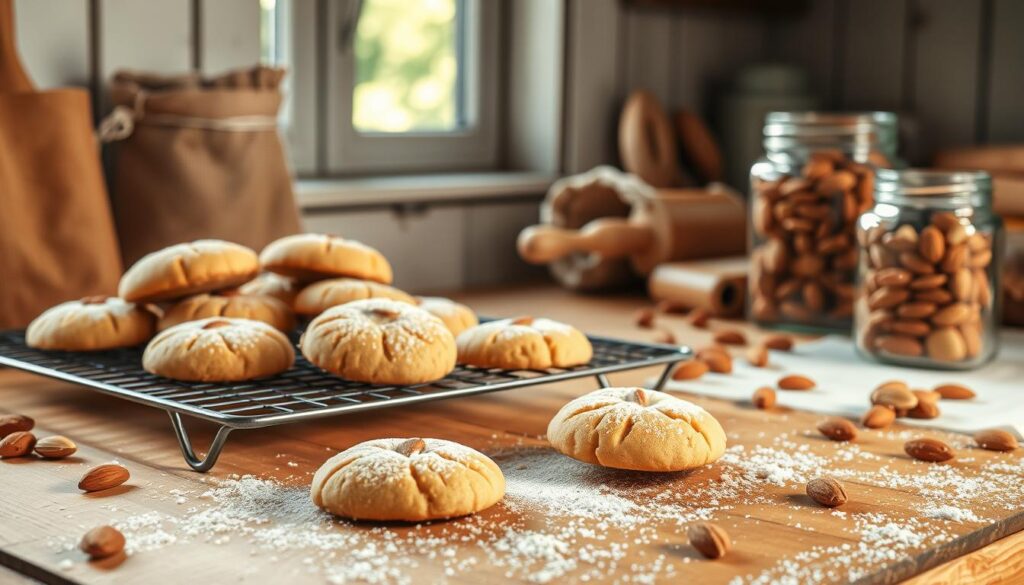
As the sun shines through the kitchen window, the smell of fresh cookies fills the air. It takes you back to happy childhood memories. The smell of toasted almonds and the crunch of these treats are hard to ignore.

Whether you’re baking for a family get-together or looking for a special gift, this almond cookies recipe is a winner. It’s sure to please everyone’s taste buds.

Key Takeaways

  • Discover the secret to creating the perfect balance of crunch and tenderness in homemade almond cookies.
  • Learn how to harness the health benefits of almonds to make these treats a guilt-free indulgence.
  • Uncover the simple yet effective techniques that elevate these cookies to a new level of deliciousness.
  • Explore a variety of flavor combinations and seasonal adaptations to keep your taste buds constantly surprised.
  • Dive into the step-by-step instructions to master the art of baking these almond cookies with ease.

Why These Almond Cookies Will Become Your New Favorite

Baking almond cookies is a fun way to enjoy almonds’ health benefits. These treats satisfy your sweet cravings and offer a nutritional boost. Almonds are the key ingredient.

Health Benefits of Almonds in Baking

Almonds are packed with nutrients, making them perfect for baked goods. They are full of protein, dietary fiber, healthy fats, vitamins, and minerals. Adding almond cookie ingredients to your baking can bring many health benefits, such as:

  • Improved heart health due to the monounsaturated fats found in almonds
  • Better blood sugar management thanks to the fiber and protein content
  • Stronger bones and teeth with the help of calcium, magnesium, and phosphorus
  • Enhanced cognitive function from the vitamins and antioxidants present in almonds

What Makes These Cookies Special

These almond cookies are special because of their unique texture and flavor. They have crisp edges, chewy centers, and a lovely almond scent. This makes them irresistible. The secret is in the right mix of ingredients and baking technique for the perfect crunch.

“These almond cookies are a true delight – the perfect blend of crunchy and chewy, with a subtle almond flavor that keeps you coming back for more.”

If you want a cookie that’s both tasty and healthy, try this almond cookie recipe. It’s sure to become your new favorite.

almond cookie ingredients

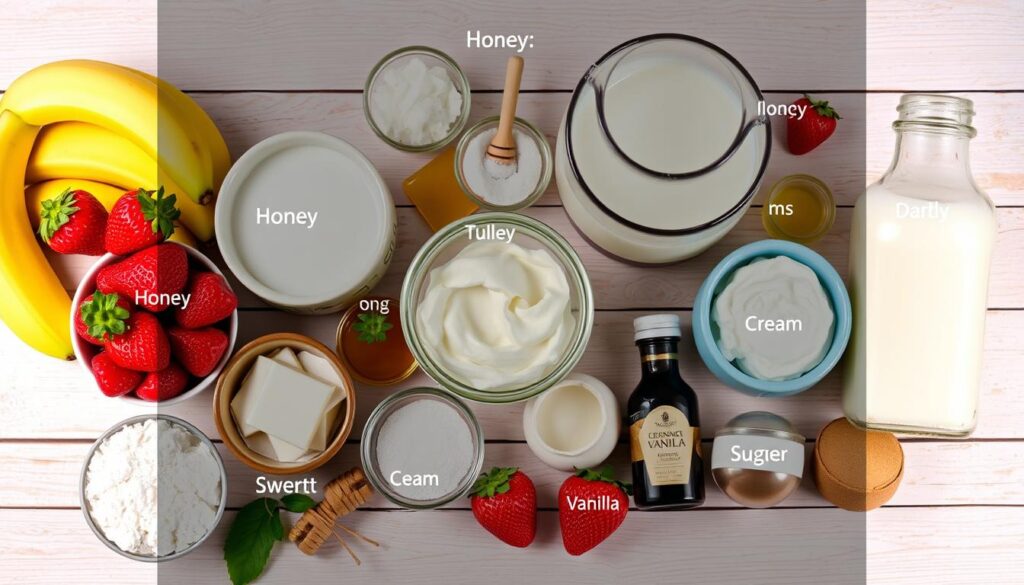
Essential Ingredients for Perfect Almond Cookies

Making the perfect almond cookies is all about the right mix of ingredients. Whether you like the traditional almond flour cookies or something different, knowing these key elements is crucial. It’s what makes the cookies both delicious and textured just right.

The core of the recipe is the almonds. Ground almond flour or meal gives a soft, nutty texture. Whole, sliced, or slivered almonds add a nice crunch. You can adjust how much of each you use to get the cookie just right for you.

Butter or plant-based alternatives like coconut oil add richness and softness. Granulated sugar and brown sugar add sweetness and a caramel flavor. Eggs or egg replacers help the dough stick together and make the cookies chewy.

Finally, a little vanilla extract adds a deep aroma, a pinch of salt balances the taste, and baking powder or baking soda ensure the cookies rise and have the right texture.

“The secret to creating the ultimate almond cookies lies in finding the right balance of these fundamental components.”

With these essential ingredients, you’re ready to bake almond cookies that will impress everyone. They’ll be a hit with your guests, and they’ll want more.

almond cookie ingredients

Kitchen Tools and Equipment You’ll Need

Baking almond cookies needs some key kitchen tools for the right texture and taste. Whether you’re experienced or new to baking, the right tools make it easier and more fun. Here are the essential baking tools and some extra equipment for making those tasty almond cookies.

Must-Have Baking Tools

  • Baking sheets or cookie trays: Get good-quality baking sheets or trays for even heat and baking.
  • Mixing bowls: You’ll need different sizes of mixing bowls for all the ingredients and steps.
  • Whisk or hand mixer: A whisk or hand mixer mixes wet and dry ingredients well, making the dough smooth.
  • Spatula or wooden spoon: A strong spatula or wooden spoon is key for mixing and shaping the dough.
  • Parchment paper or silicone baking mats: Use parchment paper or silicone mats to stop cookies from sticking.
  • Cooling rack: A cooling rack helps cookies cool evenly and prevents them from getting soggy.

Optional Equipment for Professional Results

While the basic tools are crucial, some extra equipment can improve your almond cookie baking:

  1. Stand mixer: A stand mixer with a paddle attachment makes mixing the dough easier, especially for big batches.
  2. Piping bag and tips: Use a piping bag and tips for a professional look when shaping the dough before baking.
  3. Cookie scoop: A cookie scoop makes your almond cookies the same size, for even baking and a neat look.
  4. Food processor: A food processor quickly grinds almonds into fine flour, great for gluten-free recipes.

Even without all the extra equipment, you can still make delicious almond cookies with the basics. The important thing is to be creative and use what you have to get the best results.

baking almond cookies

Step-by-Step Almond Cookies Recipe

Making delicious almond cookies is easy with this guide. It’s perfect for both new and experienced bakers. These easy almond cookie recipe steps will help you make tasty homemade almond cookies every time.

First, heat your oven to 350°F (175°C). Then, line a baking sheet with parchment paper. In a bowl, mix the flour, baking powder, and a bit of salt. Set it aside.

  1. In another bowl, mix the butter and sugar until fluffy, about 2-3 minutes.
  2. Add the egg and vanilla extract and mix well.
  3. Slowly add the dry ingredients to the wet ones, mixing just until a dough forms. Don’t overmix.
  4. Then, mix in the chopped almonds by hand, making sure they’re spread out evenly.

Use a cookie scoop or tablespoon to make 1-inch balls. Place them 2 inches apart on the baking sheet. Flatten each cookie slightly with a fork.

almond cookies

Bake the easy almond cookie recipe for 10-12 minutes, until the edges are golden. Let them cool on the sheet for 5 minutes. Then, move them to a wire rack to cool completely.

Enjoy these soft, chewy, and tasty almond cookies with coffee or as a snack. Follow this guide, and you’ll be baking perfect easy almond cookie recipe in no time!

Tips for Achieving the Perfect Texture

Baking crunchy almond cookies or chewy ones is an art. Getting the texture right is crucial for making treats that everyone loves. Whether you want a crunchy or chewy cookie, these tips will help you achieve the perfect texture every time.

Getting That Signature Crunch

To get that crunchy texture, focus on your baking method. Chill your cookie dough well before baking. This helps the cookies keep their shape and get a crisp outside.

Also, watch your baking temperature and time. Baking at around 350°F for a bit longer will give you a crunchy finish.

Moisture Control Techniques

It’s important to balance moisture to avoid soggy or dry cookies. Use the right amount of butter and eggs in your recipe. Don’t overmix the dough, as it can make the cookies tough and dry.

Keep an eye on your cookies towards the end of baking. Take them out when they’re lightly golden brown around the edges. This way, you’ll get a chewy center with a crisp outside.

“Achieving the perfect texture in almond cookies is all about paying attention to the details. With a little practice, you’ll be baking batch after batch of cookies that are exactly how you want them – crunchy, chewy, and utterly delicious.”

Variations and Flavor Combinations

The classic almond cookies recipe is a timeless delight. But why not explore some creative variations to tantalize your taste buds? Whether you’re a fan of bold flavors or prefer a more subtle approach, there’s an almond cookie variation out there to suit your preferences.

For those with a sweet tooth, consider folding in some rich chocolate chips or tangy dried cranberries to the dough. The combination of the buttery almond cookies and the contrasting flavors will leave you craving more. If you’re in the mood for a tropical twist, try adding shredded coconut or a splash of coconut extract to the mix.

Looking to add a little spice to your life? Experiment with ground cinnamon, cardamom, or even a hint of cayenne pepper to create a delightful play of flavors. For a more sophisticated take, consider incorporating espresso powder or dark chocolate chunks into the dough.

“The beauty of almond cookies lies in their ability to serve as a blank canvas for endless flavor combinations.”

Remember, the key to creating your own signature almond cookies recipe is to have fun and let your taste buds be your guide. Don’t be afraid to step outside the traditional boundaries and unleash your inner culinary artist.

Whether you opt for classic simplicity or a bold blend of flavors, these versatile almond cookies are sure to delight your family and friends. Indulge in the perfect balance of crunch and tenderness, and let your creativity shine through in every bite.

Storage and Freshness Guidelines

Keeping your homemade almond cookies fresh is crucial. They should stay crunchy and buttery. With the right storage and a few tips, you can keep them fresh longer.

Best Storage Containers for Almond Cookies

The key to keeping cookies fresh is the right container. Choose airtight ones like tin cans, glass jars, or sturdy plastic boxes. These keep the cookies fresh and prevent them from drying out. Don’t use plastic bags, as they can make cookies soggy.

Shelf Life Tips for Homemade Almond Cookies

  1. Keep your cookies in a cool, dry place away from sunlight or heat.
  2. Stored properly, they can last up to 1 week at room temperature.
  3. For longer storage, freeze them. They can stay fresh for up to 3 months.
  4. Thaw frozen cookies at room temperature for a few hours before enjoying.

Follow these tips to enjoy your homemade almond cookies for days. They’ll stay crunchy and delicious!

Common Baking Mistakes to Avoid

Baking almond cookies can be a fun experience. But, even experienced bakers can run into problems. Don’t worry, we’re here to guide you to avoid common mistakes. This way, your almond cookies will always be crisp and full of flavor.

One big mistake is putting too many cookies on the baking sheet. It’s tempting to fit as many as you can, but it’s not worth it. Overcrowding leads to uneven baking and soft, spread-out cookies. Make sure to leave enough space for each cookie to bake evenly.

Choosing the wrong almonds or almond flour is another common error. It’s best to follow the recipe’s advice for the best taste and texture. Different types of almonds can change how your cookies turn out.

  1. Make sure to measure your ingredients accurately. This is crucial for the right texture in your almond cookies.
  2. Don’t overbake your cookies. Take them out of the oven when they start to brown around the edges. Overbaked cookies can become dry and hard.
  3. Preheat your oven to the right temperature. If the heat is off, your cookies might not bake evenly.

“The secret to perfect almond cookies is patience and attention to detail. Small adjustments can make a big difference in the final result.”

By avoiding these common mistakes and sticking to the recipe, you’ll make delicious almond cookies. Your friends and family will love them. Happy baking!

If you’re on a gluten-free diet, you’ll love these gluten-free almond cookies. They can be easily made without gluten. Just a few simple changes will let you enjoy the same taste and texture.

Alternative Flour Options

Creating gluten-free almond flour cookies is all about the right flours. Here are some great choices:

  • Almond flour: Made from ground almonds, it’s naturally gluten-free. It adds a rich, nutty taste and a soft texture.
  • Coconut flour: This flour is low in carbs and high in fiber. It adds a sweet touch and a unique texture to your cookies.
  • Tapioca flour: This flour is based on starch. It helps hold the ingredients together, making the cookies soft and chewy.

Texture Modifications

Changing the recipe a bit can make your gluten-free almond cookies just right. Here’s how:

  1. Use more eggs or egg whites. They help the ingredients stick together, making the dough more cohesive.
  2. Add a little xanthan gum or psyllium husk. They help the cookies hold their shape, like gluten does.
  3. Adjust the baking time and temperature. This prevents the cookies from drying out or becoming too crumbly.

With a little trial and error, you can make delicious gluten-free almond cookies. They’ll be perfect for your gluten-free diet.

Seasonal Variations of Traditional Almond Cookies

Almond cookies are a classic treat that can be made even better with seasonal flavors. Whether for a holiday or just to enjoy, these variations will impress.

In winter, add peppermint or cranberry to your almond cookies. Peppermint’s coolness complements the almond’s nuttiness. Cranberries add festive color and flavor. Just mix in chopped cranberries or peppermint extract into your dough.

In spring, brighten your cookies with lemon zest and white chocolate. Lemon’s citrus and white chocolate’s creaminess enhance the almond flavor. You can also add pistachios or coconut for extra indulgence.

Summer brings a chance to use juicy berries in your cookies. Blueberries, raspberries, or a mix add a fruity twist. Fold the berries into the dough or place them on top before baking.

Fall is the time for cozy flavors like cinnamon, nutmeg, or caramel in your cookies. These spices and caramel warm up the almond flavor, making a perfect seasonal treat.

Almond cookies are versatile, allowing you to explore many seasonal flavors. Let the changing seasons inspire your baking and enjoy these delicious creations.

“Almond cookies are a blank canvas, ready to be transformed with the flavors of the season.”

Pairing and Serving Suggestions

Your homemade almond cookies are perfect with many drinks and desserts. Try them with a warm cup of coffee, tea, or hot chocolate. The cookies’ nutty and buttery taste goes well with the rich flavors of these drinks.

Want to make a sweet dessert platter? Place your almond cookies next to mini cheesecakes, chocolate-dipped strawberries, or artisanal chocolates. These cookies can be the main attraction or a great addition to a rich dessert selection.

Make your almond cookies a special gift or a treat for guests. Put them in decorative tins or boxes and add a ribbon. Include a personal note for a nice touch. They’re great for hostess gifts, holiday treats, or a surprise for your loved ones.

FAQ

What are the key ingredients in the best-ever almond cookies recipe?

The key ingredients are almond flour, butter, sugar, eggs, and vanilla extract. These simple items create the perfect taste and texture.

How do the health benefits of almonds contribute to the cookies?

Almonds add protein, healthy fats, fiber, and antioxidants to the cookies. This makes them a healthier choice than regular cookies.

What makes these almond cookies so special?

They are crispy on the outside and chewy inside. The almond flour adds a nutty, buttery flavor that’s unique.

What essential baking tools do I need to make these almond cookies?

You’ll need a mixing bowl, a hand mixer or stand mixer, baking sheets, and parchment paper. A cookie scoop is optional for even sizes.

How do I ensure the perfect crunchy texture in these almond cookies?

Bake them until they’re golden brown. Let them cool completely on the sheet for a crisp exterior. Keeping them dry is crucial for the crunch.

Can I make these almond cookies gluten-free?

Yes, just replace all-purpose flour with almond flour or a gluten-free blend. Adjust the texture if needed to keep them chewy.

How long do homemade almond cookies stay fresh?

They stay fresh for up to 1 week at room temperature. Store them in an airtight container to keep them fresh.

French Jelly Filled Beignet Recipe – Easy Homemade Pastry

french jelly filled beignet recipe

Step into the French Quarter in New Orleans, and you’ll smell the beignets. These soft, sugar-dusted pastries with jelly fillings are a city favorite. When you eat them, you’ll see why they’re loved by everyone.

We’ll show you how to make French jelly filled beignets at home. You’ll learn to make the dough, fry it, and add jelly. This guide is for everyone, whether you’re a pro or just starting out.

Key Takeaways

  • Explore the rich history and origins of the classic French beignet
  • Learn the essential ingredients and techniques for creating the perfect beignet dough
  • Discover the secrets to achieving the iconic light and fluffy texture of beignets
  • Experiment with delicious jelly fillings and mastering the powdered sugar coating
  • Unlock tips for serving and storing your homemade beignets to perfection

The History and Origins of French Beignets

The french jelly filled beignet recipe has a rich history in the French Quarter of New Orleans. These tasty pastries are a big part of new orleans cuisine. They are also a favorite treat for those visiting the french quarter.

From French Quarter to Your Kitchen

Beignets became popular in the late 18th century. French settlers brought the recipe to New Orleans. The famous Café du Monde in the French Quarter made beignets a must-try. They served hot, fluffy treats with powdered sugar for over a century.

Traditional vs Modern Beignet Variations

  • The traditional beignet is a simple, square-shaped pastry. It’s fried to golden perfection and coated in powdered sugar.
  • Now, there are many french jelly filled beignet recipe variations. Fillings include fruit preserves, chocolate, and cream.
  • Whether you like the classic or the modern version, the french jelly filled beignet recipe is a beloved part of new orleans cuisine. It’s a must-try for anyone visiting the french quarter.
french jelly filled beignets

“Beignets are a New Orleans tradition. They are a delicious way to start the day and a key part of the city’s vibrant culinary heritage.”

Essential Ingredients for Perfect Beignet Dough

Making the perfect beignet dough is key to creating delicious French jelly filled beignets. You need a mix of ingredients to get that light and airy texture. Let’s look at the main parts that make up the choux pastry base for your recipe.

  1. All-Purpose Flour: This is the core of the dough, giving it structure and stability for a light texture.
  2. Active Dry Yeast: Yeast makes the dough rise, creating a fluffy interior.
  3. Granulated Sugar: Sugar adds sweetness, balancing the savory flavors and enhancing the jelly filling.
  4. Whole Milk: Milk adds moisture and richness, making the dough tender and soft.
  5. Unsalted Butter: Butter adds a luxurious flavor and helps achieve the choux pastry texture.
  6. Eggs: Eggs bind the dough together, creating a delicate and flaky exterior.

By mixing these ingredients in the right amounts, you can make a beignet dough. It’s ready to be turned into the perfect French jelly filled pastry.

beignet dough ingredients

Step-by-Step French Jelly Filled Beignet Recipe

Want to make delicious french jelly filled beignets? Follow this guide to learn how to make these tasty deep fried pastries. They come with a jelly filling that will make your taste buds happy.

Preparing the Choux Pastry Base

To start, mix water, butter, and a bit of salt in a pan. Heat it until boiling, then stop the heat. Add flour and mix until it’s smooth and sticky. Let it rest for 10 minutes before shaping it into small pieces.

Mastering the Deep Frying Technique

Heat oil in a big pan or Dutch oven to 350°F. Put the dough pieces into the hot oil and fry for 2-3 minutes on each side. They should turn golden and puffy. After frying, place them on a paper towel to soak up extra oil.

Adding the Perfect Jelly Filling

When the beignets cool a bit, make a small hole in each one. Use a knife or pastry tip. Then, fill each beignet with a teaspoon of jelly filling. Be careful not to fill it too much or break the pastry.

french jelly filled beignet recipe

By following these steps, you can make french jelly filled beignets that are crispy and filled with yummy jelly filling. Enjoy them anytime you want!

Tips for Creating Light and Fluffy Beignet Texture

Getting the right beignet dough texture is key for making delicious, light French jelly filled beignet recipe pastries. With a few simple tips, your homemade deep fried pastry beignets will always be perfect.

First, make sure to proof the dough well. Let the beignet dough rise for 30-60 minutes, until it doubles in size. This step is important for a light and tender texture.

When deep frying the beignets, keep the oil temperature between 350-375°F. If the oil is too hot, the outside will burn before the inside is cooked. If it’s too cool, the beignets will soak up too much oil and become heavy.

  • Properly proof the beignet dough to allow for optimal rise and development of the gluten structure.
  • Maintain the oil temperature between 350-375°F for evenly cooked, light, and fluffy beignets.
  • Avoid overcrowding the oil, which can cause the temperature to drop and result in greasy pastries.

By following these tips, you’ll make perfect light and airy beignets. Enjoy your delicious, freshly fried treats!

Making the Perfect Raspberry Filling and Variations

Start by making your own raspberry filling to elevate your french jelly filled beignets. Homemade filling beats store-bought options in flavor and texture. With a simple recipe and some tips, you’ll create a delicious raspberry filling that pairs well with the beignet dough.

Homemade vs. Store-bought Filling Options

Homemade raspberry filling has a better taste and texture than store-bought. It lets you control sweetness, acidity, and consistency. You can also add vanilla or lemon zest for extra flavor.

Alternative Fruit Filling Ideas

Try different fruit fillings for a new taste. Use fresh strawberries, blueberries, or apricot preserves. Each fruit adds a unique flavor to the beignets.

Make sure your filling is the right consistency. It should be spreadable but not too thin. With practice, you’ll make perfect beignets with your favorite filling.

Mastering the Powdered Sugar Coating

Adding the perfect powdered sugar coating is the final step to make your homemade French jelly filled beignets look amazing. The sugar dusting not only looks good but also balances the pastry’s richness and the jelly’s sweetness.

Timing is everything when it comes to the powdered sugar coating. Dust the beignets with sugar right after they’re fried. This way, the sugar sticks well to the warm, crispy outside. For a better look, use a fine-mesh sieve or a powdered sugar shaker for an even coat.

“The powdered sugar is the crown jewel of the beignet, adding a delightful contrast to the soft, pillowy texture of the pastry.”

The powdered sugar is more than just a topping. It’s key to the French jelly filled beignet recipe‘s flavor. Its sweetness balances the beignet’s richness, making for a perfect taste.

  • Apply the powdered sugar as soon as the beignets are removed from the oil for optimal adhesion.
  • Use a fine-mesh sieve or powdered sugar shaker to achieve an even, cloud-like coating.
  • The powdered sugar complements the richness of the beignet and the sweetness of the jelly filling.

Mastering the powdered sugar coating can take your French jelly filled beignets to the next level. You’ll get a pastry that looks stunning and tastes amazing, impressing everyone.

Serving and Storage Recommendations

Serving your homemade french jelly filled beignets warm is key. This way, you get to enjoy their light, fluffy texture and sweet flavor. Serve them straight from the fryer to keep the outside crispy and the inside soft.

Best Temperature for Serving

The best temperature for beignets is between 180°F and 200°F. This temperature makes the jelly filling melt just right. It also keeps the beignets soft and easy to handle, making them a favorite breakfast treat.

Storage and Reheating Methods

  • Enjoy your fresh beignets right away for the best taste. If you have leftovers, store them in an airtight container at room temperature for up to 2 days.
  • To reheat, place the beignets in a 350°F oven for 5-7 minutes. This makes them warm and crispy again. Don’t use the microwave, as it can make them soggy.
  • If your beignets have lost their fluffiness, fry them briefly again. Fry for 30-60 seconds before serving to restore their light texture.

By following these tips, your homemade french jelly filled beignets will stay fresh and delicious. Enjoy the perfect mix of crispy outside and soft, jammy inside for a truly satisfying breakfast pastries experience.

Troubleshooting Common Beignet Making Challenges

Making french jelly filled beignet recipe can be fun, but it comes with its own set of problems. If your beignet dough isn’t rising right or if frying the deep fried pastry is tough, don’t worry. We have some easy fixes for common beignet-making issues.

One big problem is a dough that’s too dense and won’t rise. This might happen if your water is too hot or cold, if you knead too much, or if it doesn’t proof long enough. To fix this, make sure your water is between 105°F and 115°F. Knead gently and let it rise in a warm, draft-free spot until it doubles in size.

Frying the beignets can also be tricky. If your oil is too hot, the outside will brown too fast, leaving the inside raw. On the other hand, if it’s not hot enough, the beignets will soak up too much oil, making them greasy. Use a kitchen thermometer to keep your oil between 350°F and 375°F. Adjust the heat to get them golden brown.

FAQ

What makes the French jelly filled beignet recipe so special?

The French jelly filled beignet recipe is a classic from New Orleans’ French Quarter. It has a light, airy choux pastry base. This is deep-fried until golden, then filled with sweet fruit jelly and covered in powdered sugar.

The crisp outside, soft inside, and fruity filling make it a treat. It’s perfect for breakfast or dessert.

What are the key ingredients needed to make authentic beignet dough?

To make beignet dough, you need flour, yeast, sugar, milk, eggs, and salt. The dough is cooked on the stovetop. Then, it rests and is shaped before frying.

How do you achieve the perfect jelly filling for French jelly filled beignets?

For the jelly filling, use homemade or store-bought fruit preserves. Raspberry, strawberry, or apricot work well. The jelly should be thick and spreadable.

It should fill the beignets without leaking or making them soggy. Try different flavors for a unique twist.

What’s the secret to getting a light and fluffy beignet texture?

For a light texture, proof the dough well. This lets the yeast work. Also, fry at the right temperature to make the pastries light.

Don’t over-mix the dough. And fry them just right to avoid greasiness.

How should I serve and store French jelly filled beignets?

Serve beignets hot, right after frying. They should be crisp on the outside and soft inside. Dust them with powdered sugar for the best taste.

For storage, keep them in an airtight container at room temperature for 2 days. Reheat them in a 350°F oven for a few minutes to restore crispiness.

Classic Homemade Chex Mix Recipe Oven | Party Snack Mix

chex mix recipe oven

The smell of freshly baked chex mix recipe oven reminds me of family gatherings and special events. This classic recipe is more than a snack. It’s a tradition that brings people together, making every bite feel comforting and nostalgic.

Looking for a snack for a party or just something tasty? This oven-baked Chex Mix is ideal. It’s full of savory spices, toasted grains, and crunchy bits. It’s a hit with everyone, making them want more.

Key Takeaways

  • Classic homemade chex mix recipe oven recipe with Corn, Rice, and Wheat Chex cereals
  • Savory, crunchy snack mix baked in the oven for maximum flavor and texture
  • Easy to customize with your favorite mix-ins like nuts, pretzels, and crackers
  • Perfect for parties, gatherings, and satisfying snack cravings
  • Nutritious and satisfying with a balance of carbohydrates, protein, and healthy fats

Introduction to Traditional Homemade chex mix recipe oven

Chex Mix is a favorite snack at parties and gatherings. It’s a classic recipe that’s easy to make in large batches. It’s perfect for game-day or a casual snack to share.

This recipe combines Chex cereals, nuts, and pretzels with a tasty seasoning mix. With basic ingredients and quick baking, you get a snack that’s crunchy and flavorful.

The original Chex Mix recipe is from the 1950s. It uses Wheat, Rice, and Corn Chex, mini pretzels, peanuts, and a savory seasoning. This mix has been loved for decades, making it perfect for any occasion.

We’ll explore the key ingredients, step-by-step guide, and tips for making the best homemade chex mix recipe oven. Get ready to make a snack that will wow your friends and family.

Essential Ingredients for Perfect Chex Mix

Making the ultimate holiday snack mix or savory baked cereal snacks begins with the right ingredients. The classic Chex Mix recipe combines crunchy cereals, nuts, pretzels, and a tasty seasoning blend. Let’s look at the key parts that make this beloved party mix.

Cereal Components and Proportions

The base of Chex Mix is the Chex cereal. The recipe suggests using equal parts of Corn Chex, Rice Chex, and Wheat Chex – about 3 cups of each. This mix of cereals offers a variety of textures and tastes. You can also try other baked cereals like Cheerios or Cheez-It crackers for more crunch and flavor in your holiday snack mix.

Seasoning and Spice Selection

The secret to the perfect Chex Mix flavor is the seasoning blend. The classic recipe includes melted butter, Worcestershire sauce, seasoned salt, garlic powder, and onion powder. These ingredients create a savory, umami-rich taste that’s hard to resist. You can also add smoked paprika, cayenne pepper, or a bit of MSG to make the flavor even better.

Additional Mix-ins and Variations

  • Nuts: Peanuts, almonds, or a mix of nuts add crunch and protein.
  • Pretzels: Mini pretzels or pretzel sticks offer a salty contrast to the seasoned Chex.
  • Bagel Chips: Garlic-flavored bagel chips add a crunchy, savory element.
  • Dried Herbs and Spices: Try dried thyme, rosemary, or a bit of cayenne for a deeper flavor.

Chex Mix is all about personal taste. Feel free to change the ingredient ratios or add unique mix-ins to make your own special holiday snack mix or savory baked cereal snacks.

Why Oven-Baked Chex Mix Tastes Better

Oven-baked party mix is the best choice for a perfect snack. The oven method beats quick microwave cooking. It lets flavors meld slowly, making the snack crunchy and full of taste.

Oven baking gives you control over cooking. It ensures even seasoning and a golden color. As it bakes, the butter and spices soak into the mix, creating a mix of savory and salty flavors.

“The oven-baked method is the secret to achieving that signature Chex Mix crunch and flavor that you just can’t replicate in the microwave.”

Stirring the mix every 15 minutes for an hour ensures even cooking. This way, the oven-baked party mix stays crunchy and keeps its texture. The slow heat also keeps the ingredients distinct, avoiding a soggy mess.

While the microwave is fast, oven-baked Chex mix is the better choice for a tasty snack. It has balanced flavors and a crunchy texture. This homemade recipe will be the hit at any gathering.

Step-by-Step Chex Mix Recipe Oven Instructions

Making homemade Chex Mix in the oven is easy and fun. It results in crunchy and tasty snacks. Follow these simple steps to make this favorite snack at home.

Preparation and Mixing Techniques

First, collect all the ingredients. You’ll need Corn Chex, Wheat Chex, Rice Chex, Cheerios, pretzels, and nuts. Mix the cereals, pretzels, and nuts in a big bowl. The mix includes 4 cups of Corn Chex, 4 cups of Wheat Chex, and 3 cups of Rice Chex. It also has 2 cups of Cheerios and 3 cups of pretzels.

Then, melt the butter and mix in Worcestershire sauce, seasoned salt, garlic powder, onion powder, and thyme. Use 10 tablespoons of unsalted butter, 3 tablespoons of Worcestershire sauce, and 2 heaping teaspoons of seasoned salt. Add 1.25 teaspoons of garlic powder, 0.75 teaspoons of onion powder, and 0.75 teaspoons of thyme. Pour the butter mix over the dry ingredients and stir until everything is coated.

Optimal Baking Temperature and Time

Heat your oven to 250°F. Spread the Chex Mix on a big baking sheet. Bake for about 1 hour, stirring every 15 minutes to cook evenly.

Cooling and Storage Methods

After baking, take the Chex Mix out of the oven and let it cool. Store it in an airtight container at room temperature for up to 4 days. For longer storage, freeze it for up to 3 months. Reheat it in the oven at 250°F for 10-15 minutes.

Follow these steps to make delicious homemade chex mix recipe oven. It’s great for snacking or parties. Enjoy your easy chex mix recipe and homemade chex mix!

Nutritional Information and Health Benefits

Chex Mix is a favorite snack for many. But it’s also surprisingly nutritious. Let’s explore its nutritional profile and health benefits.

A 1/2 cup of homemade Chex Mix has about 140 calories. It has 7 grams of fat, 16 grams of carbs, and 3 grams of protein. It also has calcium and iron, important for our health.

To enjoy Chex Mix healthily, eat it in moderation. It has sodium and added sugars. But it’s better than many snacks, especially when made with baked cereal snacks and less oil.

For more health benefits, make a homemade, savory snack mix with whole grain cereals. This adds fiber, complex carbs, and vitamins. It’s a better choice than many processed snacks.

Chex Mix is great for gatherings or as a snack. It’s tasty and healthy when made with care. Its mix of flavors, textures, and nutrients makes it a great choice for snacking.

Tips for Achieving Perfect Crunch and Flavor

Making the perfect crunchy cereal snack or homemade chex mix is all about seasoning and stirring. Start by mixing dry ingredients like baked chex mix, pretzels, and nuts well. Then, add the seasoning blend. This ensures flavors spread evenly.

While baking, stir the crunchy cereal snack every 15 minutes. This helps it cook evenly and prevents burning. For more crunch, bake a bit longer but watch it closely to avoid dryness.

Seasoning Distribution Techniques

  • Mix dry ingredients thoroughly before adding seasoning blend
  • Ensure even coating of spices, herbs, and other flavorings
  • Distribute seasoning evenly across the entire crunchy cereal snack mixture

Proper Stirring Methods

  1. Stir homemade chex mix every 15 minutes during baking
  2. Rotate baking sheets to promote even cooking
  3. Check for any signs of burning or over-browning of the baked chex mix

Follow these tips for a perfect crunchy cereal snack every time. Let it cool completely before storing. This keeps it crisp and delicious.

Party Serving Suggestions and Presentation Ideas

Chex Mix is perfect for party snack mix at casual gatherings and game days. Place it in large bowls around the party area for easy reach. Or, give out small cups or bags for individual servings. For a fun twist, use themed serving containers that match the event’s look.

This oven-baked party mix goes great with dips, making it a hit at snack spreads or appetizer buffets. A bowl of Chex Mix at the bar where drinks are served looks great and is handy.

  • Use paper lunch bags with a rolled-down top to create a rim and include a scoop for a creative serving option.
  • Provide small party snack cups that allow guests to easily fill and carry the holiday snack mix throughout the event, enhancing the social aspect.

Chex Mix’s crunchy texture and savory taste make it a favorite snack. Tailor it to different events and tastes. Thoughtful serving ideas and attractive presentations will make your guests love this party snack mix even more.

Make-Ahead and Storage Guidelines

Homemade homemade chex mix is great because you can make it ahead of time. This way, you can enjoy its crunchy goodness whenever you want. After it cools down, put it in an airtight container at room temperature.

Stored right, your party snack mix stays fresh for up to 2 weeks. This makes it perfect for any gathering or snack time.

Proper Storage Containers

For the best taste and texture, use containers with tight lids or resealable bags. Make sure to remove any air before sealing. This keeps the mix crunchy and fresh.

If your Chex Mix starts to lose its crunch, just warm it up in the oven. Spread it on a baking sheet and heat it for a few minutes.

Shelf Life and Freshness Tips

Your homemade homemade chex mix stays delicious and crunchy for up to 2 weeks with proper storage. Watch for any signs of staleness or softening.

If you notice these, it’s time to make a new batch. Following these tips ensures your party snack mix is always ready to enjoy.

FAQ

What are the main ingredients in this Chex Mix recipe?

The recipe includes 3 cups each of Corn, Rice, and Wheat Chex cereals. It also has mixed nuts, pretzels, and garlic-flavored bagel chips. The seasoning is made from melted butter, Worcestershire sauce, seasoned salt, garlic powder, and onion powder. chex mix recipe oven

How long does it take to make this Chex Mix?

Making this Chex Mix is quick. It only takes 15 minutes using the microwave method. chex mix recipe oven

Why is oven-baking preferred for Chex Mix?

Oven-baking makes the Chex Mix crunchier and flavors more even. The slow cooking lets the seasonings soak into the ingredients better. chex mix recipe oven

How many servings does this Chex Mix recipe make?

This recipe serves 24 people. It’s easy to make more for bigger parties. chex mix recipe oven

What are the nutritional details of a serving of Chex Mix?

A 1/2 cup serving has about 140 calories. It has 7g of fat, 16g of carbs, and 3g of protein. It also has small amounts of calcium and iron. chex mix recipe oven

How long can Chex Mix be stored?

Stored in an airtight container at room temperature, Chex Mix stays fresh for up to 2 weeks. It keeps its crunch and flavor. chex mix recipe oven

How can you refresh stale Chex Mix?

To refresh stale chex mix recipe oven, spread it on a baking sheet. Then, warm it in the oven for a few minutes.

What are some serving suggestions for Chex Mix?

Chex Mix is perfect for casual gatherings and game day. Serve it in large bowls or in small cups or bags. Use themed containers for a festive look. chex mix recipe oven

Delicious Ninja Creami Recipes You’ll Love to Make

ninja creami recipes,DESSERT

I love making ice cream at home. The Ninja Creami changed my game. It lets me try many flavors and textures.

It’s easy to use, whether you’re new to cooking or a pro. You can make over 200 different kinds of ice cream. It’s a fun way to get creative in the kitchen.

Key Takeaways

  • The Ninja Creami ice cream maker allows you to create a wide variety of frozen treats at home, including ice cream, gelato, and sorbet.
  • With over 52 flavor combinations possible, the Ninja Creami offers endless opportunities for experimentation and customization.
  • Each batch of Ninja Creami ice cream produces a convenient one-pint serving, perfect for individual enjoyment.
  • The Ninja Creami’s versatility extends to dietary preferences, with the ability to make dairy-free, vegan, low-calorie, and protein-rich frozen desserts.
  • Homemade Ninja Creami recipes can be a cost-effective and healthier alternative to store-bought options.

Understanding the Ninja Creami Ice Cream Maker

The Ninja Creami is a unique ice cream maker that changes how you make frozen treats at home. It’s different from traditional ice cream makers. The Ninja Creami makes smooth, creamy ice cream that’s as good as the kind you buy.

How the Ninja Creami Works

The Ninja Creami works by freezing and churning ingredients in a special way. It uses a “creamerizer” blade to shave frozen ingredients. This makes the ice cream creamy and dense. You need to freeze the ingredients for 24 hours before using the machine.

Key Features and Functions

  • Multiple settings for different frozen desserts, including ice cream, “lite” ice cream, smoothie bowls, sorbet, gelato, and milkshakes.
  • Ability to easily incorporate mix-ins, toppings, and customizations for personalized frozen treats.
  • Compact and countertop-friendly design, with dimensions of 6.52″ width, 15.95″ height, and 12.07″ depth, weighing 13.58 lb.
  • Operates at a noise level of 71-81 decibels, which may be a consideration for some users.

Benefits of Making Homemade Ice Cream

Making ice cream at home with the Ninja Creami has many benefits. You can choose the ingredients you like and try new flavors. It’s also healthier and cheaper than buying ice cream.

The Ninja Creami is easy to use and works well. It’s great for both beginners and experienced cooks.

Whether you want vanilla or chocolate ice cream, the Ninja Creami can make it. Its design and features make it perfect for anyone who loves making ninja ice cream maker recipes and easy ice cream maker recipes.

Essential Ingredients for Perfect Ice Cream

Making delicious homemade ice cream with your Ninja Creami starts with picking the right ingredients. The secret to perfect ice cream is in the base recipe. Let’s look at the key ingredients that make your Ninja Creami a frozen dessert paradise.

The heart of any Ninja Creami ice cream is the liquid base. It can be milk, cream, a protein shake, or fruit juice. This base gives the ice cream its creamy texture. To make it even smoother, you can add cream cheese, instant pudding mix, or guar gum.

Now, let’s talk about flavor! You can use extracts, flavor oils, or instant pudding mixes to add exciting tastes. Don’t forget the sweetener like sugar or a sugar substitute. It balances the creaminess and brings out the flavor.

For a classic vanilla base, you’ll need cream cheese, heavy cream, milk, sugar, and vanilla extract. To try something new, add cocoa powder, coffee, or crushed cookies and candies.

IngredientPurpose
Liquid Base (dairy, protein shake, or juice)Provides the creamy texture
Stabilizer (cream cheese, instant pudding, guar gum)Enhances the smooth, velvety mouthfeel
Flavoring (extract, flavor oil, instant pudding)Infuses the ice cream with delightful tastes
Sweetener (sugar or sugar substitute)Balances the creaminess and enhances the flavor

With these ingredients, you’re set to make the perfect Ninja Creami ice cream. It will taste amazing and impress everyone. Get ready to explore a world of homemade frozen desserts!

Classic Vanilla Base Recipe

Discover the joy of homemade vanilla ice cream with this Ninja Creami recipe. It combines cream cheese, sugar, vanilla, milk, and heavy cream. This mix creates a rich, creamy treat that’s hard to resist. Follow these easy steps to make your own vanilla ice cream.

Required Ingredients

  • 1/2 ounce cream cheese, softened
  • 1/3 cup granulated sugar
  • 3/4 cup heavy cream
  • 1 cup whole milk
  • 1 teaspoon vanilla extract

Step-by-Step Instructions

  1. In a microwave-safe bowl, heat the cream cheese for 20-30 seconds until softened.
  2. Add the heavy cream to the bowl and whisk until the cream cheese is fully incorporated.
  3. Whisk in the granulated sugar until dissolved.
  4. Pour in the milk and vanilla extract, then stir until well combined.
  5. Transfer the mixture to a freezer-safe container and freeze for at least 3 hours, or until firm.
  6. Remove the frozen mixture from the freezer and process it in your Ninja Creami according to the manufacturer’s instructions.

Customization Options

Enjoy the classic vanilla flavor or add your own twist. Mix in chocolate chips, cookie crumbs, or fresh fruit after processing. The options are endless for a personalized treat.

This vanilla ice cream recipe is perfect for Ninja Creami fans. It’s easy to make and offers a smooth, creamy texture. Let the rich vanilla take you to a world of deliciousness.

Must-Try Ninja Creami Recipes

The Ninja Creami ice cream maker has opened up a world of culinary possibilities. Home chefs can now make homemade ice cream, gelato, and sorbet flavors. It’s perfect for both classic favorites and unique creations.

One of the standout features of the Ninja Creami is its ability to add protein. This makes it a favorite among fitness enthusiasts. About 50% of Ninja Creami recipes include added protein, offering a healthier ice cream option.

  • Chocolate High-Protein Ice Cream: A creamy and indulgent treat that packs a punch of protein.
  • Cinnamon Roll Protein Ice Cream: A delightful fusion of cinnamon-sugar goodness and protein-rich decadence.
  • Banana Cream Pie Ice Cream: A re-imagined classic that captures the essence of the beloved dessert.

The Ninja Creami also shines in creating fruit-based sorbets and dairy-free ice cream alternatives. Recipes like Mango Sorbet and Pineapple Sorbet show the machine’s versatility.

RecipeFlavor ProfileDietary Considerations
Mint Chocolate Chip Ice CreamRefreshing mint with rich chocolate chipsGluten-free
Vegan Chocolate Ice CreamDecadent dairy-free chocolate indulgenceVegan, Dairy-free
Strawberry SorbetVibrant and refreshing strawberry sorbetDairy-free, Gluten-free

Whether you’re craving a classic vanilla base or new flavors, the Ninja Creami has something for everyone. Its versatility and ease of use make it a staple in many kitchens.

Healthy and Diet-Friendly Options

The Ninja Creami ice cream maker lets you make healthy treats. You can choose low-calorie or protein-rich options. This appliance is very versatile.

Low-Calorie Alternatives

Enjoy tasty low-calorie ice cream with the Ninja Creami. These recipes have less than 300 calories per pint. They use sweeteners like stevia and xanthan gum for a creamy texture without extra calories.

Protein-Rich Variations

Make protein-packed ice creams with the Ninja Creami. Adding protein shakes or powder makes them rich in protein. These treats are great for a snack or after working out.

Dairy-Free Choices

Try dairy-free recipes with the Ninja Creami. Use almond milk, coconut milk, or plant-based yogurt instead of dairy. These options are good for your body and the environment.

RecipeProtein Content (per serving)Calories (per pint)
High Protein Matcha49gN/A
High Protein Cookies and Cream38.5g – 45gN/A
High Protein Coffee45gN/A
High Protein Chocolate Raspberry38gN/A
High Protein Mint Chocolate Chip47gN/A
High Protein Mango Passionfruit26gN/A
High Protein Mocha45gN/A
High Protein Pumpkin Spice32gN/A
High Protein Strawberry37gN/A
Chocolate Protein Ice Cream41g311
Healthy Low-Calorie Ice Cream14g107

Fruit-Based Frozen Desserts

Discover the refreshing flavors of the season with Ninja Creami’s fruit-based frozen desserts. Enjoy vibrant sorbets, tangy sherbets, and creamy frozen yogurts. These desserts highlight the natural sweetness of fresh and canned fruits.

From pineapple sorbet to mango and mixed berry sorbet, these recipes will excite your taste buds. The beauty of these desserts is their simplicity and versatility. They use the flavors of fruits to create creamy, dairy-free treats that are both indulgent and nutritious.

Nutritional Information (per serving)Value
Calories248kcal
Carbohydrates63g
Protein3g
Fat1g
Fiber7g
Sugar48g
Vitamin C78mg

To make these fruit sorbet recipes and Ninja Creami fruit desserts, blend your favorite fruits with a bit of honey or maple syrup. The Ninja Creami turns this into a refreshing, guilt-free treat. It’s perfect for hot summer days or as a palate cleanser between meals.

“The perfect balance of sweetness and tartness, this pineapple sorbet is a tropical delight that transports you to a sunny beach with every spoonful.” – Food Critic, Taste Magazine

Try different fruits like strawberries, mangoes, kiwi, or passion fruit. The Ninja Creami makes it easy to create these delightful fruit sorbet recipes and Ninja Creami fruit desserts at home.

Decadent Chocolate Variations

Experience the ultimate chocolate treat with the Ninja Creami. It lets you make everything from dark chocolate delightsto mixed chocolate creations. This ice cream maker turns you into a chocolatier, making delicious frozen treats.

Dark Chocolate Delights

Start with dark cocoa powder, sugar, and vanilla for a rich chocolate ice cream. Add heavy cream and whole milk for a smooth texture. The Ninja Creami makes this mix into a creamy, indulgent dessert that chocolate lovers will adore.

Mixed Chocolate Creations

Enhance your chocolate ice cream by adding different chocolates. Try dark chocolate chips, milk chocolate chunks, or white chocolate swirls. The Ninja Creami lets you find the perfect mix of creaminess and chocolate in every bite.

IngredientQuantity
Dark Cocoa Powder1/2 cup
Granulated Sugar3/4 cup
Vanilla Extract1 tsp
Heavy Cream2 cups
Whole Milk1 cup
Dark Chocolate Chips1/2 cup
Milk Chocolate Chunks1/4 cup

The Ninja Creami makes creating these chocolate ice cream recipes easy. Enjoy the smooth, indulgent flavors of homemade chocolate ice cream recipes and ninja creami chocolate desserts to satisfy your sweet tooth.

Creative Mix-Ins and Toppings

The Ninja Creami lets you make your own ice cream with endless mix-ins and toppings. You can add crunch, flavor, or a bit of luxury. The choices are endless.

For a fun crunch, try adding chopped nuts like almonds or pecans. You can also use crushed Oreos or cookie pieces. Chocolate chips, sprinkles, and crushed candy bars make your ice cream extra special.

Fresh berries, sliced bananas, or diced mango add flavor and freshness. The Ninja Creami makes it easy to mix these in. This way, you get the perfect mix of textures and tastes.

FAQ

What is the Ninja Creami and what can it make?

The Ninja Creami is an ice cream maker for home use. It lets you make ice cream, gelato, sorbet, and more. You can even make dairy-free treats with it. ninja creami recipes

How does the Ninja Creami work?

It freezes ingredients for 24 hours first. Then, it uses a special paddle to mix them. This makes creamy treats without air, unlike traditional ice cream makers. ninja creami recipes

What are the benefits of the Ninja Creami?

It lets you choose your ingredients for healthier options. You can make over 52 flavors and small batches of ice cream. It’s also cheaper than buying from stores. ninja creami recipes

What are the essential ingredients for Ninja Creami recipes?

Recipes need a liquid base, a stabilizer, flavoring, and sweetener. These can be dairy, protein shakes, juice, cream cheese, pudding mix, extracts, and sugar. ninja creami recipes

How do you make the classic vanilla base recipe?

For vanilla, mix 1/2 ounce cream cheese, 1/3 cup sugar, 3/4 cup heavy cream, 1 cup milk, and 1 teaspoon vanilla extract. Microwave the cream cheese with cream, whisk in sugar, then add the rest. Freeze for 3 hours and process in the Ninja Creami. ninja creami recipes

Favorites include mixed berry sorbet, cookies and cream, and chocolate ice cream. There’s also banana cream pie, cinnamon roll, mango, pineapple, frozen yogurt, mint chocolate chip, and vegan ice cream. ninja creami recipes

Can the Ninja Creami make healthy and diet-friendly options?

Yes, it’s great for healthy treats. You can make low-calorie options, protein-rich ice creams, and dairy-free choices. Just use alternatives like almond or coconut milk. ninja creami recipes

What types of fruit-based desserts can you make in the Ninja Creami?

You can make sorbets, sherbets, and frozen yogurts. Try pineapple, mango, or mixed berry sorbet for a refreshing treat. ninja creami recipes

What kind of chocolate variations can you make in the Ninja Creami?

It’s perfect for chocolate lovers. You can make dark chocolate or mix different chocolates. Use cocoa powder, sugar, vanilla, cream, and milk for a basic recipe. Add chocolate chips or pudding for extra flavor. ninja creami recipes

What kind of mix-ins and toppings can you use with Ninja Creami recipes?

Add nuts, graham crackers, cookies, fruit, chocolate chips, or crushed candy bars. You can mix them in or sprinkle on top for extra texture and taste. It’s all about creativity! Source Links ninja creami recipes