Descubre 10 Secretos para la Mejor Receta de Panqueques

receta de panqueques

El aroma de panqueques recién hechos recuerda domingos perezosos y desayunos familiares. Hacer panqueques caseros es como dar un abrazo cálido al alma. Ver la masa convertirse en círculos dorados y esponjosos es mágico.

Esta receta de panqueques te llevará a momentos especiales. Llena tu cocina de dulzura y nostalgia. Los panqueques caseros son más que un desayuno; son una tradición que une a las personas.

Ya sea con jarabe de arce, frutas frescas o mantequilla, estos panqueques serán perfectos para tu día. Con ingredientes simples y pasos fáciles, descubrirás que hacer panqueques desde cero es gratificante y delicioso.

Puntos Clave

  • Los panqueques caseros son fáciles de preparar con ingredientes básicos.
  • La textura esponjosa se logra con la proporción correcta de ingredientes.
  • Esta receta es versátil y permite múltiples variaciones de sabores.
  • Los panqueques son ideales para desayunos o meriendas en familia.
  • Hacer panqueques desde cero es más económico y saludable.

Todo lo que necesitas saber sobre los panqueques caseros

Los panqueques son un clásico del desayuno que puedes hacer fácilmente en casa. Descubre su historia, los beneficios de hacerlos tú mismo y las variedades más populares.

Historia y origen de los panqueques

Los panqueques vienen de la antigua Grecia, donde se llamaban “tagenites”. Se hacían con harina de trigo, aceite de oliva, miel y leche cuajada. Con el tiempo, esta receta se expandió por el mundo, adaptándose a diferentes culturas.

Panqueques fáciles

Beneficios de preparar panqueques en casa

Hacer panqueques en casa tiene muchas ventajas. Puedes elegir los ingredientes y adaptarlos a tus gustos. Es divertido hacerlos en familia y te permite probar diferentes sabores.

Tipos de panqueques más populares

Hay muchos tipos de panqueques para todos. Los panqueques con frutas son saludables y sabrosos. Los veganos son una buena opción sin productos animales. Y los esponjosos son perfectos para cualquier momento.

Tipo de panquequeCaracterísticas principales
Panqueques con frutasIncorporan frutas frescas o secas en la masa o como topping
Panqueques veganosHechos sin ingredientes de origen animal
Panqueques esponjososSuaves y aireados, ideales para absorber siropes y salsas

Receta de panqueques: ingredientes y preparación paso a paso

Hacer panqueques caseros es fácil. Solo necesitas los ingredientes correctos y seguir unos pasos simples. Aquí te enseñamos cómo hacer panqueques esponjosos en casa.

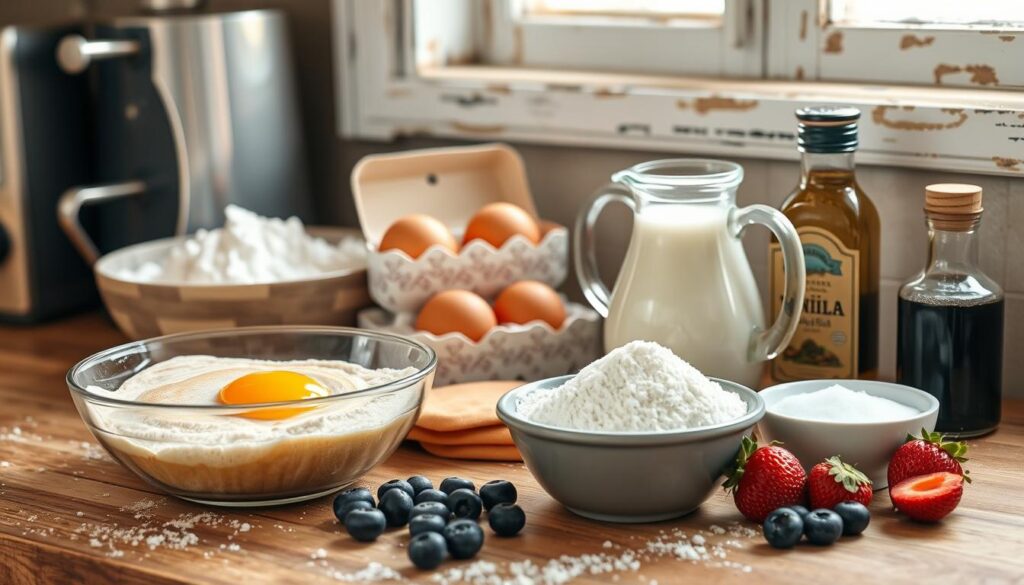
Ingredientes básicos para panqueques esponjosos

Para panqueques suaves, es clave usar los ingredientes adecuados. Para una receta básica, necesitarás:

  • 2 tazas de harina
  • 2 cucharadas de azúcar
  • 2 cucharaditas de polvo de hornear
  • 1/2 cucharadita de sal
  • 2 huevos
  • 1 1/2 tazas de leche
  • 1/4 taza de mantequilla derretida
ingredientes para panqueques

Paso a paso para una masa perfecta

Para una masa ideal, sigue estos pasos:

  1. Mezcla los ingredientes secos en un bol grande
  2. En otro bol, bate los huevos con la leche y la mantequilla
  3. Incorpora los líquidos a los secos y mezcla hasta integrar
  4. Deja reposar la masa 5 minutos antes de cocinar

Consejos para cocinar panqueques uniformes

Calienta bien la sartén antes de cocinar. Usa una cuchara para servir porciones iguales. Voltea cuando veas burbujas y cocina el otro lado hasta que esté dorado.

Variaciones y toppings recomendados

Prueba hacer panqueques integrales usando harina integral. Para panqueques sin huevo, usa plátano machacado o semillas de lino. Decora con frutas frescas, miel, jarabe de arce o crema batida.

Conclusión

Aprender a hacer panqueques caseros es una habilidad valiosa. Solo necesitas ingredientes simples y seguir unos pasos fáciles. Así, podrás hacer panqueques esponjosos que encantarán a tu familia.

La clave es mezclar bien los ingredientes. También es importante cocinarlos a fuego medio. Esto te ayudará a lograr la textura perfecta.

Los panqueques son muy versátiles. Puedes probar diferentes sabores y toppings. Ya sea con jarabe de arce o frutas frescas, puedes crear algo especial.

El aroma de panqueques recién hechos es increíble. Llena tu cocina de un aroma delicioso en un fin de semana. Así que, prepárate para hacer tus propios panqueques esponjosos.

Con un poco de práctica, tus panqueques serán como los de un restaurante. Pero tendrás el orgullo de haberlos hecho tú mismo.

FAQ

¿Cuáles son los ingredientes básicos para hacer panqueques caseros?

Para hacer panqueques caseros, necesitas harina, leche, huevos, azúcar, sal y polvo de hornear. Mezcla estos ingredientes para crear una masa suave. Luego, cocina la masa en una sartén caliente.

¿Cómo puedo hacer panqueques más esponjosos?

Para panqueques esponjosos, no bates demasiado la masa. Usa ingredientes a temperatura ambiente. Deja reposar la masa 5-10 minutos antes de cocinar.

Separar las claras de las yemas ayuda. Bate las claras a punto de nieve y añádelas suavemente a la mezcla al final.

¿Se pueden hacer panqueques sin huevo?

Sí, puedes hacer panqueques sin huevo. Reemplaza cada huevo con 1/4 de taza de puré de manzana, yogur, plátano machacado, o semillas de chía con agua.

¿Cómo puedo hacer panqueques veganos?

Para panqueques veganos, usa leche vegetal en lugar de leche. Reemplaza el huevo con plátano machacado o semillas de chía. Asegúrate de que los demás ingredientes sean vegetales.

¿Qué frutas puedo agregar a mis panqueques?

Puedes añadir arándanos, plátano, fresas, manzana o frambuesas a tus panqueques. Añádelas a la masa o colócalas sobre el panqueque mientras se cocina.

¿Cómo puedo hacer panqueques integrales?

Para panqueques integrales, usa harina integral en lugar de harina blanca. Los panqueques pueden ser más densos. Ajusta la cantidad de líquido según sea necesario.

¿Cuál es la mejor manera de cocinar panqueques uniformes?

Usa una sartén antiadherente a fuego medio para panqueques uniformes. Vierte la masa con un cucharón o taza medidora. Voltea el panqueque cuando veas burbujas y los bordes se sequen.

¿Cómo puedo almacenar los panqueques que sobran?

Almacena los panqueques sobrantes en un recipiente hermético en el refrigerador. Pueden durar 2-3 días. También puedes congelarlos en papel encerado en una bolsa de congelación por hasta 2 meses. Recalienta en microondas o tostadora.

Receta verde jugo de para depurar tu organismo

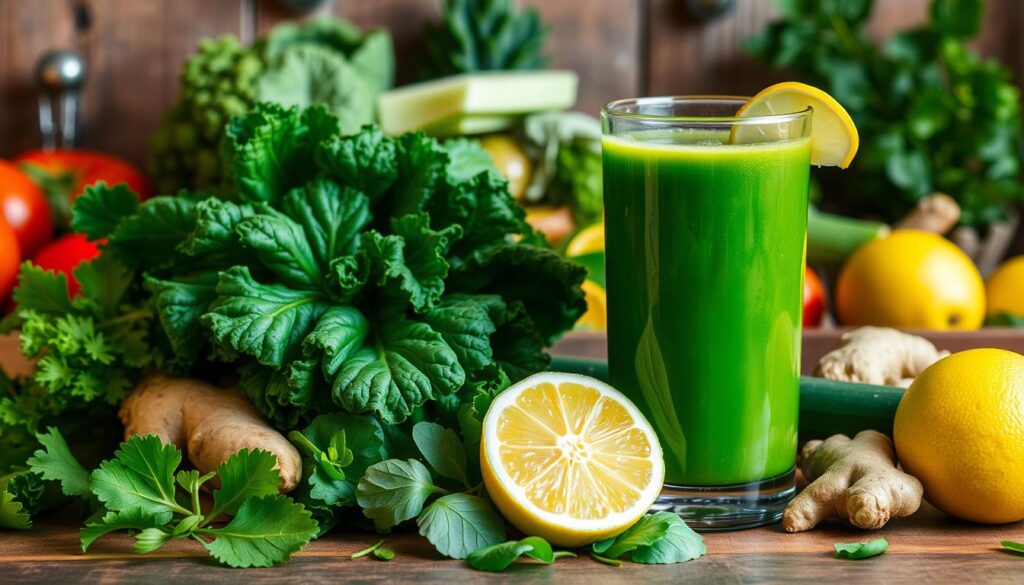
jugo verde receta

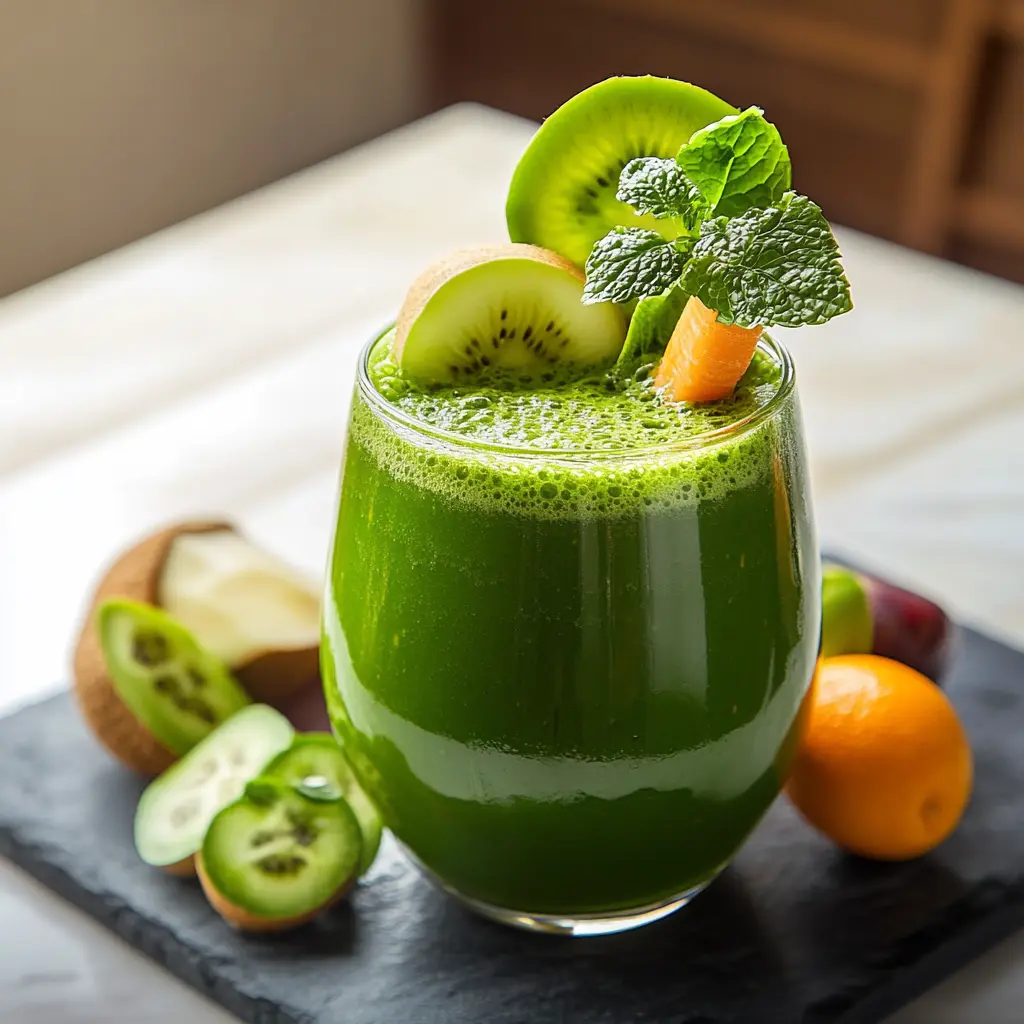
¿Alguna vez has sentido que tu cuerpo necesita un reinicio? Imagina despertar cada mañana con mucha energía. Es como si hubieras presionado el botón de reinicio de tu cuerpo. El jugo verde receta es una bebida que refresca y purifica tu cuerpo.

El jugo vegetal es un aliado secreto para la salud. Es una bebida llena de nutrientes. Ayuda a eliminar toxinas y nutre tu cuerpo con vitaminas y minerales.

Hacer tu propio jugo de vegetales es fácil y gratificante. Con los ingredientes correctos y un poco de creatividad, puedes hacer un jugo verde delicioso. Este artículo te mostrará cómo prepararlo y sus beneficios.

Puntos Clave

  • El jugo verde receta es una bebida depurativa y energizante
  • Rico en nutrientes esenciales y antioxidantes
  • Ayuda a eliminar toxinas del organismo
  • Fácil de preparar en casa con ingredientes frescos
  • Personalizable según tus preferencias de sabor
  • Beneficioso para la salud digestiva y el metabolismo

Beneficios depurativos del jugo verde para tu salud

El jugo verde es un gran aliado para mejorar tu bienestar. Esta bebida natural tiene muchos beneficios. Ayuda a fortalecer tu sistema inmunológico y a desintoxicar tu cuerpo.

Propiedades antioxidantes y desintoxicantes

El jugo verde incluye vegetales con mucha clorofila, como espinacas y kale. Estos vegetales combaten los radicales libres y eliminan toxinas. Beberlo regularmente mejora la salud de tu piel y reduce la inflamación.

Nutrientes esenciales para la limpieza del organismo

Un jugo verde saludable tiene vitaminas y minerales importantes. Estos nutrientes ayudan a limpiar el hígado y los riñones. Así, tu cuerpo elimina mejor las sustancias nocivas.

NutrienteBeneficioFuente en jugo verde
Vitamina CFortalece el sistema inmuneLimón, naranja
ClorofilaDesintoxica la sangreEspinacas, perejil
PotasioEquilibra electrolitosPepino, apio

Mejora del sistema digestivo y metabolismo

El jugo verde es rico en fibra, buena para tu intestino. Ayuda a regular los movimientos intestinales y mejora la absorción de nutrientes. El jengibre, por ejemplo, puede ayudar a perder peso de forma saludable.

jugo de vegetales

Beber jugo verde receta todos los días puede hacer que tu vida sea más saludable. Pero, antes de hacer cambios en tu dieta, habla con un médico. Esto es especialmente importante si tienes alguna condición médica.

Jugo verde receta: Ingredientes fundamentales

Hacer un jugo verde es un arte que mezcla sabor y salud. Es vital elegir bien los ingredientes para lograr un jugo delicioso y saludable. Aquí te mostramos los ingredientes clave para un jugo verde receta maravilloso.

Vegetales de hoja verde recomendados

Los vegetales de hoja verde son la base de un jugo verde. Aportan clorofila, fibra y vitaminas importantes. Asegúrate de incluir estos en tu receta:

  • Espinacas: Ricas en hierro y antioxidantes
  • Kale: Alto contenido de vitamina K y C
  • Acelgas: Excelente fuente de magnesio
  • Perejil: Aporta sabor y propiedades depurativas

Frutas complementarias para mejorar el sabor

Para mejorar el sabor de tu jugo verde, añade frutas. Estas no solo mejoran el gusto sino que también aportan vitaminas adicionales:

  • Manzana verde: Añade dulzor y mejora la digestión
  • Piña: Aporta enzimas digestivas y sabor tropical
  • Limón: Potencia la absorción de nutrientes
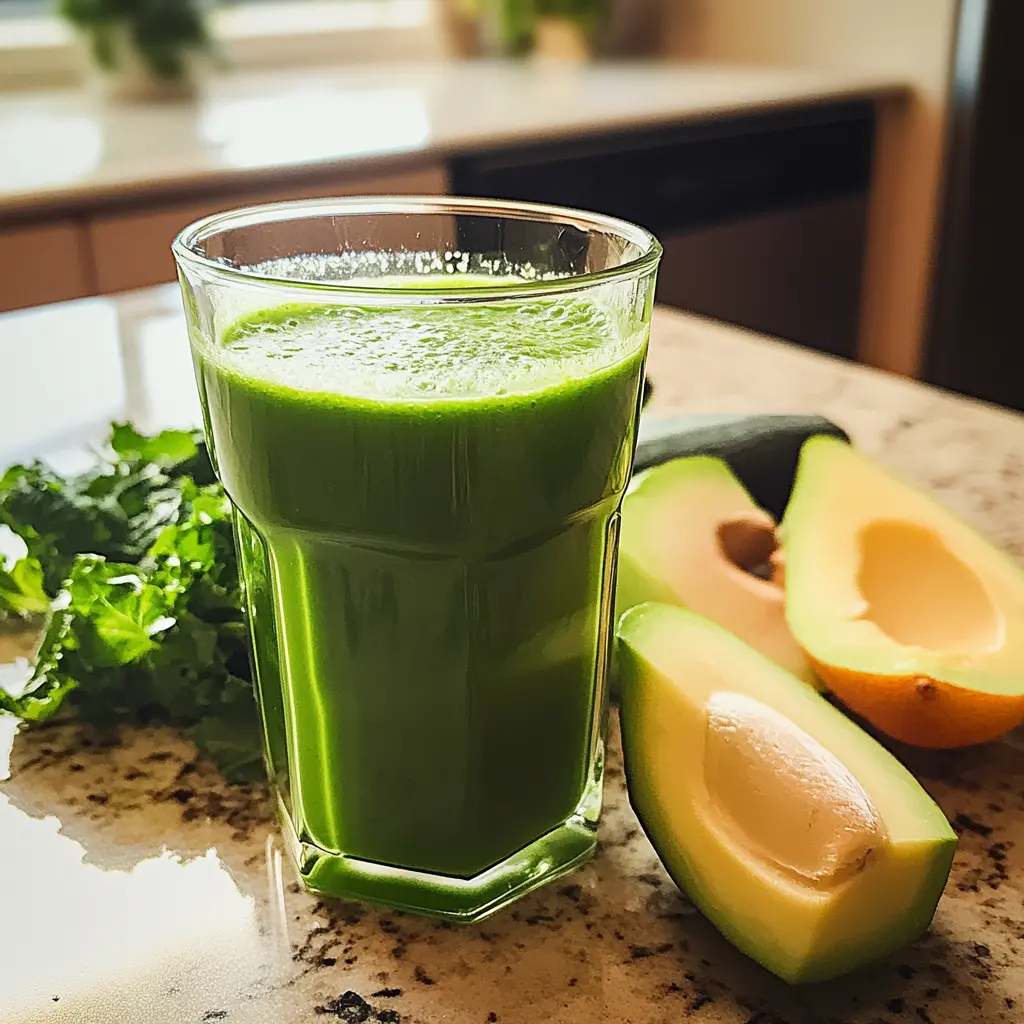
jugo vegetal

Superalimentos opcionales para potenciar beneficios

Para hacer tu bebida vegetal aún más rica, añade superalimentos. Estos ingredientes mejoran mucho el valor nutricional de tu jugo:

SuperalimentoBeneficio
SpirulinaRica en proteínas y antioxidantes
Semillas de chíaAportan omega-3 y fibra
JengibrePropiedades antiinflamatorias

Combina estos ingredientes para hacer tu jugo verde ideal. Experimenta con diferentes proporciones para encontrar tu receta perfecta. La clave es la variedad y el equilibrio para disfrutar de todos los beneficios de esta bebida.

Preparación paso a paso de tu bebida vegetal

Hacer un jugo verde es fácil y rápido. Sigue estos pasos para hacer tu smoothie verde ideal:

  1. Lava bien todos los vegetales y frutas que vayas a usar.
  2. Corta los ingredientes en trozos pequeños para que sean fáciles de licuar.
  3. Coloca los vegetales de hoja verde en la licuadora primero.
  4. Agrega las frutas y superalimentos que hayas elegido.
  5. Vierte agua o líquido de coco para que la mezcla tenga la consistencia que prefieras.

Para una textura perfecta, licúa los ingredientes 30-60 segundos. Si quieres un smoothie más suave, colar la mezcla antes de servir es una buena idea.

Es importante tener 60% vegetales y 40% frutas. Esto asegura un equilibrio de nutrientes y sabor en tu jugo verde.

Un truco para mejorar los beneficios: añade un poco de limón al final. Esto ayuda a que los nutrientes sean más fáciles de absorber y mejora el sabor.

Bebe tu jugo verde inmediatamente para sacarle el máximo provecho. Si lo quieres guardar, ponlo en un recipiente hermético en la nevera. Recuerda que no debe estar más de 24 horas.

Conclusión

El jugo verde es una excelente opción para limpiar tu cuerpo. Esta bebida vegetal tiene nutrientes que ayudan a eliminar toxinas. Al añadirlo a tu dieta, disfrutarás de muchos beneficios para tu salud.

Es importante elegir ingredientes frescos y de calidad. Los vegetales de hoja verde, frutas y superalimentos te darán vitaminas, minerales y antioxidantes. Experimenta con diferentes combinaciones para encontrar tu jugo favorito.

Tomar este jugo verde por la mañana puede mejorar tu vida. No solo limpia tu cuerpo, sino que también mejora tu digestión y energía. ¡Prueba este jugo detox delicioso y nutritivo hoy mismo!

FAQ

¿Qué es exactamente un jugo verde?

Un jugo verde es una bebida hecha de vegetales verdes y frutas. Es muy rico en nutrientes y antioxidantes. Ayuda a limpiar el cuerpo y mejorar la salud.

¿Con qué frecuencia debo tomar jugo verde?

Es bueno tomar jugo verde todos los días. Pero incluso beberlo 3-4 veces a la semana puede ser beneficioso.

¿Cuáles son los mejores vegetales para incluir en un jugo verde?

Los mejores vegetales son espinacas, kale, acelga, perejil y pepino. Son ricos en clorofila y nutrientes que limpian el cuerpo.

¿Puedo agregar frutas a mi jugo verde?

Sí, puedes añadir frutas como manzana, piña o limón. Esto mejora el sabor. Pero recuerda que los vegetales deben ser más.

¿Es necesario usar una licuadora especial para hacer jugo verde?

No es necesario, pero ayuda una licuadora potente. Si usas una normal, corta los ingredientes pequeños y agrega líquido suficiente.

¿El jugo verde puede reemplazar una comida?

No es bueno usar jugo verde como comida. Es mejor como complemento para una dieta equilibrada.

¿Cuánto tiempo se puede almacenar el jugo verde?

Mejor consume el jugo verde al momento. Si lo guardas, usa un recipiente hermético en el frío. Consumelo en 24 horas para mantener sus beneficios.

¿El jugo verde ayuda a bajar de peso?

Sí, puede ayudar en un plan de pérdida de peso. Es bajo en calorías y rico en nutrientes. Pero recuerda que no es una solución mágica. Necesitas dieta equilibrada y ejercicio.

Pan de Elote Receta Perfecta | Deliciosamente Irresistible y Fácil

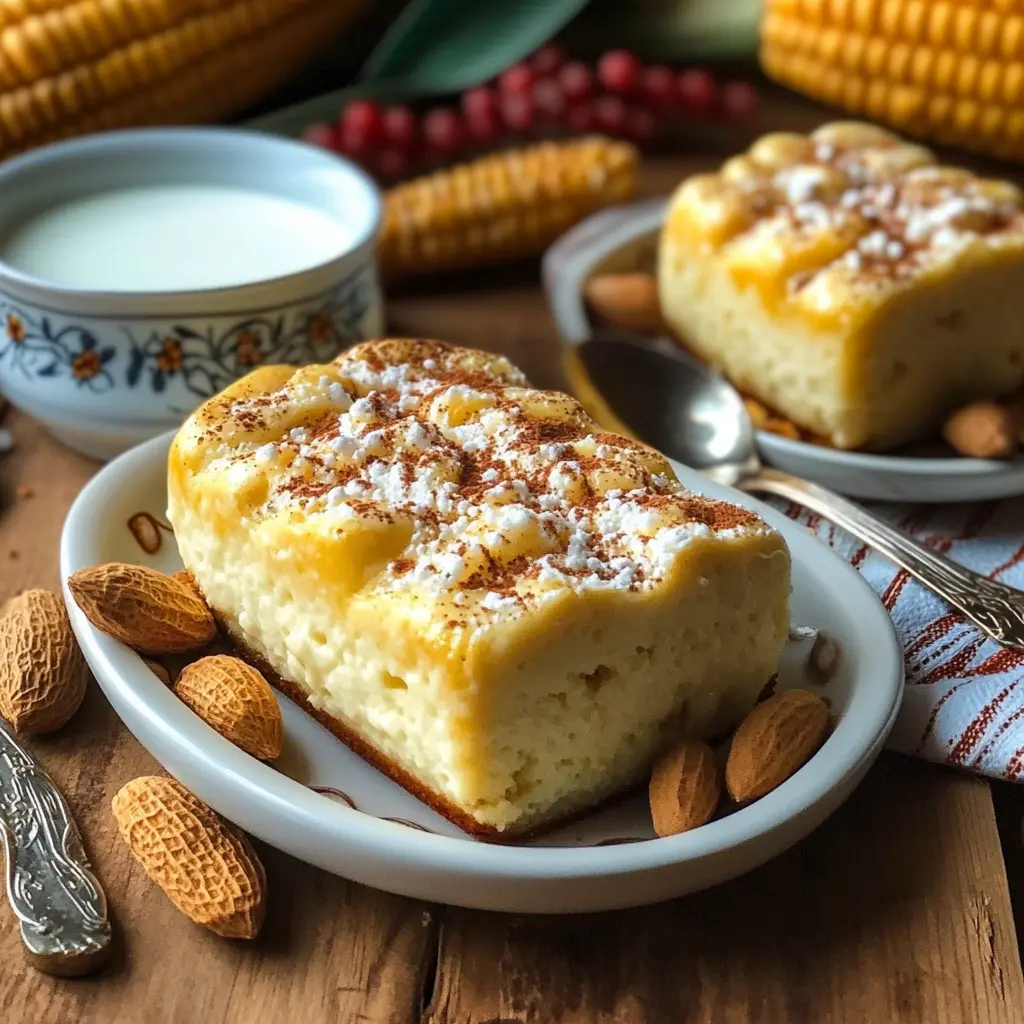
pan de elote

¿Te acuerdas del aroma que hacía tu abuela cuando hacía pan de elote? Ese olor especial te llevaba a la infancia y hacía que te sintieras en casa. El pan de elote receta es más que un postre, es una tradición mexicana querida por muchos.

Si te encanta este postre o estás descubriéndolo, te sorprenderá saber por qué es tan especial. Te llevaré a un mundo de sabores que te hará querer más.

Ideas Clave

  • El pan de elote es un postre tradicional mexicano con una textura suave y un sabor auténtico.
  • Es un antojito muy popular en la gastronomía mexicana, apreciado por generaciones.
  • Esta receta te guiará para preparar un pan de elote delicioso y fácil de hacer en casa.

Todo Sobre el Pan de Elote Tradicional Mexicano

El pan de elote es un postre tradicional de México. Ha encantado a muchas generaciones. Se hace con maíz tierno y sigue una receta antigua. Es un símbolo de la rica cocina de México.

Historia y Origen del Pan de Elote

El pan de elote viene de la época prehispánica. Los indígenas de México usaban el maíz como alimento principal. Con el tiempo, la receta se adaptó, mezclando ingredientes y técnicas de la cocina española.

Hoy, el pan de elote simboliza la cultura culinaria de México. Se disfruta en festividades y momentos especiales.

Beneficios Nutricionales del Maíz Tierno

  • Alto contenido de fibra, vitaminas y minerales esenciales
  • Bajo en grasa y calorías, convirtiéndolo en una opción saludable
  • Fuente de carbohidratos complejos que proporcionan energía
  • Aporta antioxidantes que pueden ayudar a proteger la salud

El pan de elote es querido por su sabor único. También por su conexión con la cultura mexicana. Su textura suave y el sabor del maíz lo hacen irresistible.

IngredienteCantidad
Maíz tierno2 tazas
Harina de trigo1 1/2 tazas
Azúcar3/4 taza
Mantequilla1/2 taza
Huevos2
Leche1/2 taza
Polvo de hornear1 cucharadita
Sal1/4 cucharadita

“El pan de elote es un símbolo de la riqueza y la diversidad de la cocina mexicana, una verdadera delicia que une a las familias y celebra las tradiciones.”

Pan de Elote Receta: Ingredientes Esenciales

Para hacer un pan de elote delicioso, necesitas los ingredientes correctos. La receta mexicana clásica necesita ciertos elementos clave. Estos le dan su sabor y textura únicos. Veamos qué ingredientes son esenciales para esta preparación especial.

Tipo de Maíz Recomendado

El corazón del pan de elote receta es el maíz tierno o *masa de maíz tierno*. Es mejor usar maíz fresco y de temporada, como el *elote* o *panecillos de elote*. Este maíz añade dulzura natural y una textura suave a la masa.

Sustitutos y Alternativas

Si no encuentras maíz tierno, puedes usar *pan de maíz* enlatado o congelado. Aunque no será igual, puede funcionar bien. También puedes probar mezclar harina de maíz con harina de trigo para una textura más esponjosa.

Utensilios Necesarios

  • Rallador o procesador de alimentos para rallar el maíz
  • Molde o bandeja para hornear
  • Batidora eléctrica o manual para mezclar los ingredientes
  • Espátula o cuchara de madera para incorporar la masa
  • Horno precalentado a la temperatura adecuada

Con estos ingredientes y utensilios, estarás listo para hacer un delicioso *pan de elote* en casa.

Método de Preparación Paso a Paso

Preparar un delicioso pan de elote es fácil. Sigue estos pasos para una receta sencilla y un resultado exquisito:

  1. Precalienta el horno a 350°F (175°C). Engrasa un molde para pay o un molde cuadrado de 8×8 pulgadas.
  2. En un tazón grande, mezcla los granos de maíz tierno cocidos, los huevos, el azúcar, la mantequilla derretida y la leche. Bate hasta que quede una mezcla homogénea.
  3. Agrega la harina, el polvo de hornear y la sal. Revuelve suavemente hasta que todos los ingredientes se combinen bien.
  4. Vierte la mezcla en el molde preparado y alisa la superficie.
  5. Hornea durante 40-45 minutos, o hasta que un palillo insertado en el centro salga limpio.
  6. Deja enfriar el pan de elote en el molde por 10 minutos antes de desmoldarlo.
  7. Sirve tibio o a temperatura ambiente. ¡Disfruta de esta deliciosa receta sencilla!

Estos pasos simples te ayudarán a hacer un pan de elote casero. Usa maíz tierno fresco y no mezcles demasiado para evitar que sea duro. Sigue esta receta sencilla y sorprende a tus seres queridos con este postre mexicano tradicional!

Conclusión

El pan de elote es un antojito mexicano muy querido. Combina los sabores dulces del maíz tierno con una textura suave. Esto lo hace un verdadero deleite para los paladares.

Este pan es perfecto como postre o acompañamiento. Es fácil de hacer y usa ingredientes baratos. Así, puedes disfrutar y compartirlo en casa.

Te animamos a probar esta receta. Descubrirás por qué es tan especial en la cocina mexicana. Disfruta de sus sabores únicos. ¡Buen provecho!

FAQ

¿Qué es el pan de elote?

El pan de elote es un delicioso antojito mexicano. Se hace con maíz tierno. Tiene una textura suave y un sabor único a elote.

¿Cuáles son los beneficios nutricionales del maíz tierno?

El maíz tierno es rico en fibra, vitaminas y minerales. Es una excelente fuente de vitamina C, folato y potasio. Esto lo hace un ingrediente muy saludable.

¿Qué tipo de maíz se recomienda usar para hacer pan de elote?

Es mejor usar maíz tierno o elote fresco. Lo puedes encontrar en mercados locales o supermercados. También, el maíz congelado es una buena opción.

¿Qué utensilios se necesitan para preparar pan de elote?

Necesitarás una procesadora o licuadora para el maíz. También un tazón para mezclar, un molde y un horno.

¿Cuáles son los pasos clave para hacer pan de elote?

Primero, tritura el maíz tierno. Luego, mezcla los ingredientes hasta que sea una masa suave. Colócala en el molde y hornea hasta que esté dorada.

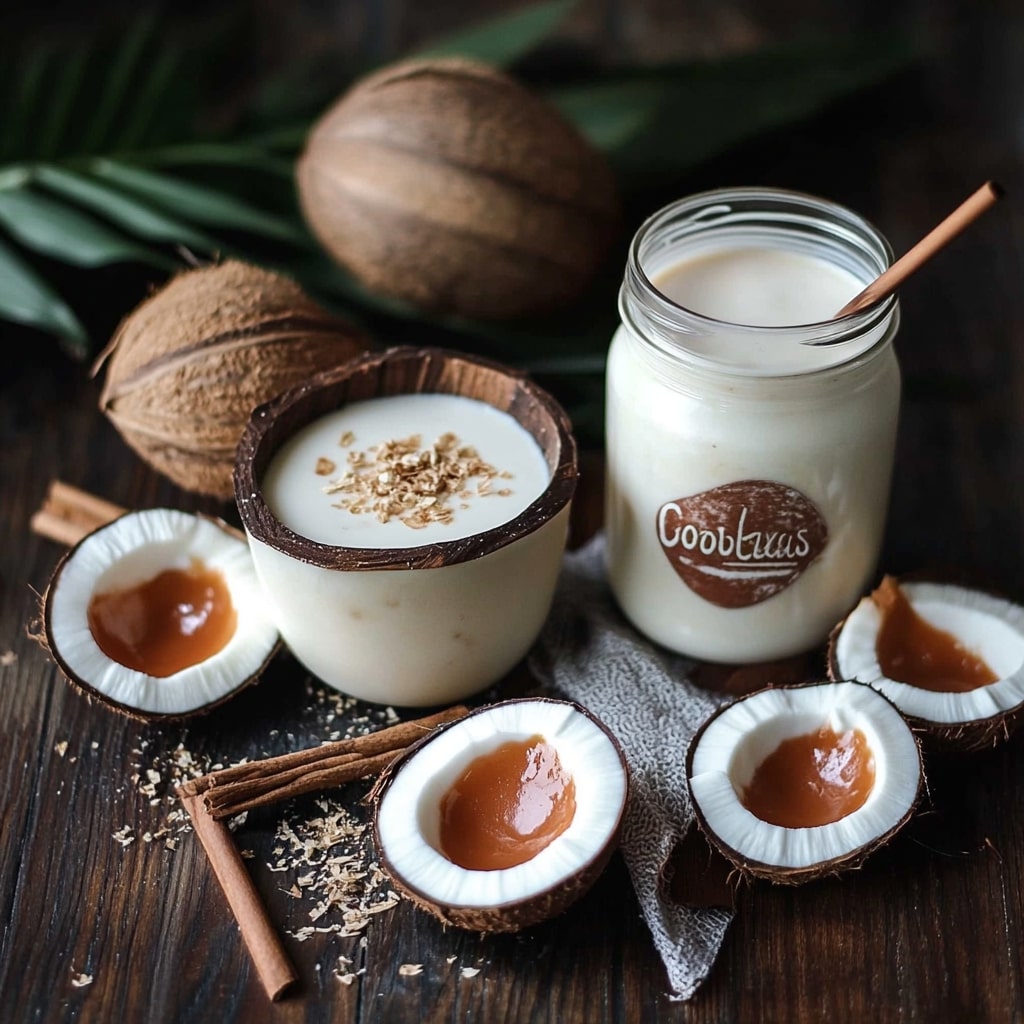
La Mejor Receta de Coquito | Cremoso y Lleno de Sabor Festivo

Receta de Coquito

¿Receta de coquito Recuerdas cuando el aroma a coquito llenaba el aire en Navidad? Era como si reviviera recuerdos de la infancia y la alegría de las fiestas. El coquito es más que un licor; es una conexión con nuestra cultura y una celebración de los sabores festivos.

Te voy a enseñar a hacer un coquito cremoso y sabroso. Es perfecto para compartir con tus seres queridos.

Aspectos Clave:

  • Receta auténtica de coquito puertorriqueño
  • Sabor cremoso y notas de vainilla, canela y ron
  • Bebida tradicional de las fiestas navideñas
  • Orígenes y trasfondo cultural de esta bebida
  • Ingredientes esenciales y método de preparación

El Coquito: La Bebida Tradicional Navideña de Puerto Rico

El coquito es una bebida típica de Navidad en Puerto Rico. Se hace con coco, leche de coco y ron. Es un símbolo de las fiestas en la isla.

Historia y Origen del Coquito

El coquito tiene raíces en la cultura de Puerto Rico. Se mezclan influencias españolas, africanas e indígenas. Se hacía con coco, leche de coco y especias locales.

Con el tiempo, se añadió ron. Esto le dio un toque festivo único.

¿Por Qué el Coquito es Especial en las Fiestas?

El coquito es clave en las tradiciones navideñas de Puerto Rico. Las familias se juntan para disfrutar de su sabor reconfortante. Es una oportunidad para compartir recetas y crear recuerdos.

Se sirve en fiestas y reuniones. Es un símbolo de unión y alegría.

“El coquito es mucho más que una simple bebida; es una expresión de nuestra identidad y tradiciones, una manera de conectarnos con nuestras raíces y celebrar juntos la magia de las fiestas.”

El coquito es esencial en las celebraciones navideñas. Se disfruta en veladas íntimas o en fiestas. Trae consigo un legado de sabor, cultura y tradición.

Ingredientes Esenciales para la Receta de Coquito

Preparar el coquito puertorriqueño requiere elegir bien los ingredientes. Esta bebida es famosa por su cremosidad y sabor festivo. Se logra gracias a una selección cuidadosa de ingredientes.

Vamos a ver los tipos de ron, leches y cremas, y las especias que hacen del coquito una delicia.

Tipos de Ron Recomendados

El ron es clave en el coquito. Hay varias opciones para elegir. Algunos rones populares son:

  • Ron dorado o añejo, que aporta profundidad y complejidad de sabor.
  • Ron blanco, que brinda una base neutra y permite que los otros ingredientes resalten.
  • Ron de coco, que agrega un toque tropical y cremoso.

Selección de Leches y Cremas

El coquito es famoso por su cremosidad. Esto se logra con leche de coco y otras cremas. Algunas opciones populares son:

  1. Leche de coco enlatada o fresca
  2. Crema de coco
  3. Leche condensada o evaporada
  4. Crema de vainilla o de almendras

Especias y Saborizantes Tradicionales

Las especias y saborizantes dan al coquito su sabor navideño. Algunos de los más comunes son:

Especia/SaborizanteAporte al Coquito
Canela en polvoAporta notas cálidas y aromáticas.
Nuez moscadaBrinda un toque de dulzor y complejidad.
Extracto de vainillaRealza los sabores y aporta un toque elegante.

Estos ingredientes juntos crean el coquito cremoso y sabroso. Se ha convertido en un símbolo navideño en Puerto Rico y más allá.

Método de Preparación Paso a Paso

Prepárate para disfrutar de una deliciosa bebida navideña: el coquito. Sigue estos pasos sencillos para hacer tu propia receta. Así, tendrás una bebida llena de sabor festivo.

  1. Comienza mezclando leche de coco, crema de coco, yemas de huevo y azúcar. Bate hasta que sea suave y cremoso.
  2. Agrega tu ron preferido, blanco o dorado. Bate hasta que esté todo bien mezclado.
  3. Perfuma con vainilla, canela y otros saborizantes tradicionales para darle ese toque especial.
  4. Deja reposar en el refrigerador por al menos 2 horas. Así alcanza la preparación y consistencia que deseas.
  5. Antes de servir, agita bien la receta. Asegúrate de que todos los ingredientes estén bien mezclados.
  6. Vierte en copas o vasos. Decora con canela en polvo, nuez moscada rallada o coco rallado para un toque elegante.

El secreto para un coquito perfecto es el método de preparación y la calidad de los ingredientes. ¡Disfruta de esta bebida típica de las fiestas navideñas en Puerto Rico!

“El coquito es una tradición que se transmite de generación en generación, llena de sabor y recuerdos familiares.”

Conclusión

Has aprendido cómo hacer el receta de coquito, una bebida navideña de Puerto Rico. Ahora sabes qué ingredientes usar y cómo prepararlo paso a paso. Esto te permitirá hacer este tradicional y cremoso sabor festivo para tus celebraciones.

El coquito es ideal para tus postres navideños o para disfrutar con familia y amigos. Su sabor suave y dulce lo hace una bebida deliciosa. Te llevará a las tradiciones puertorriqueñas.

Te animamos a añadir este emblemático coquito a tus festividades. Así, compartirás la alegría y el espíritu de la Navidad con tus seres queridos. ¡Disfruta cada sorbo de este tradicional y cremoso coquito!

FAQ

¿Qué es el coquito y de dónde proviene?

El coquito es una bebida tradicional de Puerto Rico. Es muy popular en la temporada navideña. Se hace con leche de coco, ron y especias, lo que le da una textura cremosa y deliciosa. receta de coquito

¿Cuáles son los ingredientes clave para hacer un coquito auténtico?

Para hacer un coquito auténtico, necesitas leche de coco, ron, azúcar, canela, vainilla y a veces, nuez moscada. Es clave usar ingredientes de calidad para obtener el sabor y la textura perfectos. receta de coquito

¿Cómo se prepara el coquito paso a paso?

Primero, mezcla la leche de coco, el ron, el azúcar y las especias. Luego, cocina a fuego lento hasta que espese un poco. Finalmente, deja enfriar y sirve bien frío. Puedes decorarlo con canela o nuez moscada rallada. receta de coquito

¿Con qué se suele acompañar el coquito?

El coquito se disfruta en las fiestas navideñas. Se puede servir solo o con postres típicos de Puerto Rico, como dulces, galletitas o bizcochos. receta de coquito

¿Cómo se conserva el coquito?

Se puede guardar el coquito en el refrigerador por varios días. Almacénalo en un recipiente hermético para mantener su frescura. Antes de servir, agita bien para mezclar los ingredientes. receta de coquito

Powerful Ginger Shot Recipe – 3 Steps to Boost Energy and Immunity

ginger shot recipe

When the sun rises, I look for a natural energy boost to start my day. I don’t choose sugary drinks or artificial stimulants. Instead, I make a ginger shot, a simple yet powerful remedy.

Ginger is a superfood with many health benefits. It fights inflammation and boosts the immune system. Adding a daily ginger shot recipe to your routine can give you more energy and resilience.

Key Takeaways

  • Ginger shots offer a natural energy boost and immune system support.
  • The recipe is simple, requiring just three steps to create a powerful wellness drink.
  • Ginger’s anti-inflammatory and digestive health benefits make it a versatile addition to your diet.
  • Customizable flavor options allow you to tailor the ginger shot to your personal taste preferences.
  • Proper storage and preparation techniques ensure the freshness and potency of your homemade ginger shots.

Understanding the Health Benefits of Ginger Shots

Ginger is a root known for its unique taste and health perks. Ginger wellness shots pack a strong punch of ginger’s benefits. They’re a favorite for those looking to boost their health.

Anti-inflammatory Properties

Ginger is famous for its anti-inflammatory powers. It has compounds like gingerol and shogaol that fight inflammation. Drinking ginger wellness shots can ease joint pain, muscle soreness, and headaches.

Immune System Support

Ginger is great for your immune system too. It’s full of antioxidants and compounds that boost white blood cells. Adding anti-inflammatory ginger drink to your diet can strengthen your immune system.

Digestive Health Enhancement

Natural ginger remedy also helps your digestion. It aids in making digestive enzymes and soothes your stomach. Ginger shots can help with nausea, bloating, and indigestion.

Adding ginger wellness shots to your day can bring many health benefits. They help with inflammation, boost your immune system, and improve digestion. Ginger shots are a natural and easy way to support your health.

ginger wellness shots

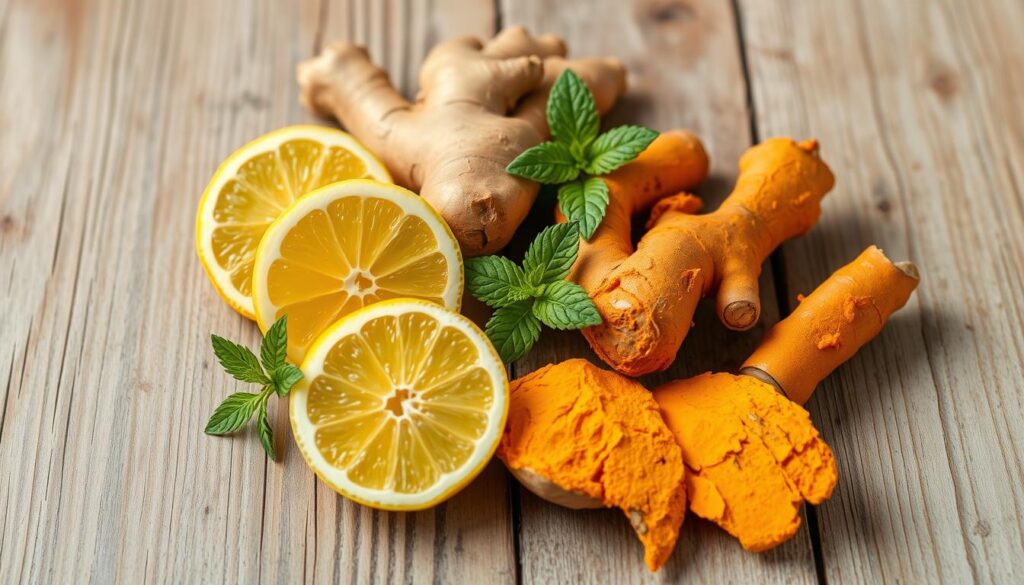
Essential Ingredients for Your Perfect Ginger Shot Recipe

Making the perfect ginger juice recipe or fresh ginger shots starts with choosing the right ingredients. Each part plays a key role in making your drink both tasty and healthy.

Here’s what you need for your own ginger shot:

  • Fresh Ginger Root – This is the main ingredient, giving your shots their unique taste and health benefits.
  • Citrus Fruits – Lemon, lime, or orange juice add a nice tang that balances out the ginger’s heat.
  • Honey or Maple Syrup – A bit of natural sweetener makes the drink sweeter and easier to enjoy.
  • Filtered Water – Using purified water keeps your drink clean and free of unwanted tastes.
  • Optional Additions – You can also add turmeric, cayenne pepper, or green apple to make your shot even healthier and tastier.

Choose organic, high-quality ingredients to get the most health benefits. Fresh ginger is especially important for a great ginger juice recipe or fresh ginger shots.

ginger ingredients

“Ginger is a powerful superfood that can transform a simple shot into a wellness elixir packed with antioxidants and anti-inflammatory compounds.”

Knowing what each ingredient does lets you make a zingy ginger elixir that’s just right for you. With ginger, you can make your daily routine healthier and more exciting.

Required Equipment and Preparation Tips

Making a ginger shot recipe at home is simple and rewarding. You’ll need some basic equipment and preparation. Whether you’re new to juicing or experienced, knowing the right tools and techniques is key. This will help you make the most delicious and energizing ginger shots.

Juicing Tools and Alternatives

You’ll need a good juicer to start. Choose a strong one that gets all the juice out of fresh ginger. If you don’t have a juicer, a blender works too. Just strain the mix through a fine-mesh sieve or cheesecloth to get the juice.

Storage Solutions

After juicing, store the ginger juice right. Use airtight, glass containers and keep it cold in the fridge. This keeps the ginger shot recipe fresh and full of nutrients for up to a week.

Prep Time Guidelines

  • Sourcing and washing the ginger: 5-10 minutes
  • Juicing or blending the ginger: 10-15 minutes
  • Straining and storing the juice: 5-10 minutes

With the right tools and a little prep, you’re ready to enjoy homemade energizing ginger shots. Enjoy the fresh, exciting taste of a DIY ginger shot recipe.

ginger shot recipe

Basic Ginger Shot Recipe – Step-by-Step Guide

Ready to unlock ginger’s power and make your own spicy wellness shots? Follow this easy guide to make a tasty and healthy ginger shot at home.

  1. Gather the Ingredients: You’ll need fresh ginger root, lemon or lime juice, and a sweetener like honey or maple syrup.
  2. Prepare the Ginger: Peel the ginger and cut it into small pieces. This exposes more surface area for flavor.
  3. Extract the Juice: Use a juicer, blender, or garlic press to get the ginger juice. If blending, strain to remove pulp.
  4. Add the Citrus: Squeeze in lemon or lime juice to balance the ginger’s heat and add a zing.
  5. Sweeten to Taste: Start with a little honey or maple syrup and adjust to your sweetness preference. This helps balance the ginger’s spiciness.
  6. Serve and Enjoy: Pour your homemade ginger shot recipe into a shot glass and enjoy the invigorating flavor. For a diluted version, mix with water or sparkling water.

Remember, finding the perfect balance in your ginger juice recipe is all about experimenting. Start small and adjust the flavors until you’re happy. Enjoy the spicy, tangy, and aromatic flavors of these spicy ginger wellness shots.

ginger shot recipe

“Ginger has been used for centuries to support overall health and well-being. Adding these ginger shots to your daily routine can be a simple way to enjoy its natural benefits.”

Flavor Enhancers and Optional Add-ins

Making the perfect ginger wellness shots is more than just ginger. Adding different ingredients can make your zingy ginger elixir even better. You can brighten it with citrus, add warmth with spices, or sweeten it with natural sweeteners. The choices are endless.

Citrus Additions

A squeeze of fresh citrus juice can instantly refresh and balance the strong ginger flavor. Try adding a splash of lemon, lime, or orange juice to your ginger tonic. The bright, tangy notes will complement the spicy ginger beautifully.

Spice Combinations

For those who love a little extra kick, try different spice blends. A pinch of cayenne pepper or a dash of ground cinnamon can add a delightful warmth. Turmeric is also great, offering an earthy, anti-inflammatory boost.

Natural Sweeteners

  • Honey: A classic pairing that can tame the bite of ginger and add a touch of sweetness.
  • Maple Syrup: This natural sweetener provides a rich, caramelized flavor that pairs well with ginger.
  • Dates or Dates Syrup: Blending in a pitted date or a drizzle of date syrup can lend a subtle sweetness and a creamy texture.

The beauty of ginger shots is their versatility. Experiment with different flavors to find your perfect mix. Customize your ginger wellness shots to match your taste. Enjoy the refreshing, energizing result.

Best Times to Take Your Ginger Wellness Shots

Adding ginger wellness shots to your day can really boost your energy and immune system. But when is the best time to take them? Let’s look at the best moments to enjoy energizing ginger shots and immunity-boosting ginger tonic.

Starting your day with a ginger shot can be refreshing. It helps kickstart your digestive system and gets your body ready for the day. It’s a great way to boost your metabolism and stay focused.

  • Try a ginger shot 15-30 minutes before breakfast for the best morning effect.
  • Drink an immunity-boosting ginger tonic to keep your body’s defenses strong and fight off colds.

As the day goes on, ginger wellness shots can give you a midday boost. The spicy compounds in ginger fight off afternoon tiredness and give you a natural energy lift. Take a ginger shot around 2-3 pm to refresh your mind and body.

“Ginger shots are my go-to for a natural energy kick that doesn’t leave me jittery or crash later on.” – Wellness Enthusiast

If you want better digestion, drink a ginger shot before or after meals. Ginger helps with bloating, gas, and other stomach issues, keeping your gut healthy.

The best time for your ginger wellness shots depends on what you need and like. Try different times to see what works best for you.

Storage Tips and Shelf Life for Fresh Ginger Shots

Storing your ginger shots right is key to keep their taste and health benefits. Whether you’re making a single ginger juice recipe or a batch of ginger wellness shots for the week, these tips will help. They’ll keep your ginger drinks fresh and flavorful.

Proper Storage Methods

For the best taste, store your ginger shots in an airtight container in the fridge. This keeps the good stuff in and the bad stuff out. Glass jars or BPA-free plastic containers are great for this.

Batch Preparation Guidelines

Make ginger shots in advance to enjoy them for 3-5 days. For longer storage, freeze them in ice cube trays or small containers. This keeps the health benefits for up to 2 months.

Don’t forget to mark your ginger wellness shots with the date you made them. This way, you know how fresh they are. With the right storage and planning, you’ll get the most out of your homemade ginger drinks.

Common Mistakes to Avoid When Making Ginger Shots

Making the perfect ginger shot recipe is fun and rewarding. But, it’s key to avoid common mistakes. This way, your spicy ginger wellness shots will always taste great and be full of benefits from natural ginger remedy.

One big mistake is steeping ginger for too long. It might seem like a good idea to get more flavor. But, it can make your shots taste bitter. Aim for 5-10 minutes of steeping for the best taste.

  1. Don’t use old or low-quality ginger. It can make your shots taste woody or fibrous.
  2. Don’t add too much citrus or spices. They can overpower the ginger. Start small and adjust as needed.
  3. Store your ginger shot recipe right. Bad storage can make it lose its potency fast. Keep it in the fridge and use it within 3-5 days.

By avoiding these mistakes, you’ll make spicy ginger wellness shots that are tasty and full of health benefits from natural ginger remedy.

“Ginger is a superstar ingredient, but like any culinary wonder, it requires a gentle touch to truly shine.”

Conclusion

Congratulations on starting your journey to better health with ginger shots! We’ve shown you how ginger can help with inflammation, boost your immune system, and aid digestion.

You now know how to make your own ginger shot recipe. It’s all about trying new flavors and making ginger shots a part of your routine.

Keep moving forward on your health path with ginger shots. They can give you energy, support your immune system, or just be a tasty, healthy drink. They’re a great addition to your health plan.

FAQ

What are the main health benefits of ginger shots?

Ginger shots are full of anti-inflammatory properties. They help reduce body inflammation. They also boost your immune system and improve digestion.

What are the essential ingredients needed for a ginger shot recipe?

You need fresh ginger, lemon or citrus, and a natural sweetener like honey or maple syrup for a ginger shot.

What equipment is required to make ginger shots at home?

You’ll need a juicer or high-powered blender and containers for storing the shots. Good storage keeps the shots fresh and potent.

How do I make the perfect ginger shot?

Making the perfect ginger shot is easy. Just juice or blend the ginger, add lemon or citrus, and maybe a natural sweetener to balance the taste.

Can I customize the flavor of my ginger shots?

Yes, you can. Try different citrus fruits, spices, and natural sweeteners. Orange, lime, or turmeric add flavor and health benefits.

When is the best time to drink ginger shots?

Drink ginger shots in the morning for energy, before a workout for anti-inflammatory benefits, or during the day for immune and digestive support.

How long do freshly made ginger shots last?

Fresh ginger shots last 3-5 days in the fridge. Freeze them in ice cube trays or airtight containers for longer storage.

What are some common mistakes to avoid when making ginger shots?

Avoid using old or low-quality ginger. Make sure to juice or blend well. Don’t add too much or too little sweetener. Store the shots properly.

10 Best Gluten Free Breakfast Casserole Recipes | Irresistibly Easy & Delicious

gluten free breakfast casserole recipes

Imagine waking up to the mouthwatering aroma of a hearty, gluten free breakfast casserole recipes. It’s freshly baked and ready to nourish your body and soul. Whether you’re on a gluten-free diet or just looking for tasty breakfast options, these 10 recipes are a game-changer. They offer flavors that will have you coming back for more, all while meeting your dietary needs.

Key Takeaways

  • Discover 10 easy-to-prepare, gluten-free breakfast casserole recipes that are both nutritious and delicious.
  • Explore a variety of flavors and ingredients, from savory sausage and sweet potato hash to dairy-free Mediterranean delights.
  • Learn about essential gluten-free baking ingredients and substitutions to create the perfect breakfast bakes.
  • Prepare make-ahead options for stress-free, meal-prepped mornings.
  • Enjoy the convenience and versatility of these gluten-free breakfast casserole recipes, suitable for various dietary needs.

Understanding Gluten Free Breakfast Casseroles: A Complete Guide

Living gluten-free doesn’t mean you can’t enjoy a tasty breakfast casserole. These dishes are not only yummy but can fit your dietary needs. This guide will show you how to make delicious gluten-free breakfast casseroles. We’ll cover the key ingredients, substitutes, and kitchen tools you need.

Essential Ingredients for Gluten Free Baking

For gluten-free baking, some ingredients are crucial for great taste and texture. Instead of wheat flour, try almond flour, coconut flour, or gluten-free flour blends. These help your casserole stay together perfectly.

Common Substitutes and Alternatives

Exploring gluten-free cooking is fun, with many creative options. Swap regular breadcrumbs for gluten-free ones, use dairy-free milk, and choose gluten-free oats or quinoa. Knowing these substitutes will help you make tasty gluten free breakfast casserole recipes and gluten free brunch ideas.

Kitchen Tools You’ll Need

To make a great gluten free breakfast casserole, you need the right tools. Get a good baking dish for even heat and easy cleaning. A food processor or blender is great for mixing ingredients. A sturdy whisk helps make the perfect custard-like egg mixture. With these tools, you’ll make delicious healthy breakfast bakes everyone will love.

gluten free breakfast casserole

“Embracing a gluten-free lifestyle doesn’t have to mean sacrificing the flavors and textures you love. With the right ingredients and tools, you can create irresistible gluten-free breakfast casseroles that will satisfy your cravings and nourish your body.”

Sweet Potato and Sausage Hash Breakfast Bake

Start your day with this tasty gluten free breakfast bakes recipe – the Sweet Potato and Sausage Hash Breakfast Bake. It’s a mix of sweet potatoes and spicy sausage. This makes for a hearty and healthy breakfast bakes option that’s sure to please.

To make this egg casserole recipes masterpiece, you need a few simple ingredients. You’ll need sweet potatoes, Italian sausage, onions, bell peppers, and eggs. Sauté the vegetables and sausage until they’re caramelized. Then, bake with the eggs until it’s golden and irresistible.

When this gluten free breakfast bakes dish comes out of the oven, you’ll smell something amazing. It looks great too. Serve it warm, with fresh herbs or shredded cheese, for a breakfast that will keep you going all day.

“This recipe is a game-changer for anyone looking for a delicious and nutritious gluten-free breakfast option. The combination of sweet potatoes and sausage is simply unbeatable!”

  1. Preheat your oven to 375°F (190°C).
  2. In a large skillet, cook the Italian sausage over medium-high heat until browned and cooked through. Remove the sausage from the pan and set it aside.
  3. In the same skillet, sauté the diced onions and bell peppers until they’re tender and caramelized, about 8-10 minutes.
  4. Add the diced sweet potatoes to the skillet and continue cooking for 10-12 minutes, or until the sweet potatoes are fork-tender.
  5. Return the cooked sausage to the skillet and stir to combine.
  6. Crack the eggs into the skillet, making sure to distribute them evenly. Season with salt and pepper to taste.
  7. Transfer the skillet to the preheated oven and bake for 20-25 minutes, or until the eggs are set and the top is lightly browned.
  8. Remove the breakfast bake from the oven and let it cool for a few minutes before serving.

Enjoy this delightful gluten free breakfast bakes and egg casserole recipes creation as a satisfying start to your day. The mix of sweet potatoes, sausage, and eggs is both nutritious and indulgent. Bon appétit!

gluten free breakfast bakes

Dairy Free Mediterranean Egg Casserole

Discover the taste of the Mediterranean with this dairy-free egg casserole. It’s filled with fresh veggies, herbs, and protein. It’s perfect for make ahead breakfast casseroles and will wow your guests.

Best Dairy Free Cheese Options

For a dairy-free casserole, choose plant-based cheese. Great choices include:

  • Cashew-based cheese
  • Almond-based cheese
  • Coconut-based cheese
  • Nutritional yeast for a cheese-like flavor

Mediterranean Ingredients Guide

Bring the Mediterranean to your casserole with these ingredients:

  1. Kalamata olives
  2. Sun-dried tomatoes
  3. Feta-style dairy-free cheese
  4. Fresh basil, oregano, and thyme
  5. Roasted red peppers
  6. Spinach or kale

Make-Ahead Tips and Storage

This dairy free breakfast casserole is great for gluten free breakfast casserole recipes. Assemble it, cover, and chill for up to 3 days. Bake when you’re ready. Store leftovers in a sealed container for up to 4 days.

This egg casserole is a tasty and flexible choice for your next brunch or breakfast.

dairy free breakfast casseroles

Gluten Free Breakfast Casserole Recipes: Classic Ham and Cheese

Take your brunch to the next level with this gluten free breakfast casserole. It’s perfect for those with dietary needs or anyone looking for a cozy morning meal. This recipe is sure to wow your guests.

Begin by picking top-notch gluten free bread or English muffins. Cut them into small pieces to form the casserole’s base. For the cheese, mix sharp cheddar with creamy Swiss for the best taste.

Choose low-sodium ham or a plant-based option to keep your dish light. Add sautéed onions and bell peppers for color and crunch. They complement the casserole’s creamy texture beautifully.

Whisk eggs, milk, and a bit of seasoning together. Pour this over your ingredients, making sure everything is well coated. Sprinkle more cheese on top. Bake until it’s golden and the center is set, filling your kitchen with a delicious smell.

This gluten free breakfast casserole is great for brunch or meal prep. Serve it with fresh fruit, a side salad, or breakfast potatoes for a complete meal.

gluten free breakfast casserole

“This ham and cheese casserole is the ultimate comfort food for breakfast. The gluten free bread creates a hearty base, while the creamy egg and melted cheese make every bite positively irresistible.”

Vegetarian Mexican Breakfast Casserole

Make your gluten free breakfasts more exciting with a Vegetarian Mexican Breakfast Casserole. It’s packed with plant-based proteins, spices, and Mexican flavors. It’s perfect for a gluten free brunch or a healthy breakfast.

Plant-Based Protein Sources

Don’t worry about missing out on protein with a vegetarian casserole. Use:

  • Tofu or extra-firm tofu, pressed and cubed
  • Cooked and crumbled tempeh
  • Drained and rinsed canned black beans or pinto beans
  • Diced avocado, rich in healthy fats

Spice Combinations and Heat Levels

Bring Mexico’s bold flavors to your breakfast with spices. Start with cumin, chili powder, and smoked paprika. Then, add:

  1. Diced jalapeños or serrano peppers for a spicy kick
  2. Chipotle powder or adobo sauce for a smoky, medium heat
  3. Mild green chiles or bell peppers for a more subtle heat

“Elevating gluten free breakfast bakes with the vibrant flavors of Mexico is a surefire way to delight your taste buds and nourish your body.”

Berry and Cream Cheese Overnight French Toast Bake

Take your gluten-free brunch to the next level with this overnight breakfast casserole. It’s packed with berries and cream cheese. Made with gluten-free bread, it’s perfect for stress-free entertaining.

Make this gluten free breakfast casserole recipe the night before. Bake it in the morning for a dish that’s warm and irresistible. The mix of tart berries, creamy cheese, and sweetness is amazing.

  1. Start by cubing your preferred gluten-free bread or rolls and arranging them in a greased baking dish.
  2. In a separate bowl, whisk together eggs, milk, vanilla, and a touch of cinnamon for a delightful French toast flavor.
  3. Gently fold in fresh or frozen berries and cream cheese cubes, then pour the mixture over the bread cubes.
  4. Cover and refrigerate overnight, allowing the flavors to meld and the bread to soak up the custard-like batter.
  5. In the morning, simply bake the overnight breakfast casserole until golden brown and set.

“This berry and cream cheese French toast bake is the perfect make-ahead breakfast for busy mornings or entertaining guests. The combination of sweet berries and rich cream cheese is absolutely divine.”

Serve this gluten free breakfast casserole warm. Top it with more berries and powdered sugar for a luxurious brunch.

Spinach and Mushroom Make-Ahead Breakfast Casserole

Make your mornings better with this tasty spinach and mushroom casserole. It’s easy to make and great for busy days. It’s full of fresh spinach, mushrooms, and creamy eggs. This make ahead breakfast casserole will quickly become a favorite.

Best Mushroom Varieties to Use

Choosing the right mushrooms is important for your healthy breakfast bakes. Use a mix of cremini and shiitake mushrooms. They add a rich flavor that pairs well with spinach.

Proper Vegetable Preparation

Getting your veggies ready right is crucial for vegetarian breakfast casseroles. Clean and slice the mushrooms well. Sauté the spinach until it’s just wilted. This keeps the veggies’ flavors and texture.

This spinach and mushroom bake is a game-changer for breakfast. It’s nutritious and delicious. Enjoy it for a fulfilling start to your day or impress guests at brunch.

Denver-Style Egg and Potato Breakfast Bake

Take your brunch to the next level with this tasty Denver-style egg and potato breakfast bake. It’s inspired by the classic Denver omelet. This dish combines bell peppers, onions, and ham for a delicious breakfast. It’s great for gluten free breakfast bakes, egg casserole recipes, and brunch casserole dishes.

To start, layer the ingredients in a baking dish. Begin with diced potatoes, then add sautéed bell peppers and onions. Next, add chopped ham or your favorite protein. Finish with a fluffy egg mixture. Bake until the eggs are set and the potatoes are tender.

For perfect egg consistency, whisk the eggs well before adding them. This ensures the eggs are evenly distributed. You can also add shredded cheese or fresh herbs for extra flavor.

This gluten free breakfast bake is easy to serve and portion. It’s perfect for brunch gatherings or meal prep. Serve it with a fresh salad or your favorite sides for a complete meal. Enjoy the fluffy eggs, tender potatoes, and savory vegetables in every bite.

Quinoa and Apple Breakfast Casserole

Start your day with a nutritious and delicious gluten free breakfast casserole. It features quinoa and apples. This mix of protein-rich quinoa and sweet apples makes a wholesome breakfast. It’s great for gluten free brunch ideas or a healthy breakfast.

Cooking Perfect Quinoa Tips

To get fluffy and flavorful quinoa, follow these tips:

  1. Rinse the quinoa well to remove bitter saponins.
  2. Use a 1:2 quinoa-to-liquid ratio, like 1 cup quinoa to 2 cups water or broth.
  3. Boil the liquid, then lower the heat, cover, and simmer for 15-20 minutes. The quinoa should be tender and the liquid absorbed.
  4. Fluff the quinoa with a fork before adding it to the casserole.

Apple Selection Guide

Not all apples are the same for baking. For the best results, pick a variety that holds its shape and balances sweetness and acidity. Here are some top picks:

  • Granny Smith – Tart and crisp, adds contrast to the sweet casserole.
  • Honeycrisp – Juicy, sweet-tart, and firm, a popular choice.
  • Fuji – Sweetly crisp, with a crunchy bite, great for baked dishes.

Enjoy this healthy gluten free breakfast bake in the morning or for a gluten free brunch. The mix of quinoa and apples will keep you satisfied and energized all day.

Conclusion

Gluten free breakfast casseroles are a tasty and flexible choice for morning meals. They range from savory to sweet, like the “Denver-Style Egg and Potato Breakfast Bake” and the “Berry and Cream Cheese Overnight French Toast Bake.” These recipes show how easy it is to make gluten free breakfasts that are both delicious and healthy.

These casseroles are not just yummy; they’re also easy to make ahead of time. This makes them perfect for busy mornings or meal prep. They’re great for anyone who needs to follow a gluten-free diet, wants to try new recipes, or just needs a filling breakfast.

We invite you to try out the gluten free breakfast casserole recipes we’ve shared. Feel free to get creative and make your own versions. Discover the joy of gluten free breakfast bakes and enjoy a variety of make ahead breakfast casseroles that are both tasty and good for you.

FAQ

What are the key ingredients for gluten free breakfast casseroles?

Gluten free breakfast casseroles need gluten-free flours like almond or coconut flour. You’ll also need eggs, dairy-free milk, and your favorite veggies, proteins, and spices. This mix makes a tasty and healthy dish.

Can I make gluten free breakfast casseroles ahead of time?

Yes, many recipes are made to be prepared ahead. These casseroles can be refrigerated overnight and baked in the morning. They’re perfect for busy days or brunches.

What are some common substitutes for dairy in gluten free breakfast casseroles?

For dairy-free options, try unsweetened almond, coconut, or oat milk. You can also use dairy-free cheese made from cashews or soy for a creamy texture.

Can I make gluten free breakfast casseroles vegetarian or vegan?

Definitely! To make them vegetarian or vegan, skip the meat and add tofu, tempeh, or veggies. Just swap out any non-vegan ingredients for vegan ones.

What kitchen tools are essential for making gluten free breakfast casseroles?

You’ll need a good baking dish, a mixing bowl, and a whisk or hand mixer. Also, a cutting board and sharp knives for prep. A food processor or blender is handy for smooth batters or sauces.

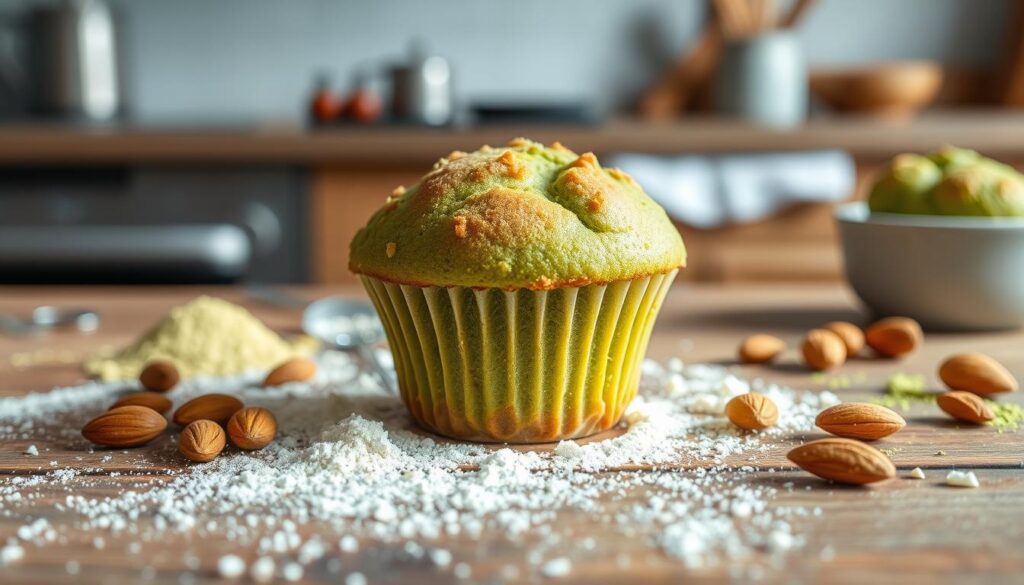
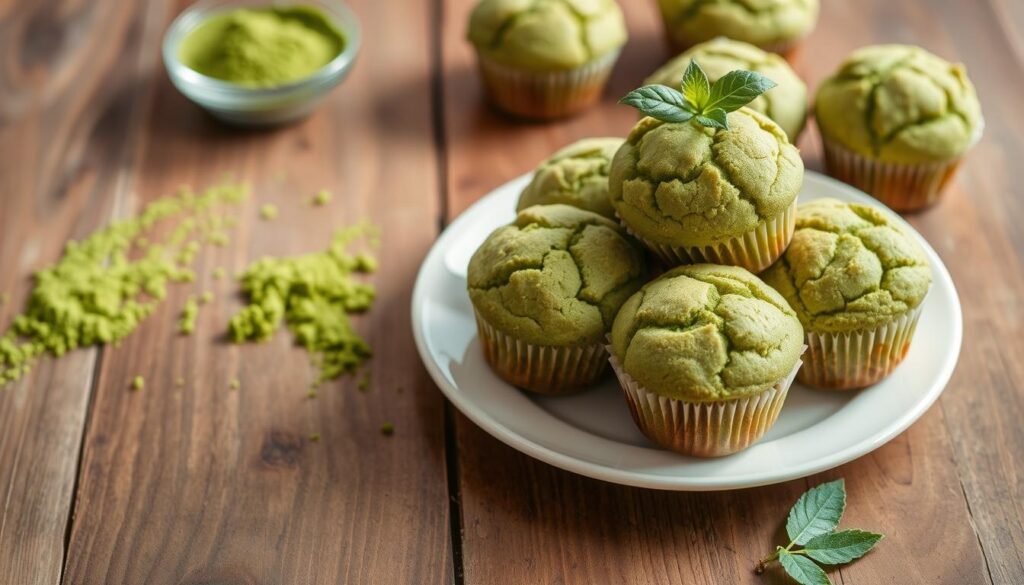
Fluffy Matcha Muffin Recipe with Almond Flour – A Healthy, Gluten-Free Treat

matcha muffin recipe with almond flour

As a busy mom, I’m always searching for quick, healthy snacks my family will enjoy. I found this amazing matcha muffin recipe with almond flour. These treats are not only tasty but also gluten-free and full of antioxidants. They’re perfect for breakfast or a guilt-free snack.

Key Takeaways

  • Matcha muffins with almond flour are a healthy, gluten-free treat
  • Matcha green tea provides powerful antioxidants and a unique, earthy flavor
  • Almond flour adds moisture, texture, and nutritional benefits to the muffins
  • This recipe is easy to make and ready in just 30 minutes
  • Enjoy these muffins for breakfast, a snack, or a delightful dessert

Why These Matcha Almond Flour Muffins Are Your New Favorite Healthy Treat

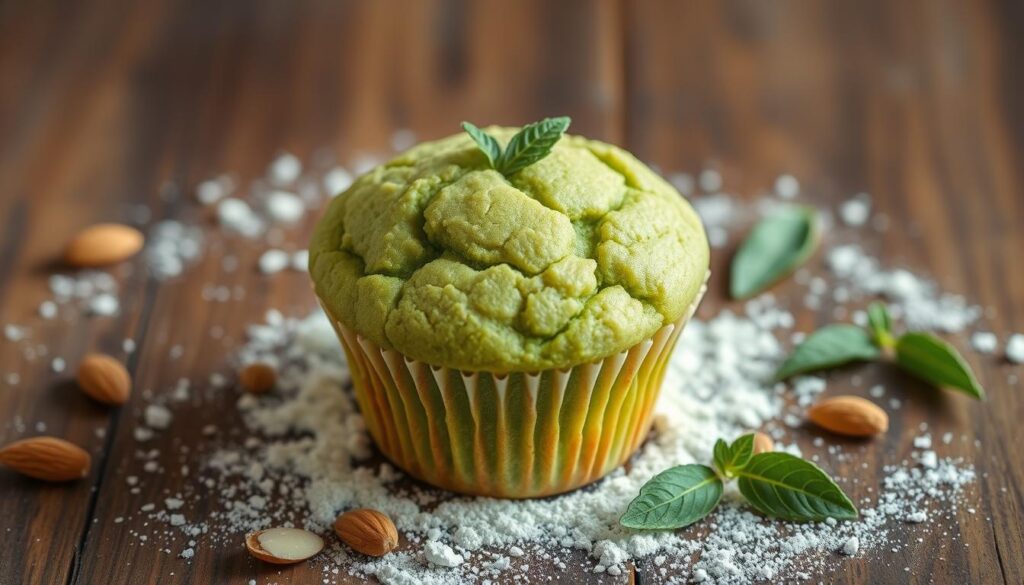
These green tea muffins are made with matcha powder and almond flour. They are a healthy treat that you’ll love. They are packed with nutrients and fit many diets.

Health Benefits of Matcha Green Tea

Matcha powder is a superfood in these muffins. It’s full of antioxidants that fight off bad stuff in our bodies. It also has caffeine, which gives you a gentle energy boost.

Advantages of Using Almond Flour

Using almond flour makes these muffins gluten-free and full of nutrients. Almond flour has vitamins, minerals, and healthy fats. It’s great for those who follow a paleo or low-carb diet.

Perfect for Special Dietary Needs

  • Gluten-free: The almond flour base ensures these muffins are free from gluten, catering to those with dietary restrictions.
  • Paleo-friendly: With their simple, whole-food ingredients, these green tea muffins are the perfect paleo-approved treat.
  • Potentially keto-friendly: Depending on the specific recipe and portion sizes, these matcha powder muffins may also fit into a ketogenic diet.

Try the mix of matcha and almond flour in these muffins. You’ll see why they’re your new favorite snack!

matcha powder muffins

Essential Ingredients for Perfect Matcha Muffins

Making matcha muffins with almond flour is easy with the right ingredients. You need a few key items for the perfect taste and texture.

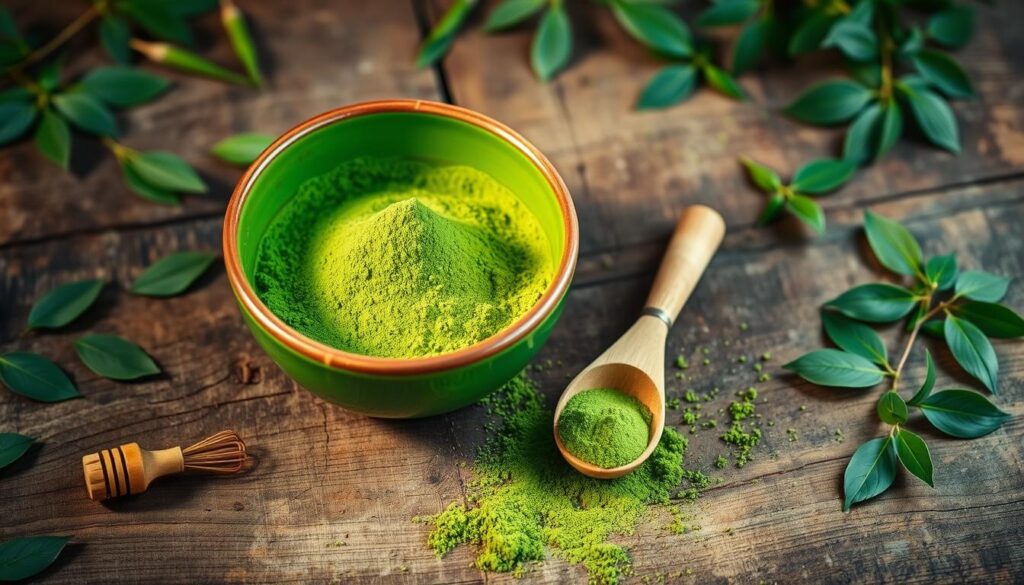
The main ingredient is matcha powder. This fine, green tea powder gives your muffins a unique earthy and sweet flavor. Choose a culinary-grade matcha for the best taste.

Almond flour is crucial for structure and a soft crumb. It’s gluten-free and made from ground almonds. It adds a moist, nutty flavor to your vegan muffins.

Sweeteners like maple syrup, coconut sugar, or dates balance the matcha’s bitterness. Flax or chia seeds, applesauce, or mashed bananas act as binding agents. They hold the muffins together without eggs.

Adding vanilla extract, lemon zest, or a pinch of salt can enhance the flavor. These ingredients round out the recipe.

“The key to perfect matcha muffins lies in the careful balance of high-quality ingredients.”

With these ingredients, you’re ready to make delicious, healthy matcha almond flour muffins. They’ll impress your family and friends.

matcha powder

Kitchen Tools and Equipment You’ll Need

To bake delicious Japanese pastries or gluten-free treats, you need more than ingredients. You’ll also need the right tools and equipment. Let’s look at what you need to make those fluffy matcha muffins with almond flour.

Mixing Equipment Essentials

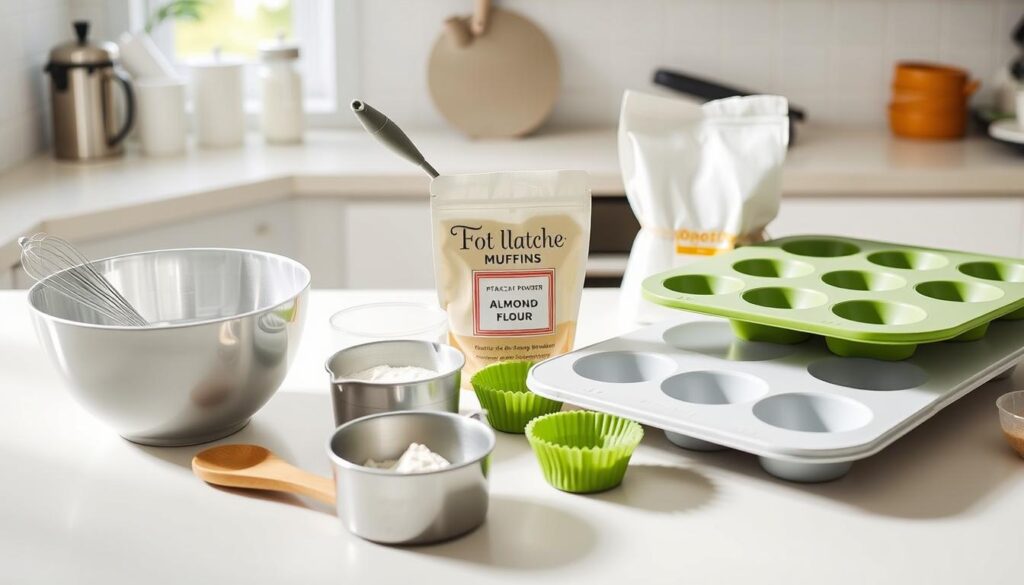
You’ll need a good mixing bowl set, preferably stainless steel or glass. These bowls are durable and make mixing easy. A strong whisk or hand mixer is also key to get the batter just right.

Baking Tools Required

  • A non-stick muffin tin for perfect matcha muffins
  • A spoon or scoop for even batter distribution
  • A silicone spatula for smooth batter transfer and easy muffin removal

Optional Accessories

While not necessary, some tools can enhance your baking experience:

  1. A kitchen scale for precise ingredient measurements
  2. A pastry bag or piping tip for decorative muffin tops
  3. A cooling rack for even cooling of your muffins

With these tools and equipment, you’re ready to make delicious Japanese pastries and gluten-free treats.

kitchen tools

“The right tools can make all the difference in the kitchen, especially when baking up a storm.”

Step-by-Step Matcha Muffin Recipe with Almond Flour

Try the tasty mix of matcha and almond flour in this simple recipe. It’s perfect for those watching their health or following a gluten-free diet. These muffins are light and delicious, making them a favorite treat.

  1. Preheat your oven to 375°F (190°C). Grease a 12-cup muffin tin or line it with paper liners.
  2. In a medium bowl, whisk together 2 cups of almond flour, 1/4 cup of matcha powder, 1 teaspoon of baking powder, and 1/4 teaspoon of salt. Set aside.
  3. In a separate bowl, beat 3 large eggs, 1/2 cup of honey, and 1/3 cup of melted coconut oil until well combined.
  4. Gently fold the wet ingredients into the dry ingredients until just combined, being careful not to overmix.
  5. Spoon the batter evenly into the prepared muffin tin, filling each cup about 3/4 full.
  6. Bake the matcha muffins for 18-22 minutes, or until a toothpick inserted into the center comes out clean.
  7. Allow the muffins to cool in the tin for 5 minutes before transferring them to a wire rack to cool completely.

Enjoy these tasty matcha muffin recipe with almond flour as a healthy, gluten-free baking treat. The mix of earthy matcha and nutty almond flour makes a satisfying and nutritious snack or breakfast.

matcha muffin recipe with almond flour

Tips for Achieving the Perfect Muffin Texture

Baking healthy, gluten-free muffins is a delicate task. But with the right techniques, you can get a fluffy and tender texture. We’ll explore temperature control, mixing methods, and storage tips to help you excel in gluten-free baking.

Temperature Control Secrets

Keeping the right temperature is key for the perfect muffin. Make sure your oven is at the right temperature before baking. Don’t open the oven door too often, as it can mess with the temperature and baking.

Use the oven light to check on your muffins instead. This way, you can avoid uneven baking.

Mixing Techniques

Mixing your gluten-free batter is important. Avoid overmixing, as it can make the muffins dense and tough. Instead, gently fold the ingredients together until they’re just combined.

This gentle approach will help you get a light and airy texture in your muffins.

Storage Guidelines

  • Store your baked and cooled muffins in an airtight container at room temperature for up to 3 days.
  • For longer storage, freeze the muffins in an airtight container or resealable bag for up to 3 months.
  • To reheat, place the frozen muffins in a 350°F oven for 5-10 minutes, or until warmed through.

By following these tips, you can make gluten-free, healthy muffins that are sure to impress. Enjoy your fluffy, delicious treats!

Customization Options and Add-ins

The beauty of these keto-friendly treats lies in their versatility. The basic matcha muffin recipe with almond flour is already a delightful treat. But, there are endless ways to customize and elevate it to suit your personal preferences or dietary needs. Whether you’re craving a more paleo-friendly snack or simply want to add a personal touch, the options are endless.

One way to customize your matcha muffins is by incorporating various add-ins. Consider adding a handful of chopped nuts like almonds or walnuts for a satisfying crunch. Alternatively, sprinkle in some seeds like chia or flaxseeds for an extra boost of nutrition. For a pop of sweetness, fold in fresh or dried berries such as raspberries, blueberries, or even diced apples.

If you’re following a specialized diet, such as keto or paleo, you can easily adapt the recipe to suit your needs. For a keto-friendly version, simply replace the almond flour with a low-carb alternative like coconut flour or ground flaxseed. To make the muffins paleo-friendly, you can swap out the sweetener for a natural option like honey or maple syrup.

The possibilities are endless when it comes to customizing your matcha muffins. Embrace your creativity and experiment with different flavors and textures to find your personal favorite. Whether you prefer a nutty crunch, a burst of fruity sweetness, or a more specialized dietary approach, these muffins can be tailored to your taste buds and dietary preferences.

Troubleshooting Common Baking Issues

Baking gluten-free muffins with matcha powder can be tricky. But don’t worry, we’ve got you covered! Let’s look at some common problems and how to fix them.

Texture Problems and Solutions

If your matcha muffins are too dense or dry, there are a few things you can do. First, avoid overmixing the batter. This can make the muffins tough and rubbery. Instead, gently mix the ingredients until they’re just combined.

Also, adding a bit more milk or plant-based milk can help. This will keep the muffins moist and fluffy.

If the muffins are too wet or gummy, try adding more almond flour. Or reduce the liquid ingredients a bit. Finding the right balance is key, depending on your ingredients and oven.

Flavor Adjustments

If the matcha flavor isn’t strong enough, add more matcha powder. Start with an extra teaspoon or two in the dry ingredients. If it’s too strong, cut back on the matcha and add a bit more vanilla or sweetener.

To deepen the flavor, add a pinch of cinnamon, a splash of lemon juice, or some chopped nuts or dried fruit. These can enhance the matcha and almond flour flavors.

“Baking is a science, but with a little experimentation, you can find the perfect formula for your gluten-free matcha muffins.”

The joy of baking comes from trying new things. Don’t be afraid to adjust and find the perfect texture and flavor. With patience and persistence, you’ll soon be making amazing matcha muffins.

Nutritional Information and Dietary Benefits

These healthy muffins are made with matcha and almond flour. They are great for keto-friendly treats and paleo snacks. Let’s explore their benefits!

Each muffin has about 160 calories. It has 12 grams of fat, 8 grams of carbs (4 grams of fiber), and 6 grams of protein. This makes them perfect for keto or paleo diets. They help with weight management and health.

Matcha green tea powder in these muffins adds antioxidants. It’s full of catechins, which are good for your heart and brain.

Using almond flour instead of wheat flour makes them gluten-free. Almond flour is rich in fiber and healthy fats. It helps you feel full and supports your health.

If you want a keto-friendly treat, a paleo snack, or just a tasty, healthy muffin, try this recipe. It’s delicious and good for you.

Serving Suggestions and Pairing Ideas

Make your matcha green tea muffin experience even better with creative serving ideas. These Japanese pastries, made with almond flour, are perfect for many ways of enjoyment.

For a traditional Japanese tea time, pair the green tea muffins with a steaming cup of ceremonial-grade matcha tea. The tea’s earthy, umami flavors will match the muffin’s sweet and grassy notes. Add a bit more matcha powder on top for a beautiful look.

Want something different? Try pairing your Japanese pastries with a fragrant, floral oolong tea. The oolong’s floral notes will blend well with the matcha muffin, making a perfect flavor mix.

For a refreshing twist, serve the muffins with a chilled glass of unsweetened, premium green tea. The tea’s coolness will contrast nicely with the muffin’s warmth, making a refreshing pair.

Feel adventurous? Mix the muffins into a modern Japanese-inspired dessert spread. Place them with other Japanese pastries like mochi, wagashi, or a creamy matcha cheesecake. This makes a stunning and tasty tea-time experience.

No matter how you serve and enjoy these green tea muffins, they’ll surely please your taste buds. They’ll take you to a peaceful, Japanese-inspired moment of indulgence.

Storage Tips and Shelf Life

To keep your matcha almond flour muffins fresh, proper storage is crucial. Once they cool down, store them in an airtight container at room temperature for up to 3 days. For longer freshness, refrigerate them. This will keep their texture and prevent drying out for up to 5 days.

Freezing is the best option for longer storage. Wrap each muffin in plastic wrap or foil, then put them in a freezer-safe bag or container. Frozen muffins can last up to 3 months. To enjoy, thaw at room temperature or reheat in the oven or microwave until warm and fluffy.

For the best texture and flavor, store them in a cool, dry place. Avoid direct sunlight or moisture. With these tips, you can enjoy your homemade treats for days.

FAQ

What are the main ingredients in these matcha muffins?

The main ingredients are high-quality matcha powder, almond flour, and eggs or vegan substitutes. You also need a sweetener and baking soda or powder. Optional add-ins include vanilla extract, lemon zest, or chopped nuts for extra flavor and texture.

Are these matcha muffins gluten-free?

Yes, they are gluten-free because they use almond flour instead of wheat flour. This makes them perfect for those who follow a gluten-free diet.

Can I make these muffins vegan?

Absolutely! To make them vegan, use flax or chia eggs and non-dairy milk or yogurt instead of eggs and dairy products.

What are the health benefits of matcha powder?

Matcha green tea powder is full of antioxidants, vitamins, and minerals. It boosts metabolism, improves focus, and gives a gentle caffeine boost without jitters.

What are the advantages of using almond flour?

Almond flour is a healthy gluten-free option. It’s rich in healthy fats, protein, and fiber. It makes baked goods like these muffins tender and moist.

What equipment do I need to make these matcha muffins?

You’ll need a mixing bowl, whisk, spatula, and a 12-cup muffin tin. A small cookie scoop or ice cream scooper helps portion the batter evenly. A matcha whisk or bamboo brush ensures the matcha powder is mixed well.

How do I store these matcha muffins?

Store them in an airtight container at room temperature for up to 3 days. You can also freeze them for 2-3 months. Thaw at room temperature or reheat briefly in the oven or microwave.

Can I customize these matcha muffins?

Absolutely! You can add chopped nuts, seeds, chocolate chips, or dried fruit. Adjust the sweetness or use different sugar substitutes to fit your diet.

What are some common issues I should troubleshoot when baking these muffins?

Issues like dry texture, trouble rising, or strong matcha flavor can happen. Avoid overmixing, adjust matcha amount, and check your oven temperature. Proper storage and cooling help keep the texture right.

How do these matcha muffins fit into a healthy diet?

These muffins are nutritious and filling. They’re low in carbs, high in fiber and protein, and packed with antioxidants from matcha. They’re great for keto, paleo, or low-carb diets as a healthy snack or breakfast.

Lemon Balm Recipe for Weight Loss: Natural Fat Burner

lemon balm recipe for weight loss

I was on a quest for a natural way to lose weight. That’s when I found lemon balm. It’s a simple herb that can help with weight loss in amazing ways. Scientific studies show it can change your path to a healthier, more confident you.

In this guide, we’ll explore how lemon balm recipe for weight loss helps with weight loss. We’ll also show you how to add it to your daily life. It can help you feel full, boost your energy, and more. This natural remedy might be the answer to your weight loss dreams.

Key Takeaways

  • Lemon balm is a natural herb with powerful weight loss properties, including appetite suppression and metabolic enhancement.
  • The active compounds in lemon balm, such as rosmarinic acid and citral, have been shown to have fat-burning effects.
  • Incorporating lemon balm into your diet, through recipes or supplements, can help support a healthy weight management routine.
  • Lemon balm can be combined with other natural fat-burning ingredients for even greater weight loss benefits.
  • Proper dosage and safety guidelines should be followed to ensure the safe and effective use of lemon balm for weight loss.

Understanding Lemon Balm’s Weight Loss Properties

Lemon balm is a fragrant herb from the mint family. It’s known for its health benefits. But did you know it can help with weight loss too? Let’s explore how lemon balm can boost your metabolism and burn fat.

Active Compounds in Lemon Balm

Lemon balm’s weight loss benefits come from its unique compounds. It’s packed with rosmarinic acid, citronellal, and citral. These ingredients help your body burn fat naturally and keep your metabolism healthy.

Scientific Evidence Behind Fat Burning Effects

Many studies have looked into lemon balm’s weight loss effects. They found that its compounds increase energy use, fat burning, and control hunger hormones. Adding lemon balm to your daily routine could unlock its fat-burning power.

Metabolic Benefits of Lemon Balm

  • Boosts metabolism and energy levels
  • Helps regulate blood sugar levels
  • Supports healthy thyroid function
  • Reduces stress and cortisol levels

Lemon balm is a strong metabolism boosting herb for weight loss. Using lemon balm tea benefits and other lemon balm products can help you lose weight. It’s a natural way to burn fat.

lemon balm tea benefits

Essential Benefits of Lemon Balm for Weight Management

Lemon balm is a calming herb with many benefits for weight loss. It’s not just a natural appetite suppressant. It also helps in managing weight in several ways.

Lemon balm is great for reducing stress and anxiety. Stress can make you eat more and mess with your metabolism. Using lemon balm supplements or calorie-burning drinks can help control stress and eating habits.

It also improves digestion, which is key for weight management. Healthy digestion helps your body use nutrients better. This supports a healthy metabolism.

  • Suppresses appetite and curbs cravings
  • Reduces stress and anxiety, which can lead to emotional eating
  • Enhances digestive function, supporting healthy metabolism
  • Boosts energy levels, promoting an active lifestyle
  • Contains antioxidants that may help regulate blood sugar levels

Using lemon balm is a natural way to lose weight. Add it to your daily routine. See how it can improve your health and well-being.

lemon balm supplements

Basic Lemon Balm Recipe for Weight Loss

Lemon balm is a powerful herb that helps burn fat. Making a simple lemon balm recipe can kickstart your natural weight loss journey. Learn about the ingredients, how to make it, and when to drink it to help manage your weight.

Required Ingredients

  • Fresh lemon balm leaves (5-10 sprigs)
  • Filtered water (8 oz)
  • Honey or stevia (to taste, optional)
  • Lemon wedge (for garnish, optional)

Step-by-Step Preparation Guide

  1. Rinse the lemon balm leaves under cool water to clean them.
  2. Heat the filtered water in a small saucepan until it simmers.
  3. Add the lemon balm leaves to the water and let it steep for 5-7 minutes.
  4. Strain the tea, throwing away the leaves.
  5. If you want it sweeter, add honey or stevia.
  6. Pour the tea into a cup and add a lemon wedge if you like.

Optimal Consumption Times

Drink this tea in the morning or before meals for best results. Lemon balm boosts your metabolism, helps burn fat, and reduces hunger. It’s a great addition to your weight loss plan.

“Lemon balm is a powerful herbal ally in the quest for natural weight loss. Its unique blend of active compounds can help you achieve your goals in a gentle, sustainable way.”

Try the lemon balm recipe for weight loss to add this herbal weight loss remedy to your daily routine. Discover the fat-burning potential of lemon balm and start your journey to a healthier you.

lemon balm recipe

Creating the Perfect Lemon Balm Tea for Fat Burning

Lemon balm tea is more than just a tasty drink. It’s a strong helper in your weight loss journey. This herb is known for its calming effects. It also helps boost your metabolism and burn calories.

To make the best lemon balm tea for fat burning, follow these easy steps:

  1. Start with fresh, high-quality lemon balm leaves. Roughly chop or tear the leaves to release their aromatic oils.
  2. Bring a cup of water to a gentle simmer. Once the water is hot, remove from heat and add the lemon balm leaves.
  3. Let the tea steep for 5-7 minutes, allowing the metabolism boosting herbs to infuse the water fully.
  4. Strain the tea, discarding the spent leaves. You can sweeten it with a touch of honey or a slice of lemon to enhance the flavor.

For an extra metabolic boost, consider adding a pinch of cinnamon or a few slices of fresh ginger to your lemon balm tea. These calorie-burning drinks can further enhance the fat-burning properties of this delightful beverage.

“Lemon balm tea is a refreshing and healthy way to support your weight loss goals. Its natural compounds can help rev up your metabolism and promote overall well-being.”

Make lemon balm tea a part of your daily routine. Enjoy it throughout the day or as a mid-afternoon pick-me-up. With its gentle, citrusy flavor and proven fat-burning benefits, this tea can be a valuable addition to your weight management arsenal.

Lemon Balm Smoothie Variations for Enhanced Weight Loss

Adding lemon balm to your smoothies can change your weight management game. This herb is great for controlling hunger and burning fat. Here are three lemon balm smoothie recipes to help you lose weight.

Morning Energizing Blend

Begin your day with a zesty lemon balm smoothie. Mix fresh lemon balm, Greek yogurt, banana, spinach, and a bit of honey. This smoothie is packed with nutrients and boosts your metabolism. Lemon balm helps you feel full and reduces cravings, aiding in your weight loss journey.

Post-Workout Recovery Mix

Recharge after a tough workout with a lemon balm smoothie. Blend lemon balm, pineapple, almond milk, and protein powder. This smoothie fights inflammation, supports muscle recovery, and replenishes energy with protein and pineapple’s natural sugars.

Bedtime Fat-Burning Smoothie

Make a calming lemon balm smoothie for bedtime. Mix lemon balm, avocado, almond milk, and cinnamon for a creamy drink. This smoothie lowers stress and improves sleep, key for weight loss.

Try these lemon balm smoothie recipes to find your favorite. Adding this herb to your diet can naturally aid in weight management.

Combining Lemon Balm with Other Natural Fat Burners

Using herbal weight loss remedies like lemon balm can be even better when mixed with other metabolism boosting herbs and natural appetite suppressants. This mix can greatly improve your weight loss journey. It’s a way to get more health benefits for your body and mind.

Pairing lemon balm with green tea is a smart move. Green tea’s catechins help burn fat and boost metabolism. Lemon balm adds calming and stress-reducing effects. This combo is a strong ally in your fight against extra pounds.

Another great mix is lemon balm and ginger. Ginger is known for controlling hunger and preventing overeating. Lemon balm aids in digestion and helps your body absorb nutrients better. This duo is great for those who eat too much due to stress or emotions.

“The right blend of natural ingredients can work in synergy to turbocharge your metabolism and keep your appetite in check.”

Adding adaptogenic herbs like ashwagandha or rhodiola to lemon balm is also smart. These herbs help manage stress and cortisol levels. High stress can lead to weight gain and cravings. By tackling stress, you can achieve lasting weight loss success.

When mixing lemon balm with other natural fat burners, start with small amounts. Listen to how your body reacts. The right mix of these herbal weight loss remedies can help you reach your weight loss goals.

Proper Dosage and Safety Guidelines

Adding lemon balm to your weight loss plan is great. But, it’s key to know the right amount and safety tips. This ensures you get the most benefits without risks.

Studies suggest taking 300-500 milligrams of lemon balm extract daily for weight loss. This amount helps burn fat and boosts metabolism. Start with 300 milligrams and increase if needed, under a doctor’s advice.

Potential Side Effects

  • Lemon balm supplements are mostly safe. But, some might get headaches, nausea, or stomach issues.
  • Be careful of allergic reactions since lemon balm is related to mint.
  • Pregnant or nursing women and those with health issues should talk to their doctor before using lemon balm tea benefits.

Contraindications

Lemon balm can affect certain medicines like thyroid drugs, sedatives, and blood thinners. Always tell your doctor if you’re taking any medications.

“Adding lemon balm to your weight loss plan can be natural and helpful. But, it’s important to do it safely and with a doctor’s advice.”

For lasting weight loss, focus on a balanced diet, exercise, and natural supplements like lemon balm. By following the right dosage and safety tips, you can enjoy lemon balm’s benefits and reach your weight loss goals.

Incorporating Lemon Balm into Your Weight Loss Routine

Adding lemon balm to your weight loss plan is easy and effective. This herb has many benefits that help with health and fitness. It can boost your metabolism and make calorie-burning drinks work better.

Lemon balm helps your body burn fat better. It also supports healthy digestion. By adding lemon balm to your daily routine, you can get these benefits.

  1. Drink lemon balm tea before meals to feel full and aid digestion.
  2. Add lemon balm to your smoothies after working out for energy and recovery.
  3. Drink lemon balm tea at night to relax and sleep better.

While lemon balm is great for weight loss, it’s just one part of a healthy lifestyle. Eat well, exercise regularly, and use other herbal remedies for the best results.

“Lemon balm is a powerful tool in the fight against unwanted weight. By incorporating it into your daily routine, you can unlock its metabolic benefits and support your overall health and wellness.”

Try different ways to use lemon balm and see how it helps your weight loss. Enjoy a refreshing tea, a smoothie, or a calming bedtime drink. You’ll be on your way to a healthier you.

Tips for Maximum Weight Loss Results with Lemon Balm

Lemon balm is a strong metabolism booster that can help with weight loss. To get the most out of it, follow these expert tips:

  1. Pair Lemon Balm with a Healthy Diet: Use lemon balm with a balanced diet that burns fat. It’s a natural appetite suppressant. But it works best with healthy, whole foods.
  2. Enhance Lemon Balm’s Effects with Regular Exercise: Exercise boosts lemon balm’s fat-burning power. Mix cardio and strength training to burn calories and build muscle.
  3. Consistency is Key: For lasting weight loss, make lemon balm a daily habit. Add it to your morning tea, afternoon smoothie, or evening routine. This keeps its fat-burning compounds flowing.
  4. Avoid Common Mistakes: Don’t overdo it with lemon balm or rely on it alone for weight loss. It’s best when part of a healthy lifestyle, not a replacement for a balanced diet and exercise.

By following these tips, you can unlock lemon balm’s full weight loss potential. Remember, staying consistent and taking a holistic approach are crucial for the best results.

“Lemon balm is a powerful natural tool for weight management, but it works best when incorporated into a comprehensive lifestyle approach.”

Conclusion

The lemon balm is a natural way to help with weight loss. It has compounds like rosmarinic acid and citronellal. These help burn fat and improve your metabolism.

Adding lemon balm recipes to your day can boost your weight loss efforts. You can enjoy a calming lemon balm tea or a cool lemon balm smoothie. You can also mix it with other natural fat burners for more benefits.

Make sure to use lemon balm safely and as directed. With dedication and a balanced approach, you can see great results. Start your weight loss journey with lemon balm and feel confident about your progress.

FAQ

What is lemon balm, and how can it help with weight loss?

Lemon balm is an herb known for its weight loss benefits. It has compounds that may reduce hunger, increase metabolism, and burn fat. Adding lemon balm to your weight loss plan can be a natural and helpful step.

What are the active compounds in lemon balm that contribute to its weight loss properties?

Lemon balm has compounds like rosmarinic acid, citronellal, and eugenol. These have been studied for their fat-burning and metabolism-boosting effects. They may help with energy use and fat release.

What are the key benefits of lemon balm for weight management?

Lemon balm helps with weight management by reducing hunger, lowering stress, and improving digestion. These benefits create a good environment for losing weight and staying healthy.

How can I incorporate lemon balm into a weight loss recipe?

You can make lemon balm tea or add it to smoothies for weight loss. To make tea, steep lemon balm leaves in hot water. Enjoy it alone or with lemon juice or honey.

Can I create different lemon balm smoothie variations for weight loss?

Yes, you can try different lemon balm smoothies for various weight loss goals. For example, a morning energizer, a post-workout recovery, or a bedtime fat-burner can all use lemon balm.

Are there any safety considerations when using lemon balm for weight loss?

Lemon balm is usually safe in small amounts. But, know the daily limit and possible side effects. Pregnant or breastfeeding women and people with certain health issues should talk to a doctor before using lemon balm.

Refreshing Orange Julius Milkshake Recipe Ninja Creami – A 5-Minute

orange julius milkshake recipe ninja creami

The taste of an orange julius milkshake recipe ninja creami brings back happy childhood memories. It’s a mix of fresh oranges, creamy texture, and just the right amount of tart and sweet. Now, you can make this favorite drink at home with the Ninja Creami. Enjoy the flavors that have been loved for years.

Key Takeaways

  • Discover the history and appeal of the classic Orange Julius milkshake
  • Learn how to make a homemade version using the Ninja Creami
  • Explore customization options to make the drink your own
  • Understand the nutritional benefits of this refreshing treat
  • Discover tips for achieving the perfect creamy texture

What Makes Orange Julius Milkshakes So Special

The orange milkshake known as the Orange Julius has a rich history and a loyal fan base. It’s a creamy, frothy drink that has won over many hearts and taste buds. Its sweet orange flavor and creamy texture make it a favorite among frozen orange drinks.

The History Behind the Classic Orange Julius

In the 1920s, a Los Angeles entrepreneur named Julius Freed created the Orange Julius. He mixed orange juice concentrates to make a unique blend. This blend became a hit at his stand, and the “Orange Julius” name stuck.

Over the years, the recipe has changed a bit. But the core of fresh orange flavor and creamy texture has stayed the same.

Why Everyone Loves This Creamy Orange Drink

The frozen orange drink is loved for its sweet and creamy mix. The orange taste is fresh and zesty, while the creamy texture is indulgent. It’s a favorite for a quick boost or a cool treat on a hot day.

orange milkshake

“The Orange Julius is a refreshing and unique treat that combines the best of both worlds – the bright, citrusy flavor of orange and the creamy, indulgent texture of a milkshake.”

Essential Ingredients for Your Homemade Orange Julius

Making a homemade orange cream smoothie or citrus drink is easy with the right ingredients. To make a classic Orange Julius, you need a few key things. These ingredients come together to make a creamy, sweet, and irresistible drink.

The base of an Orange Julius is fresh orange juice concentrate. This concentrated juice gives a bold, citrusy flavor. Adding milk or a dairy-free alternative makes the drink creamy and smooths out the tartness.

To balance the flavors, vanilla extract and a sweetener like sugar or honey are key. These add the signature orange cream taste that Orange Julius fans love.

Here’s a quick list of what you need to make your own Orange Julius:

  • Orange juice concentrate
  • Milk or dairy-free milk alternative
  • Vanilla extract
  • Sweetener (sugar, honey, etc.)

With these simple ingredients, you can make a refreshing orange cream smoothie or citrus drink at home. Enjoy the classic taste of an Orange Julius whenever you want!

orange cream smoothie ingredients

Orange Julius Milkshake Recipe Ninja Creami – Step-by-Step Guide

Make your desserts better with a homemade orange julius milkshake recipe from the Ninja Creami. This treat is a twist on the classic orange julius. Follow this guide to make the perfect orange julius milkshake at home.

Preparation Tips for Perfect Results

To get a smooth and creamy orange julius milkshake recipe ninja creami, keep these tips in mind:

  • Use fresh, ripe oranges for the best flavor.
  • Chill all your ingredients before blending for a frosty texture.
  • Adjust the sweetness to your liking.
  • Try different milks to find your favorite consistency.

Freezing and Processing Instructions

To get the signature ninja blender recipe texture, follow these steps:

  1. Pour the orange julius mixture into the Ninja Creami container.
  2. Freeze the container for at least 24 hours or until completely frozen.
  3. Remove the frozen container from the freezer and insert it into the Ninja Creami base.
  4. Select the “Milkshake” setting and let the Creami work its magic, processing until smooth and creamy.

Achieving the Right Consistency

The secret to a smooth and creamy orange julius milkshake is the right mix of ingredients and processing time. Play with the amount of milk, ice cream, or frozen yogurt to get the thickness and texture you want. The Ninja Creami turns frozen mixtures into a delightful milkshake-like consistency. Trust the process and enjoy your homemade orange julius milkshake recipe ninja creami!

orange julius milkshake ninja creami

Customizing Your Orange Creamsicle Milkshake

Homemade orange creamsicle milkshakes let you tailor them to your liking. You can add sweetness, protein, or a twist to the classic taste. There are countless ways to make your orange cream smoothie unique.

Try different fruit juices to get the orange flavor you want. Swap orange juice with pineapple, mango, or a bit of lemon or lime. For a creamier texture, add Greek yogurt or cottage cheese.

Want a healthier milkshake? Add vanilla protein powder for protein and creaminess. You can also blend in spinach or kale for extra nutrition without changing the taste much.

“The great thing about homemade orange creamsicle milkshakes is that you can truly make them your own. Get creative with the ingredients and find the perfect flavor profile that satisfies your cravings.”

For sweetness, drizzle honey, maple syrup, or brown sugar. If it’s too thick, add a bit of milk or non-dairy milk.

Customizing your creamsicle milkshake or orange cream smoothie is endless. Be your own mixologist and try new flavors to create your ideal homemade orange Julius.

Tips for Getting the Perfect Creamy Texture

Getting the perfect creamy texture for your homemade orange julius milkshake is key. It’s all about capturing that classic, indulgent flavor. Whether you’re a pro or new to the Ninja Creami, mastering the technique takes practice. But don’t worry, we’ve got you covered with our top tips for nailing the ideal consistency every time.

Common Texture Problems and Solutions

Runny or icy milkshake? Grainy or chunky texture? No need to stress – we’ve got solutions for common texture issues. Here are a few troubleshooting tips:

  • If your milkshake is too thin or icy, try adding more frozen fruit or ice cream to thicken it up.
  • For a grainy or chunky texture, make sure to blend the ingredients thoroughly, and consider straining the mixture through a fine-mesh sieve.
  • Struggling to achieve that signature creamy consistency? Increase the amount of milk or cream in your recipe.

Best Ninja Creami Settings for Orange Julius

To get the perfect orange julius milkshake recipe ninja creami texture with your Ninja Creami, the key is finding the right balance of settings. Here are our top recommendations:

  1. Use the “Milkshake” or “Smoothie” setting for the initial blending cycle.
  2. Follow up with the “Ice Cream” setting to achieve a thick, creamy consistency.
  3. For an extra-smooth finish, try pulsing the mixture in short bursts on the “Sorbet” setting.

With a little experimentation and these handy tips, you’ll be whipping up orange julius milkshake recipe ninja creami that taste like they came straight from the drive-thru. But with the satisfaction of making them yourself. Happy blending!

Nutritional Benefits of Homemade Orange Julius

Making your own orange julius at home is a fun and healthy treat. You get to choose the ingredients, enjoying the creamy taste and possible health perks.

Homemade orange julius is packed with vitamin C. Oranges are full of this vitamin, which boosts your immune system, helps with collagen, and fights off free radicals. Your homemade version likely has more vitamin C than store-bought ones.

Milk in the recipe adds calcium, which is great for bones and teeth. Mixing fresh orange juice with milk makes a creamy, calcium-rich drink. It’s a tasty, nutritious choice for your diet.

Store-bought orange julius and milkshakes might have extra sugars, artificial flavors, and preservatives. Making it yourself lets you enjoy the flavor without these unwanted additives. You get a healthier, more wholesome drink.

“Homemade orange julius is not only delicious but can also be a nutritious addition to your day.”

Next time you want orange julius, make it at home. Enjoy the creamy, vitamin-rich drink, knowing it’s a healthier choice for you.

Variations and Alternative Recipes

The classic copycat orange julius recipe is loved by many. But, there are many variations and alternatives for different tastes and needs. You can find dairy-free or sugar-free options to make your own orange julius at home.

Dairy-Free Orange Julius Options

For those who can’t have dairy, there’s a simple fix. Just swap the milk or cream with plant-based alternatives. Try unsweetened almond milk, coconut milk, or oat milk for a creamy, dairy-free version.

Sugar-Free Modifications

Want to cut down on sugar? Use a zero-calorie sweetener like stevia or erythritol instead of sugar. This way, you can enjoy the citrus flavor without the sugar, making it a healthier choice.

“The great thing about homemade orange julius is the ability to customize it to your liking. Get creative and experiment with different ingredients to find your perfect blend!”

These variations are just the start. Feel free to add your own twist to the copycat orange julius. Try new flavor combinations, garnishes, or even add-ins like protein powder or chia seeds. Make it your own and enjoy!

Storage and Make-Ahead Tips

Homemade Orange Julius milkshakes are great because you can make them ahead of time. They’re perfect for when you have leftovers or want to start early. These tips will help you enjoy the creamy, citrusy taste whenever you want.

To store leftover Orange Julius milkshake, put it in an airtight container and freeze it. It will stay fresh and smooth for up to 2 weeks. Just thaw it at room temperature for 15 minutes before serving.

For easy make-ahead, prepare the key ingredients first. Mix orange juice, milk, sugar, and vanilla extract. Pour the mix into ice cube trays and freeze. Then, just add a few frozen cubes to your Ninja Creami for a quick, delicious drink.
FAQ

What is an Orange Julius milkshake?

An Orange Julius milkshake is a creamy, refreshing drink. It mixes fresh orange juice, milk, and vanilla. Its frothy and smooth texture makes it a favorite treat.

How do I make an Orange Julius milkshake at home using a Ninja Creami?

To make an Orange Julius milkshake at home, you need orange juice concentrate, milk, vanilla extract, and sugar or honey. The Ninja Creami helps you achieve the perfect texture by freezing and processing the ingredients.

What are the key ingredients in an Orange Julius milkshake?

The main ingredients for an Orange Julius milkshake are orange juice concentrate, milk, vanilla extract, and sugar or honey. These ingredients combine to create the creamy, frothy, and citrusy flavor.

How do I achieve the perfect consistency when making an Orange Julius milkshake with a Ninja Creami?

To get the perfect consistency, follow the Ninja Creami’s freezing and processing instructions. Use the right settings and techniques to blend until it’s smooth, thick, and creamy.

Can I customize my Orange Julius milkshake recipe?

Yes, you can customize your Orange Julius milkshake. Try using different fruit juices, adding protein powder, or using dairy-free milk. You can make it your own perfect treat.

What are the health benefits of a homemade Orange Julius milkshake?

A homemade Orange Julius milkshake is a nutritious treat. It has vitamin C from the orange juice and calcium from the milk. Making it at home lets you control the ingredients and reduce added sugars for a healthier option.

Can I make Orange Julius milkshakes in advance?

Yes, you can make Orange Julius milkshakes in advance. The Ninja Creami makes it easy to freeze the mixture. Just remember to follow the proper storage and reprocessing instructions for the best results.

Delicious Rice Porridge Recipe: Easy Comfort Food

rice porridge recipe

Winter’s chill brings a perfect time for a warm bowl of rice porridge recipe. This Asian soup is great for when you’re feeling sick or just need comfort. It’s a nourishing, soothing meal that’s easy to make.

rice porridge recipe, or congee, is adaptable to any taste or diet. It’s perfect for those who are gluten-free or dairy-free. With basic ingredients and a bit of time, you can make a delicious, comforting meal. It’s sure to become a favorite in your home.

Key Takeaways

  • rice porridge recipe is a comforting, nourishing dish perfect for chilly weather or when you’re feeling under the weather.
  • The dish is versatile and can be customized to suit various dietary needs, including gluten-free and dairy-free.
  • With just a few simple ingredients and minimal effort, you can create a delicious bowl of rice porridge recipe that’s sure to become a family favorite.
  • rice porridge recipe is a budget-friendly and cost-effective meal option that can be enjoyed for breakfast, lunch, or dinner.
  • The dish’s versatility allows for a wide range of topping and flavor combinations, from savory to sweet.

Understanding Rice Porridge: A Global Comfort Dish

Rice porridge, also known as congeejook, and okayu, is loved worldwide. It’s a simple, nourishing dish with deep roots in many Asian cultures. It’s a favorite breakfast or a soothing meal when you’re not feeling well.

Cultural Variations Around the World

In China, it’s called jūk, and in Japan, okayu. Each region adds its own twist. For example, Filipino lugaw is flavored with garlic and ginger. Japanese zosui has a dashi stock base with bonito.

In India, khichdi is a rice and lentil dish that dates back to Ayurvedic medicine. It’s a comfort food loved by many.

Traditional Names and Origins

rice porridge recipe is loved globally for its nourishing qualities. In China, it’s called congee and is often served with youtiao, a fried breadstick. In Korea, jook is a common breakfast food.

In Japan, okayu is a dish that can be customized with various toppings. It’s a favorite in many cultures.

Health Benefits and Nutritional Value

Rice porridge recipe is not only comforting but also nutritious. It’s easy to digest, making it great for sensitive stomachs. A serving of rice porridge recipe has about 209 calories.

It has 39g of carbohydrates, 4g of protein, and 4g of fat. This provides a balanced source of energy and sustenance.

DishRegionKey IngredientsToppings
CongeeChinaWhite rice, waterSoy sauce, sesame oil
JookKoreaShort-grain rice, waterScallions, pickled radish
OkayuJapanShort-grain rice, dashi stockMushrooms, mirin, soy sauce
LugawPhilippinesRice, chicken or pork, gingerFried garlic, scallions, chicharrón
KhichdiIndiaRice, lentils, spicesGhee, yogurt, pickles

Whether you’re craving the comforting flavors of congee, the nourishing warmth of jook, or the customizable delight of okayu, rice porridge recipe is a beloved dish. It transcends cultural boundaries and offers a soothing experience for the senses.

Essential Ingredients for Perfect Rice Porridge

Making a delicious rice porridge recipe is all about the right ingredients. You need high-quality rice, tasty broth, and the right seasonings.

Jasmine rice and short-grain sushi rice are best for porridge. They make the porridge creamy and rich. The water-to-riceratio is key for the perfect texture, usually between 1:4 and 1:9.

Using a good broth adds flavor to your porridge. Bone broth makes it creamy and savory. You can also use vegetable or chicken broth for different tastes.

Seasonings like salt, ginger, and garlic enhance the flavors. Soy sauce or white pepper can add a special touch.

With the right ingredients, you can make a comforting rice porridge recipe. It will warm your heart and please your taste buds.

IngredientQuantity
Jasmine rice or short-grain sushi rice1/2 cup
Water or broth4 1/2 cups
Chicken bouillon powder1 teaspoon
Ginger, sliced1 slice

“The quality of ingredients is crucial in this simple dish to make each component count.”

Choosing the Right Rice for Your Porridge

Choosing the right rice is key to a delicious porridge. Jasmine rice is often top choice because it’s lower in carbs and calories than white rice. But, there are other great options to try.

Best Rice Varieties for Porridge Making

  • Jasmine Rice: Known for its fragrant smell and soft, sticky texture, it’s perfect for porridge.
  • Sushi Rice: This short-grain rice is high in starch, making it creamy and porridge-like.
  • Sticky Rice: Used in Southeast Asian dishes, it’s a treat for a rich, comforting porridge.

Rice-to-Water Ratio Guidelines

The usual ratio for porridge is 1:7 rice to water. But, you can adjust it for your liking. For a thicker porridge, use 1:6. For a thinner one, try 1:8.

Pre-cooking Rice Preparation Tips

Rinsing the rice until the water is clear is crucial. It removes excess starch for a better taste. Soaking the rice for 30 minutes to an hour before cooking also helps make it creamier.

Rice VarietyCharacteristicsRecommended Use
Jasmine RiceFragrant, soft, and stickyIdeal for porridge, rice dishes, and stir-fries
Sushi RiceShort-grain, high starch contentExcellent for making sushi and rice porridge
Sticky RiceGlutinous, chewy texturePerfect for traditional Southeast Asian dishes, including porridge

Basic Rice Porridge Recipe: Step-by-Step Guide

Make a comforting rice porridge recipe at home with this easy guide. It’s perfect for a soothing breakfast or a restorative meal. This recipe is a great base for many toppings and flavors.

First, get your ingredients ready: cooked rice, water, and simple aromatics like garlic, onion, and carrot. You can also add shredded chicken for extra protein.

  1. Blend cooked rice with water in a blender until smooth.
  2. Sauté garlic, onion, and carrot in sesame oil until soft, about 5 minutes.
  3. Add the rice mixture and chicken (if using) to the pan.
  4. Boil, then simmer for 30 minutes, stirring occasionally, until thick.

This recipe takes about 30 minutes to cook, especially with leftover rice. Adjust the rice-to-water ratio for your preferred consistency.

Now, get creative with toppings! Try savory options like pickled vegetables or sweet ones like fresh fruit. Find your favorite flavor combination to make this porridge your own.

“A bowl of hot, comforting rice porridge recipe is the ultimate in simple pleasures. It nourishes the body and soul, providing a canvas for endless flavor possibilities.”

Savory and Sweet Topping Combinations

rice porridge recipe, also known as congee or jook, is a versatile dish. You can add many savory or sweet toppings. These toppings make your porridge taste better, feel different, and look great.

Asian-Inspired Garnishes

  • Soy sauce or tamari for a savory umami boost
  • Chopped green onions or cilantro for a fresh, herbaceous note
  • Drizzle of sesame oil for a nutty aroma
  • Spicy Sriracha or garlicky chili oil for a kick of heat
  • Pickled or fermented vegetables like kimchi or preserved radish

Western Topping Options

  1. Poached or soft-boiled eggs for a luxurious, creamy texture
  2. Crispy bacon or sausage for a savory, protein-packed addition
  3. Grated cheddar or crumbled feta cheese for a creamy, tangy flavor
  4. Chopped nuts like almonds or walnuts for crunch
  5. Dollop of yogurt or sour cream for a cool, refreshing contrast

Seasonal Ingredient Suggestions

To keep your porridge toppings fresh and seasonal, use ingredients that are in season:

SeasonSuggested Toppings
SpringAsparagus, peas, spring onions, soft-boiled eggs
SummerTomatoes, corn, avocado, fresh herbs
FallRoasted pumpkin, apples, cinnamon, maple syrup
WinterRoasted root vegetables, braised greens, toasted nuts

The options for savory porridge and sweet porridge toppings are endless. You can make your rice porridge just how you like it, with what’s in season.

Cooking Methods and Techniques

Rice porridge, also known as congee, can be made in different ways. You can use the traditional stovetop method or modern appliances. Each method has its own benefits.

Stovetop Cooking

The classic stovetop method lets you watch the porridge as it cooks. Just mix rice and water in a pot. Let it simmer for 45 to 60 minutes, stirring often, until it’s creamy.

Instant Pot or Pressure Cooker

For faster cooking, try an Instant Pot or pressure cooker. They use pressure to cook the porridge quickly. Cook it for about 4 whistles, or 20 minutes, for the right texture.

Cooking MethodCooking TimeRice-to-Water Ratio
Stovetop45-60 minutes1:6 to 1:8
Instant Pot/Pressure Cooker20 minutes (4 whistles)1:6 to 1:8

Choose your cooking method and adjust the rice-to-water ratio for the perfect porridge. With practice, you’ll make delicious rice porridge every time.

“The perfect rice porridge should have a velvety, luscious texture that envelops your spoon, not a thin, watery consistency.”

Tips for Achieving the Perfect Consistency

Getting the perfect porridge consistency is an art. It takes practice, but with a few tips, you can get it right. The perfect porridge is up to you, so adjust it by adding more liquid if it’s too thick or simmering it longer if it’s too thin.

Troubleshooting Common Issues

If your porridge is too thick, add more water or broth a little at a time. Stir well until it’s just right. If it’s too thin, simmer it a bit longer. Stir often to thicken the porridge.

Remember, porridge thickens as it cools. So, think about this when you serve it. The goal is to find the perfect balance between rice and liquid for your porridge consistency.

Storage and Reheating Guidelines

Leftover rice porridge recipe can be stored in the fridge for up to 5 days. When reheating, add a bit of water or broth to get the right consistency. You can reheat it on the stovetop or in the microwave, stirring often until it’s hot.

By following these tips, you’ll easily reheat rice porridge. Enjoy a creamy, comforting dish every time.

Variations and Alternative Rice Porridge Recipes

The basic rice porridge recipe is comforting, but you can make it your own. Try adding milk, sugar, and spices like cinnamon or vanilla for a sweeter version. This turns it into a creamy rice pudding.

For a healthier option, use brown jasmine rice. It has a nuttier taste and more fiber. Adding spinach or mushrooms can also increase the nutritional value. For a savory dish, try using shrimp or tofu instead of chicken.

Rice porridge is very versatile. You can make it your own, whether for breakfast, lunch, or dinner. It’s a dish that can be enjoyed at any time, making it perfect for any meal.

FAQ

What is rice porridge and how is it different from other rice dishes?

Rice porridge, also known as congee, jook, or okayu, is a savory dish. It’s made by simmering rice in water or broth until it’s thick. Unlike other rice dishes, it’s creamy and can be eaten at any time of day.

What are the health benefits of rice porridge?

Rice porridge is easy on the stomach and can help when you’re feeling sick. It’s a good source of energy. Plus, it’s great for those who need gluten-free or dairy-free options.

What are the best types of rice for making porridge?

Jasmine, sushi, and sweet sticky rice are top picks for porridge. They have fewer carbs and calories than white rice. The right ratio of rice to water is 1:7, but you can adjust it for your liking.

How do you make rice porridge from scratch?

Start by blending cooked rice with water or broth. Then, sauté garlic, onion, and carrot in sesame oil. Add the rice mixture and any protein, like chicken, to the pan.

Bring to a boil, then reduce heat and simmer. It usually takes about 30 minutes, especially with leftover rice.

Soy sauce, tamari, and chopped green onions are favorite toppings. You can also add cilantro, sesame oil, and poached eggs. For sweetness, try fruits or honey.

Some like to add Sriracha or kimchi for a kick. Feel free to mix in different proteins, veggies, and seasonal ingredients.

How do you store and reheat leftover rice porridge?

Store leftover porridge in the fridge for up to 5 days. When reheating, add a bit of water or broth. You can reheat it on the stovetop or in the microwave.

Can rice porridge be adapted to different dietary needs?

Yes, rice porridge is very adaptable. You can make it gluten-free and dairy-free by choosing the right ingredients. Experiment with different rice types, proteins, and toppings to meet your dietary needs.