cooking beef short ribs recipe seasoned with oxtail seasoning

cooking beef short ribs recipe seasoned with oxtail seasoning

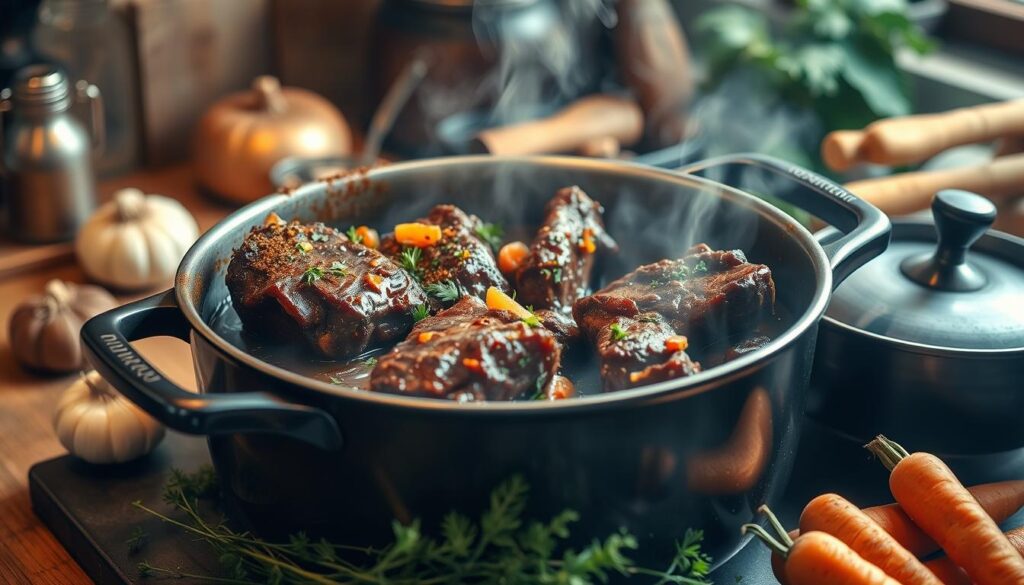
I love cooking beef short ribs because of their rich flavors. The smell of slow-cooked meat with spices reminds me of my grandma’s kitchen. Her short ribs were tender and full of flavor, a true culinary delight.

In this guide, I’ll share how to make delicious cooking beef short ribs recipe seasoned with oxtail seasoning. It’s perfect for both experienced cooks and beginners. You’ll learn how to make braised short ribs and use oxtail spice blend. Your family and friends will love it so much, they’ll ask for more.

Key Takeaways

  • Discover the different cuts and quality grades of beef short ribs to ensure the perfect selection
  • Understand the unique flavor profile of oxtail seasoning and how to incorporate it into your cooking
  • Equip your kitchen with the essential tools and equipment for preparing tender, flavorful short ribs
  • Learn the step-by-step process for trimming, seasoning, and cooking short ribs using various techniques
  • Explore the nuances of braising vs. smoking to achieve your desired texture and flavor

Understanding Beef Short Ribs: Cuts and Quality Selection

When you’re cooking beef short ribs, knowing the cuts and quality is key. These ribs are tasty and can be cooked many ways, like in a slow cooker or on the barbecue. Let’s look at how to pick the best beef rib rub for your dish.

English-Cut vs. Flanken-Style Short Ribs

First, you need to decide on the short ribs cut. You can choose between English-cut and Flanken-style. English-cut ribs are thicker, with the bone along the meat. Flanken-style ribs are thinner, with the bone across the meat. Pick the cut that fits your slow cooker beef ribs or barbecue beef ribs recipe best.

Choosing Prime vs. Choice Grade

Next, think about the beef grade. Prime-grade ribs have more marbling, making them richer and more tender. Choice-grade ribs are also good, offering quality at a lower price. Your choice depends on your budget and taste.

Marbling and Thickness Considerations

Finally, consider the marbling and thickness of the ribs. More marbling means more flavor and juiciness. Thicker ribs take longer to cook but are meatier. Finding the right balance will make your beef rib rub stand out, whether you’re using a slow cooker or the barbecue.

beef short ribs

“The key to great short ribs is selecting the right cut and quality, which will set the stage for a mouthwatering dish.”

The Magic of Oxtail Seasoning: Flavor Profile and Ingredients

When you want to make your beef short ribs taste amazing, use jamaican oxtail seasoning. This special seasoning boosts the meat’s natural flavors. It also works well with different cooking ways, like braising or smoking.

The core of oxtail seasoning is a mix of earthy and aromatic spices. It usually has:

  • Allspice, which adds a warm, slightly peppery taste
  • Thyme, bringing a herbaceous depth
  • Garlic, for a strong, savory flavor
  • Onion, adding a hint of sweetness
  • Paprika, for a smoky richness
  • Black pepper, to add a subtle heat

While you can buy oxtail spice blends, making your own beef rib rub is better. You can adjust the flavors to match your taste and the beef short ribs you’re using.

“The secret to juicy, tender short ribs lies in the perfect seasoning blend. Oxtail seasoning is the key to unlocking their full flavor potential.”

Adding jamaican oxtail seasoning to your short ribs makes a big difference. Its complex yet balanced taste will take your dish to the next level. Every bite will be a joy for your taste buds.

oxtail seasoning

Essential Kitchen Tools and Equipment for Perfect Short Ribs

Preparing delicious slow cooker beef ribs or braised meat recipes needs the right tools. From the cooking pot to the temperature control, each tool is key. They help make your short ribs tender, flavorful, and perfectly cooked.

For the best results, use a heavy-duty Dutch oven or a slow cooker. These pots keep heat and moisture in. This is important for braising tough beef short ribs until they’re tender.

  • Dutch oven: A sturdy, enameled cast-iron pot that can withstand high temperatures and distribute heat evenly.
  • Slow cooker: An electric appliance that simmers the meat at a low temperature for hours, resulting in incredibly tender and juicy short ribs.

Temperature Control Tools

Keeping the right temperature is key when cooking slow cooker beef ribs or braised meat. Get a reliable meat thermometer. It ensures your short ribs reach the perfect internal temperature for tenderness.

  1. Instant-read thermometer: Allows you to quickly check the temperature of the meat without losing too much heat from the oven or slow cooker.
  2. Oven-safe probe thermometer: Can be left in the meat during the cooking process, providing constant temperature monitoring.

Preparation Equipment

To trim and season your short ribs right, you’ll need these tools:

  • Sharp boning knife: Allows you to trim away any excess fat and silver skin from the short ribs.
  • Cutting board: Provides a stable surface for trimming and seasoning the meat.
  • Mixing bowls: Useful for combining the oxtail seasoning or any other dry rubs or marinades.

With the right tools, you’ll make tender, flavorful slow cooker beef ribs or braised meat. Your family and friends will love them.

slow cooker beef ribs

Cooking Beef Short Ribs Recipe Seasoned with Oxtail Seasoning

Try this amazing recipe for beef short ribs seasoned with oxtail seasoning. It works for braising, barbecuing, or slow cooking. You’ll get tender and tasty ribs every time.

First, trim the short ribs well to remove fat and silverskin. This makes them cook evenly and look better. Then, season the ribs with your homemade oxtail seasoning blend. Make sure to coat all sides.

  1. Preheat your oven, grill, or slow cooker to the right temperature for your cooking method.
  2. If braising, sear the seasoned ribs in a hot pan or Dutch oven until they get a nice crust on all sides.
  3. For barbecuing, put the ribs on a preheated grill. Rotate them often to get even browning.
  4. For slow cooking, just put the seasoned ribs in your slow cooker with your favorite braising liquid.

No matter how you cook, keep an eye on the ribs’ internal temperature. Braised short ribs should be 200-205°F. Barbecue beef ribs are best at 195-200°F.

“The secret to mouthwatering short ribs is in the seasoning and the cooking technique. This recipe delivers on both fronts for truly exceptional results.”

When your cooking beef short ribs recipe seasoned with oxtail seasoning is done, let the ribs rest for 10-15 minutes. This step makes sure the juices spread evenly. You’ll get a tender and flavorful bite every time.

Cooking beef short ribs

Preparation Techniques: Trimming and Seasoning

Take your beef short rib game to the next level by learning how to trim and season right. Use a beef rib rub, an oxtail spice blend, or a classic Jamaican oxtail seasoning. The secret to amazing flavor is in how you prepare.

Proper Trimming Methods

First, check your beef short ribs. Cut off any extra fat and silver skin for even cooking and a nice sear. Use a sharp knife to remove the tough membrane on the bone side. Be careful not to throw away any of the tender meat.

Seasoning Application Tips

  • Coat the ribs well with your beef rib rub or oxtail spice blend. Make sure to cover all sides evenly.
  • For a true Jamaican oxtail seasoning taste, add warm spices like allspice, thyme, and scotch bonnet peppers.
  • Let the seasoned ribs sit at room temperature for 30 minutes before cooking. This lets the flavors mix well.

By using these prep methods, you’ll get tender, flavorful beef short ribs. Your guests will love them. Start cooking with these essential tips on trimming and seasoning.

Braising vs. Smoking: Choosing Your Cooking Method

When it comes to making delicious beef short ribs, you have two main choices: braising and smoking. Each method changes the meat’s texture and taste in different ways. Knowing the differences helps you pick the best method for your dish.

Braising short ribs is a traditional method. It involves searing the meat and then cooking it slowly in a flavorful liquid, like beef broth or red wine. This makes the ribs tender and full of flavor. The cooking liquid, or “braising sauce,” is also delicious.

Smoking beef ribs gives them a smoky taste and a tender texture. This method cooks the ribs over low heat and wood smoke for hours. It creates a unique, barbecue-style dish that’s great on its own or with sauce.

Think about what you want your ribs to taste and feel like. Braising is perfect for a rich, tender texture and intense beef flavor. Smoking is ideal for a smoky, barbecue-style rib with a juicy bite.

In the end, whether to choose braised short ribs or smoked beef ribs depends on your taste and the dining experience you want. Try both methods to see which one you like best and what your guests will enjoy.

“The key to delicious slow cooker beef ribs lies in the cooking method you choose – each one offers a unique set of flavors and textures to explore.”

Temperature and Timing Guidelines for Tender Results

To get the perfect texture and tenderness in your beef short ribs, you need to know the best internal temperatures and cooking times. Whether you’re braising, smoking, or slow-cooking, following these guidelines is key.

Internal Temperature Targets

For tender beef short ribs, aim for an internal temperature of 200-205°F. This ensures the meat is tender and falls off the bone. Keep an eye on the temperature as it rises slightly after removing from heat.

Cooking Duration by Method

  1. Braising: Cook the seasoned beef short ribs for 2-3 hours until they’re fork-tender and shred easily.
  2. Smoking: Smoking beef ribs takes 4-6 hours, depending on the ribs’ thickness and smoke flavor desired.
  3. Slow Cooking: In a slow cooker or oven, cooking the ribs for 6-8 hours will get them tender and ready.

The exact cooking time can change based on rib size, whether they’re bone-in or boneless, and your desired tenderness. Adjust the times as needed and use a meat thermometer for the best results.

Creating the Perfect Braising Liquid

Making the perfect braising liquid is crucial for delicious braised short ribs or other braised meat recipes. It’s all about mixing the right liquids, aromatics, and seasonings. This creates a rich, savory sauce that goes well with the oxtail spice blend on your beef.

Begin with a flavorful base like beef or chicken stock. This gives your braising liquid a strong start. Add a bit of red wine or balsamic vinegar for depth and complexity. Onions, garlic, and herbs can also boost the flavor.

To finish the braising liquid, include these important elements:

  • Tomato paste or crushed tomatoes for richness and a bit of acidity
  • Worcestershire sauce or soy sauce for a savory umami taste
  • Brown sugar or honey to balance the flavors
  • Your special oxtail spice blend to bring everything together

Remember to taste and adjust the seasoning as you go. This ensures the braising liquid complements the bold taste of your braised short ribs. With a bit of practice, you’ll get great at making the perfect braising liquid for your dishes.

Resting and Serving Your Short Ribs

After cooking, whether braising or smoking, it’s key to let the meat rest. This step is vital for keeping your short ribs juicy and tender.

Proper Resting Techniques

Move the short ribs to a cutting board or clean surface once they’re done. Cover them loosely with foil or a towel. This keeps the meat warm and lets juices spread evenly.

Let the ribs rest for 10 to 15 minutes, depending on their size. This time helps the meat relax and juices settle, making it more flavorful and tender.

Presentation Tips

When serving your short ribs, consider these presentation ideas:

  • Place the ribs on a large platter or cutting board, making sure they look neat.
  • Add fresh herbs like rosemary or thyme for color and scent.
  • Drizzle braising liquid or homemade barbecue sauce for extra flavor and moisture.
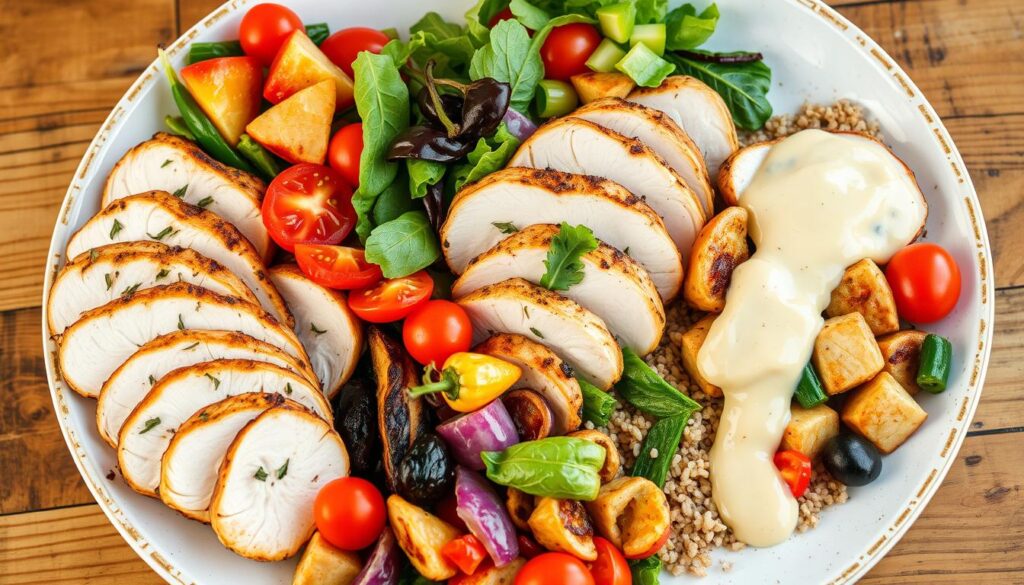
  • Pair the ribs with side dishes like mashed potatoes or roasted veggies for a balanced meal.

By following these tips, you’ll enjoy your cooking beef short ribs recipe seasoned with oxtail seasoning or barbecue beef ribs to the fullest.

Wine Pairing and Side Dish Recommendations

Enjoying oxtail-seasoned braised, smoked, or barbecue beef short ribs is even better with the right wine and side dishes. Choose a bold, full-bodied red wine to match the rich flavors of your short ribs. A Cabernet Sauvignon or Malbec is perfect, with their tannins and fruity notes balancing the meat’s richness.

For side dishes, pick items that complement the short ribs’ seasoning and cooking method. Braised short ribs go well with creamy mashed potatoes or a hearty root vegetable medley. Smoked beef ribs pair nicely with tangy coleslaw or roasted Brussels sprouts. Barbecue beef ribs are great with classic baked beans or a fresh, vinegar-based slaw.

Creating a harmonious meal means choosing flavors and textures that enhance the experience. By carefully picking your wine and side dishes, your oxtail-seasoned beef short ribs will be a hit in every bite.

FAQ

What is the difference between English-cut and Flanken-style short ribs?

English-cut short ribs are cut across the bone, making thick, individual pieces. Flanken-style ribs are cut parallel to the bone, making them thinner and strip-like.

How do I choose the best quality beef short ribs?

Look for Prime or Choice grade ribs for more marbling and flavor. Thicker ribs might need longer cooking times.

What is the flavor profile of oxtail seasoning, and how does it complement beef short ribs?

Oxtail seasoning has warm spices like garlic and onion, and herbs like thyme. It enhances the beefiness of short ribs, adding depth to the flavor.

What kitchen tools and equipment are essential for cooking perfect beef short ribs?

You’ll need a Dutch oven or slow cooker, a meat thermometer, and tools for trimming and seasoning. A sharp knife and spice grinder are helpful.

How do I properly trim and season beef short ribs with oxtail seasoning?

Trim excess fat and silver skin first. Then, coat the ribs evenly with oxtail seasoning. Let them rest for 30 minutes before cooking.

Should I braise or smoke my oxtail-seasoned beef short ribs?

Braising makes the meat tender, while smoking adds a smoky flavor. Choose based on your preference and desired texture.

What are the optimal internal temperature and cooking times for tender beef short ribs?

Aim for an internal temperature of 200-205°F. Braising takes 2-3 hours, while smoking or slow-cooking can take 4-6 hours.

How do I create the perfect braising liquid for oxtail-seasoned short ribs?

Use beef or chicken stock as a base. Add onions, garlic, and herbs, along with wine or tomatoes, and a bit of sweetness from brown sugar or honey.

How should I rest and serve my oxtail-seasoned beef short ribs?

Let the ribs rest for 10-15 minutes after cooking. This makes them tender and juicy. Serve with braising liquid and garnish with fresh herbs or oxtail seasoning.

What wine pairings and side dishes complement oxtail-seasoned beef short ribs?

Full-bodied red wines like Cabernet Sauvignon pair well with the ribs. Side dishes like creamy mashed potatoes or roasted vegetables balance the meat’s richness.

Fluffy Egg White Burger Buns Recipe – Low-Calorie, High-Protein Delight

egg white burger buns recipe

In today’s world, health and nutrition are key. Finding tasty, guilt-free foods can seem hard. But, there’s a solution: Fluffy egg white burger buns recipe. They’re not only delicious but also good for your waistline.

Key Takeaways

  • Egg white burger buns are a healthier alternative to traditional burger buns, offering a low-calorie and high-protein option.
  • These buns are versatile and can be used in a variety of diets, from low-carb to high-protein.
  • The recipe is easy to follow and the baking process is straightforward, making it accessible to home cooks of all skill levels.
  • Egg white buns provide a light and fluffy texture that can enhance the overall burger experience.
  • By incorporating this recipe into your meal planning, you can enjoy the taste of a classic burger without the guilt.

Understanding the Magic Behind Egg White Burger Buns

Egg whites are the unsung heroes in baking. They play a key role in making the perfect egg white bread. The science behind using egg whites in bread is fascinating. It shows how to get a fluffy and protein-rich burger bun.

The Science of Protein-Rich Baking

Egg whites are packed with high-quality protein. Their unique properties are crucial for the bread’s structure and texture. When baked, the proteins in egg whites form a web. This web traps air bubbles, making the bread soft and airy.

Benefits of Using Egg Whites in Bread

  • Improved texture and rise: The protein-rich egg whites help the dough rise higher and maintain a light, fluffy texture.
  • Reduced fat and calories: Egg whites are low in fat and calories, making them a healthier alternative to traditional burger buns.
  • Enhanced nutritional profile: Egg whites are a excellent source of protein, providing essential amino acids for a balanced diet.

Nutritional Advantages

Egg white bread is a nutritional powerhouse compared to traditional burger buns. It’s high in protein and low in fat. This makes egg white bread a more nutritious and satisfying choice for a healthy lifestyle.

“Egg whites are a versatile and nutritious ingredient that can transform your burger buns into a delightful, high-protein treat.”

egg white bread

Essential Ingredients for Perfect Egg White Burger Buns Recipe

Making tasty egg white burger buns recipe needs the right ingredients. Whether you want a traditional recipe or gluten-free burger buns, knowing the key ingredients is key. This ensures your buns are fluffy and full of protein.

The egg whites are at the center of this recipe. They add protein and make the buns light and airy. Mix the egg whites with gluten-free flours like almond or coconut flour. This creates a bun that’s both sturdy and soft.

  • Egg whites: The star ingredient, providing structure and protein.
  • Gluten-free flours: A mix of almond, coconut, or a gluten-free blend.
  • Baking powder: For buns that rise to fluffy heights.
  • Salt: Adds flavor.
  • Sweetener (optional): Honey or maple syrup for a hint of sweetness.
  • Milk or milk alternative: Binds the ingredients for a soft texture.

By mixing these key ingredients, you can make egg white burger buns that are healthy and delicious. Try different flours and sweeteners to find your favorite gluten-free burger buns recipe.

“The secret to amazing egg white burger buns is the right mix of protein and gluten-free flours.”

egg white burger buns recipe

Kitchen Equipment You’ll Need for Success

Creating tasty baked goods with egg whites needs the right tools. Whether you’re an experienced baker or new to it, having the right kitchen gear is key. It helps make fluffy and protein-rich burger buns. Let’s look at the essential tools and some extra equipment that will help you succeed in baking with egg whites.

Must-Have Tools

  • Stand mixer or hand mixer: A strong mixer is vital for whipping egg whites to the right volume and texture.
  • Mixing bowls: You’ll need bowls of different sizes for separating eggs, mixing, and kneading the dough.
  • Measuring cups and spoons: Accurate measurements are crucial for consistent results when baking with egg whites.
  • Parchment paper or silicone baking mats: These prevent your burger buns from sticking to the baking sheet.
  • Baking sheet or sheet pan: A solid baking sheet is key for shaping and baking the burger buns.

Optional but Helpful Equipment

While not essential, these extra tools can enhance your egg white recipes experience:

  1. Dough scraper or bench knife: This tool aids in dividing and shaping the dough.
  2. Egg separator: This gadget makes separating egg whites from yolks easy.
  3. Pastry brush: Use it to brush the baked burger buns with egg wash or melted butter for a shiny finish.
  4. Oven thermometer: It ensures your oven temperature is correct for perfect baking results.

Preparation Setup Tips

Before mixing and kneading, prepare your workspace for efficient baking with egg whites. Clear a clean, flat surface for kneading and shaping the dough. Have all your ingredients and tools within easy reach. This setup helps you follow the recipe smoothly and avoid interruptions during baking.

Baking Ingredients and Equipment

Step-by-Step Mixing and Preparation Process

Making the perfect egg white burger buns recipe needs a careful and detailed approach. Let’s go through the steps to make your homemade egg white bread fluffy, tasty, and perfect for your burgers.

  1. Start by separating the egg whites from the yolks. Make sure the whites are at room temperature for the best texture.
  2. In a big mixing bowl, mix the egg whites, sugar, and a bit of salt. Use a hand mixer or a stand mixer with the whisk to whip until stiff peaks form.
  3. Slowly add the all-purpose flour, one spoon at a time, while gently folding. This keeps the egg whites from deflating. The dough should be smooth and a bit sticky.
  4. Lightly grease a clean surface and put the dough on it. Gently knead the dough for a minute or two until it forms a ball.

It’s important to handle the dough gently. Overworking can make the egg white burger buns dense and tough. Follow these steps to make a healthy, protein-rich base for your next burger.

egg white burger buns recipe

“The secret to fluffy, light egg white bread lies in the careful handling of the dough and the perfect balance of ingredients.”

Proper Kneading and Shaping Techniques

To get the perfect texture and size for your egg white burger buns recipe, focus on kneading and shaping. These steps are crucial for making soft, fluffy buns. They will make your burgers even better.

Achieving the Perfect Texture

For a light and airy texture, knead the dough right. Start with gentle work, then get more intense. This builds the gluten, trapping air for a soft bun. Knead for 5-7 minutes until it’s smooth and elastic.

Troubleshooting Common Shaping Issues

Shaping dough into uniform buns can be tricky. Here are some tips for common problems:

  • Lightly flour your work surface and hands to prevent the dough from sticking.
  • Use a rolling pin to gently roll the dough out to an even thickness before shaping.
  • Divide the dough into equal portions using a kitchen scale for precise sizing.

Tips for Uniform Sizing

Even-sized buns look better and bake evenly. Use a burger bun mold or a biscuit cutter for uniform sizes. Shape each portion into a smooth, round bun. Be gentle to keep the texture right.

“The secret to perfectly shaped burger buns lies in the patience and precision of the shaping process.”

Baking Times and Temperature Guidelines

To make the perfect egg white burger buns, pay close attention to baking times and temperatures. This will help your buns come out fluffy, golden, and tasty. Just follow these simple guidelines:

First, preheat your oven to 375°F (190°C). This temperature is just right. It lets the buns rise and get a nice crust without burning.

  1. Bake the egg white burger buns for 18-22 minutes, or until they’re golden-brown on top.
  2. Rotate the baking sheet halfway through the baking time to ensure even cooking.
  3. Use a digital thermometer to check the internal temperature of the buns. They’re done when the center reaches 205°F (96°C).

Tip: For a perfectly even bake, divide the dough into equal portions before shaping and baking.

“The key to fluffy, bakery-style burger buns is getting the temperature and timing just right. Follow these guidelines, and your egg white burger buns will be a hit!”

Remember, your oven might be different, so baking times can vary. Watch the buns closely in the last few minutes to avoid overbrowning. With a bit of practice, you’ll make buns that everyone will love.

Storage and Freezing Methods for Your Healthy Burger Buns

Keeping your homemade, healthy burger buns fresh is key. You can enjoy them right away or save them for later. The right storage and freezing methods are crucial. Let’s look at how to keep your diet-friendly buns in great shape.

Short-Term Storage Solutions

For the first few days, store your healthy burger buns at room temperature. Use a paper bag or a bread box to keep them soft. Don’t seal them in plastic bags, as this can cause them to spoil faster.

Long-Term Freezing Tips

To enjoy your diet-friendly buns for longer, freeze them. Cool the buns down first, then wrap them in plastic wrap or put them in a freezer bag. This keeps them fresh. To thaw, let them sit at room temperature or in the fridge.

Reheating Instructions

To make your frozen healthy burger buns soft again, follow these steps:

  1. Preheat your oven to 350°F (175°C).
  2. Put the buns on a baking sheet and heat for 5-7 minutes. They should be warm and a bit crispy.
  3. You can also reheat them in a toaster oven or a skillet over medium heat for 2-3 minutes on each side.

By using these storage and freezing tips, you can enjoy your homemade diet-friendly buns for days or weeks. They’ll still taste and feel great.

Creative Variations and Flavor Enhancements

Make your egg white burger buns even better with creative twists and flavors. Try new things to keep your low-carb burgers exciting and tasty.

Herbal Infusions

Add fresh herbs like garlic, rosemary, thyme, or Italian seasoning to your egg white buns. These herbs will enhance the taste of your burger toppings.

Spicy Sensations

For a spicy kick, add cayenne pepper, smoked paprika, or crushed red pepper flakes. These spices will make your low-carb burger buns perfect for bold burgers.

Cheesy Goodness

Put shredded cheddar, parmesan, or feta cheese in the egg white batter before baking. This will make your egg white recipes even more delicious with gooey cheese.

Nutty Crunch

Adding chopped nuts like almonds, pecans, or walnuts will give your buns a nice crunch. This adds a tasty and different texture to your egg white burger buns.

“Creativity is the key to unlocking endless possibilities in the kitchen. Let your imagination soar and transform your egg white burger buns into culinary masterpieces.”

With these ideas, you can make your egg white burger buns your own. Try different things and enjoy the tasty results!

Conclusion

The egg white burger buns recipe you’ve found today is a tasty and healthy choice. It uses protein-rich egg whites to make a light, low-calorie bun. This bun is perfect for your favorite burgers, keeping the taste and texture just right.

If you’re watching your diet, want more protein, or need a healthy bun option, this recipe is for you. Egg whites in bread-making bring many benefits. They improve the bun’s texture and boost its nutritional value.

We suggest you try out this egg white burger buns recipe and see what you can do with it. Add your favorite flavors and ingredients to make it your own. This protein-rich buns can be a key part of your healthy cooking. Enjoy making and eating these diet-friendly buns with your favorite burgers.

FAQ

What makes egg white burger buns a healthier alternative?

Egg white burger buns are low in calories and high in protein. They use egg whites instead of whole eggs or flour. This makes them a good choice for those watching their carbs and fats.

How do egg whites contribute to the texture and structure of the buns?

Egg whites are full of protein, which makes the buns light and fluffy. When baked, the proteins in the egg whites create a soft, airy texture.

What are the key ingredients needed to make egg white burger buns?

To make egg white burger buns, you need egg whites, almond flour, baking powder, salt, and herbs or seasonings. The exact amounts are in the recipe.

What kitchen equipment is required to make egg white burger buns?

You’ll need a bowl, a mixer, a baking sheet, and a spatula to make egg white burger buns. A food processor and digital scale are optional but helpful.

How do I properly knead and shape the egg white burger bun dough?

Knead the dough gently to get the right texture. Don’t overwork it to avoid a dense bun. Shape the dough into round, uniform buns for a professional look.

What baking temperature and time should I use for egg white burger buns?

Bake the buns at 375°F (190°C) for 12-15 minutes. They should be lightly golden and firm. Keep an eye on them to adjust the time as needed.

How can I store and reheat my egg white burger buns?

Store the buns in an airtight container at room temperature for up to 3 days. Freeze them for up to 2 months. Reheat frozen buns in a 350°F (175°C) oven for 5-7 minutes.

Can I customize the flavor of my egg white burger buns?

Yes! You can add herbs, spices, or other flavors to the basic recipe. Try dried herbs, grated cheese, or garlic powder for unique flavors.

Powerful Ginger Shot Recipe – 3 Steps to Boost Energy and Immunity

ginger shot recipe

When the sun rises, I look for a natural energy boost to start my day. I don’t choose sugary drinks or artificial stimulants. Instead, I make a ginger shot, a simple yet powerful remedy.

Ginger is a superfood with many health benefits. It fights inflammation and boosts the immune system. Adding a daily ginger shot recipe to your routine can give you more energy and resilience.

Key Takeaways

  • Ginger shots offer a natural energy boost and immune system support.
  • The recipe is simple, requiring just three steps to create a powerful wellness drink.
  • Ginger’s anti-inflammatory and digestive health benefits make it a versatile addition to your diet.
  • Customizable flavor options allow you to tailor the ginger shot to your personal taste preferences.
  • Proper storage and preparation techniques ensure the freshness and potency of your homemade ginger shots.

Understanding the Health Benefits of Ginger Shots

Ginger is a root known for its unique taste and health perks. Ginger wellness shots pack a strong punch of ginger’s benefits. They’re a favorite for those looking to boost their health.

Anti-inflammatory Properties

Ginger is famous for its anti-inflammatory powers. It has compounds like gingerol and shogaol that fight inflammation. Drinking ginger wellness shots can ease joint pain, muscle soreness, and headaches.

Immune System Support

Ginger is great for your immune system too. It’s full of antioxidants and compounds that boost white blood cells. Adding anti-inflammatory ginger drink to your diet can strengthen your immune system.

Digestive Health Enhancement

Natural ginger remedy also helps your digestion. It aids in making digestive enzymes and soothes your stomach. Ginger shots can help with nausea, bloating, and indigestion.

Adding ginger wellness shots to your day can bring many health benefits. They help with inflammation, boost your immune system, and improve digestion. Ginger shots are a natural and easy way to support your health.

ginger wellness shots

Essential Ingredients for Your Perfect Ginger Shot Recipe

Making the perfect ginger juice recipe or fresh ginger shots starts with choosing the right ingredients. Each part plays a key role in making your drink both tasty and healthy.

Here’s what you need for your own ginger shot:

  • Fresh Ginger Root – This is the main ingredient, giving your shots their unique taste and health benefits.
  • Citrus Fruits – Lemon, lime, or orange juice add a nice tang that balances out the ginger’s heat.
  • Honey or Maple Syrup – A bit of natural sweetener makes the drink sweeter and easier to enjoy.
  • Filtered Water – Using purified water keeps your drink clean and free of unwanted tastes.
  • Optional Additions – You can also add turmeric, cayenne pepper, or green apple to make your shot even healthier and tastier.

Choose organic, high-quality ingredients to get the most health benefits. Fresh ginger is especially important for a great ginger juice recipe or fresh ginger shots.

ginger ingredients

“Ginger is a powerful superfood that can transform a simple shot into a wellness elixir packed with antioxidants and anti-inflammatory compounds.”

Knowing what each ingredient does lets you make a zingy ginger elixir that’s just right for you. With ginger, you can make your daily routine healthier and more exciting.

Required Equipment and Preparation Tips

Making a ginger shot recipe at home is simple and rewarding. You’ll need some basic equipment and preparation. Whether you’re new to juicing or experienced, knowing the right tools and techniques is key. This will help you make the most delicious and energizing ginger shots.

Juicing Tools and Alternatives

You’ll need a good juicer to start. Choose a strong one that gets all the juice out of fresh ginger. If you don’t have a juicer, a blender works too. Just strain the mix through a fine-mesh sieve or cheesecloth to get the juice.

Storage Solutions

After juicing, store the ginger juice right. Use airtight, glass containers and keep it cold in the fridge. This keeps the ginger shot recipe fresh and full of nutrients for up to a week.

Prep Time Guidelines

  • Sourcing and washing the ginger: 5-10 minutes
  • Juicing or blending the ginger: 10-15 minutes
  • Straining and storing the juice: 5-10 minutes

With the right tools and a little prep, you’re ready to enjoy homemade energizing ginger shots. Enjoy the fresh, exciting taste of a DIY ginger shot recipe.

ginger shot recipe

Basic Ginger Shot Recipe – Step-by-Step Guide

Ready to unlock ginger’s power and make your own spicy wellness shots? Follow this easy guide to make a tasty and healthy ginger shot at home.

  1. Gather the Ingredients: You’ll need fresh ginger root, lemon or lime juice, and a sweetener like honey or maple syrup.
  2. Prepare the Ginger: Peel the ginger and cut it into small pieces. This exposes more surface area for flavor.
  3. Extract the Juice: Use a juicer, blender, or garlic press to get the ginger juice. If blending, strain to remove pulp.
  4. Add the Citrus: Squeeze in lemon or lime juice to balance the ginger’s heat and add a zing.
  5. Sweeten to Taste: Start with a little honey or maple syrup and adjust to your sweetness preference. This helps balance the ginger’s spiciness.
  6. Serve and Enjoy: Pour your homemade ginger shot recipe into a shot glass and enjoy the invigorating flavor. For a diluted version, mix with water or sparkling water.

Remember, finding the perfect balance in your ginger juice recipe is all about experimenting. Start small and adjust the flavors until you’re happy. Enjoy the spicy, tangy, and aromatic flavors of these spicy ginger wellness shots.

ginger shot recipe

“Ginger has been used for centuries to support overall health and well-being. Adding these ginger shots to your daily routine can be a simple way to enjoy its natural benefits.”

Flavor Enhancers and Optional Add-ins

Making the perfect ginger wellness shots is more than just ginger. Adding different ingredients can make your zingy ginger elixir even better. You can brighten it with citrus, add warmth with spices, or sweeten it with natural sweeteners. The choices are endless.

Citrus Additions

A squeeze of fresh citrus juice can instantly refresh and balance the strong ginger flavor. Try adding a splash of lemon, lime, or orange juice to your ginger tonic. The bright, tangy notes will complement the spicy ginger beautifully.

Spice Combinations

For those who love a little extra kick, try different spice blends. A pinch of cayenne pepper or a dash of ground cinnamon can add a delightful warmth. Turmeric is also great, offering an earthy, anti-inflammatory boost.

Natural Sweeteners

  • Honey: A classic pairing that can tame the bite of ginger and add a touch of sweetness.
  • Maple Syrup: This natural sweetener provides a rich, caramelized flavor that pairs well with ginger.
  • Dates or Dates Syrup: Blending in a pitted date or a drizzle of date syrup can lend a subtle sweetness and a creamy texture.

The beauty of ginger shots is their versatility. Experiment with different flavors to find your perfect mix. Customize your ginger wellness shots to match your taste. Enjoy the refreshing, energizing result.

Best Times to Take Your Ginger Wellness Shots

Adding ginger wellness shots to your day can really boost your energy and immune system. But when is the best time to take them? Let’s look at the best moments to enjoy energizing ginger shots and immunity-boosting ginger tonic.

Starting your day with a ginger shot can be refreshing. It helps kickstart your digestive system and gets your body ready for the day. It’s a great way to boost your metabolism and stay focused.

  • Try a ginger shot 15-30 minutes before breakfast for the best morning effect.
  • Drink an immunity-boosting ginger tonic to keep your body’s defenses strong and fight off colds.

As the day goes on, ginger wellness shots can give you a midday boost. The spicy compounds in ginger fight off afternoon tiredness and give you a natural energy lift. Take a ginger shot around 2-3 pm to refresh your mind and body.

“Ginger shots are my go-to for a natural energy kick that doesn’t leave me jittery or crash later on.” – Wellness Enthusiast

If you want better digestion, drink a ginger shot before or after meals. Ginger helps with bloating, gas, and other stomach issues, keeping your gut healthy.

The best time for your ginger wellness shots depends on what you need and like. Try different times to see what works best for you.

Storage Tips and Shelf Life for Fresh Ginger Shots

Storing your ginger shots right is key to keep their taste and health benefits. Whether you’re making a single ginger juice recipe or a batch of ginger wellness shots for the week, these tips will help. They’ll keep your ginger drinks fresh and flavorful.

Proper Storage Methods

For the best taste, store your ginger shots in an airtight container in the fridge. This keeps the good stuff in and the bad stuff out. Glass jars or BPA-free plastic containers are great for this.

Batch Preparation Guidelines

Make ginger shots in advance to enjoy them for 3-5 days. For longer storage, freeze them in ice cube trays or small containers. This keeps the health benefits for up to 2 months.

Don’t forget to mark your ginger wellness shots with the date you made them. This way, you know how fresh they are. With the right storage and planning, you’ll get the most out of your homemade ginger drinks.

Common Mistakes to Avoid When Making Ginger Shots

Making the perfect ginger shot recipe is fun and rewarding. But, it’s key to avoid common mistakes. This way, your spicy ginger wellness shots will always taste great and be full of benefits from natural ginger remedy.

One big mistake is steeping ginger for too long. It might seem like a good idea to get more flavor. But, it can make your shots taste bitter. Aim for 5-10 minutes of steeping for the best taste.

  1. Don’t use old or low-quality ginger. It can make your shots taste woody or fibrous.
  2. Don’t add too much citrus or spices. They can overpower the ginger. Start small and adjust as needed.
  3. Store your ginger shot recipe right. Bad storage can make it lose its potency fast. Keep it in the fridge and use it within 3-5 days.

By avoiding these mistakes, you’ll make spicy ginger wellness shots that are tasty and full of health benefits from natural ginger remedy.

“Ginger is a superstar ingredient, but like any culinary wonder, it requires a gentle touch to truly shine.”

Conclusion

Congratulations on starting your journey to better health with ginger shots! We’ve shown you how ginger can help with inflammation, boost your immune system, and aid digestion.

You now know how to make your own ginger shot recipe. It’s all about trying new flavors and making ginger shots a part of your routine.

Keep moving forward on your health path with ginger shots. They can give you energy, support your immune system, or just be a tasty, healthy drink. They’re a great addition to your health plan.

FAQ

What are the main health benefits of ginger shots?

Ginger shots are full of anti-inflammatory properties. They help reduce body inflammation. They also boost your immune system and improve digestion.

What are the essential ingredients needed for a ginger shot recipe?

You need fresh ginger, lemon or citrus, and a natural sweetener like honey or maple syrup for a ginger shot.

What equipment is required to make ginger shots at home?

You’ll need a juicer or high-powered blender and containers for storing the shots. Good storage keeps the shots fresh and potent.

How do I make the perfect ginger shot?

Making the perfect ginger shot is easy. Just juice or blend the ginger, add lemon or citrus, and maybe a natural sweetener to balance the taste.

Can I customize the flavor of my ginger shots?

Yes, you can. Try different citrus fruits, spices, and natural sweeteners. Orange, lime, or turmeric add flavor and health benefits.

When is the best time to drink ginger shots?

Drink ginger shots in the morning for energy, before a workout for anti-inflammatory benefits, or during the day for immune and digestive support.

How long do freshly made ginger shots last?

Fresh ginger shots last 3-5 days in the fridge. Freeze them in ice cube trays or airtight containers for longer storage.

What are some common mistakes to avoid when making ginger shots?

Avoid using old or low-quality ginger. Make sure to juice or blend well. Don’t add too much or too little sweetener. Store the shots properly.

Best-Ever Almond Cookies Recipe | Easy, Crunchy & Irresistible Treats

almond cookies recipe

As the sun shines through the kitchen window, the smell of fresh cookies fills the air. It takes you back to happy childhood memories. The smell of toasted almonds and the crunch of these treats are hard to ignore.

Whether you’re baking for a family get-together or looking for a special gift, this almond cookies recipe is a winner. It’s sure to please everyone’s taste buds.

Key Takeaways

  • Discover the secret to creating the perfect balance of crunch and tenderness in homemade almond cookies.
  • Learn how to harness the health benefits of almonds to make these treats a guilt-free indulgence.
  • Uncover the simple yet effective techniques that elevate these cookies to a new level of deliciousness.
  • Explore a variety of flavor combinations and seasonal adaptations to keep your taste buds constantly surprised.
  • Dive into the step-by-step instructions to master the art of baking these almond cookies with ease.

Why These Almond Cookies Will Become Your New Favorite

Baking almond cookies is a fun way to enjoy almonds’ health benefits. These treats satisfy your sweet cravings and offer a nutritional boost. Almonds are the key ingredient.

Health Benefits of Almonds in Baking

Almonds are packed with nutrients, making them perfect for baked goods. They are full of protein, dietary fiber, healthy fats, vitamins, and minerals. Adding almond cookie ingredients to your baking can bring many health benefits, such as:

  • Improved heart health due to the monounsaturated fats found in almonds
  • Better blood sugar management thanks to the fiber and protein content
  • Stronger bones and teeth with the help of calcium, magnesium, and phosphorus
  • Enhanced cognitive function from the vitamins and antioxidants present in almonds

What Makes These Cookies Special

These almond cookies are special because of their unique texture and flavor. They have crisp edges, chewy centers, and a lovely almond scent. This makes them irresistible. The secret is in the right mix of ingredients and baking technique for the perfect crunch.

“These almond cookies are a true delight – the perfect blend of crunchy and chewy, with a subtle almond flavor that keeps you coming back for more.”

If you want a cookie that’s both tasty and healthy, try this almond cookie recipe. It’s sure to become your new favorite.

almond cookie ingredients

Essential Ingredients for Perfect Almond Cookies

Making the perfect almond cookies is all about the right mix of ingredients. Whether you like the traditional almond flour cookies or something different, knowing these key elements is crucial. It’s what makes the cookies both delicious and textured just right.

The core of the recipe is the almonds. Ground almond flour or meal gives a soft, nutty texture. Whole, sliced, or slivered almonds add a nice crunch. You can adjust how much of each you use to get the cookie just right for you.

Butter or plant-based alternatives like coconut oil add richness and softness. Granulated sugar and brown sugar add sweetness and a caramel flavor. Eggs or egg replacers help the dough stick together and make the cookies chewy.

Finally, a little vanilla extract adds a deep aroma, a pinch of salt balances the taste, and baking powder or baking soda ensure the cookies rise and have the right texture.

“The secret to creating the ultimate almond cookies lies in finding the right balance of these fundamental components.”

With these essential ingredients, you’re ready to bake almond cookies that will impress everyone. They’ll be a hit with your guests, and they’ll want more.

almond cookie ingredients

Kitchen Tools and Equipment You’ll Need

Baking almond cookies needs some key kitchen tools for the right texture and taste. Whether you’re experienced or new to baking, the right tools make it easier and more fun. Here are the essential baking tools and some extra equipment for making those tasty almond cookies.

Must-Have Baking Tools

  • Baking sheets or cookie trays: Get good-quality baking sheets or trays for even heat and baking.
  • Mixing bowls: You’ll need different sizes of mixing bowls for all the ingredients and steps.
  • Whisk or hand mixer: A whisk or hand mixer mixes wet and dry ingredients well, making the dough smooth.
  • Spatula or wooden spoon: A strong spatula or wooden spoon is key for mixing and shaping the dough.
  • Parchment paper or silicone baking mats: Use parchment paper or silicone mats to stop cookies from sticking.
  • Cooling rack: A cooling rack helps cookies cool evenly and prevents them from getting soggy.

Optional Equipment for Professional Results

While the basic tools are crucial, some extra equipment can improve your almond cookie baking:

  1. Stand mixer: A stand mixer with a paddle attachment makes mixing the dough easier, especially for big batches.
  2. Piping bag and tips: Use a piping bag and tips for a professional look when shaping the dough before baking.
  3. Cookie scoop: A cookie scoop makes your almond cookies the same size, for even baking and a neat look.
  4. Food processor: A food processor quickly grinds almonds into fine flour, great for gluten-free recipes.

Even without all the extra equipment, you can still make delicious almond cookies with the basics. The important thing is to be creative and use what you have to get the best results.

baking almond cookies

Step-by-Step Almond Cookies Recipe

Making delicious almond cookies is easy with this guide. It’s perfect for both new and experienced bakers. These easy almond cookie recipe steps will help you make tasty homemade almond cookies every time.

First, heat your oven to 350°F (175°C). Then, line a baking sheet with parchment paper. In a bowl, mix the flour, baking powder, and a bit of salt. Set it aside.

  1. In another bowl, mix the butter and sugar until fluffy, about 2-3 minutes.
  2. Add the egg and vanilla extract and mix well.
  3. Slowly add the dry ingredients to the wet ones, mixing just until a dough forms. Don’t overmix.
  4. Then, mix in the chopped almonds by hand, making sure they’re spread out evenly.

Use a cookie scoop or tablespoon to make 1-inch balls. Place them 2 inches apart on the baking sheet. Flatten each cookie slightly with a fork.

almond cookies

Bake the easy almond cookie recipe for 10-12 minutes, until the edges are golden. Let them cool on the sheet for 5 minutes. Then, move them to a wire rack to cool completely.

Enjoy these soft, chewy, and tasty almond cookies with coffee or as a snack. Follow this guide, and you’ll be baking perfect easy almond cookie recipe in no time!

Tips for Achieving the Perfect Texture

Baking crunchy almond cookies or chewy ones is an art. Getting the texture right is crucial for making treats that everyone loves. Whether you want a crunchy or chewy cookie, these tips will help you achieve the perfect texture every time.

Getting That Signature Crunch

To get that crunchy texture, focus on your baking method. Chill your cookie dough well before baking. This helps the cookies keep their shape and get a crisp outside.

Also, watch your baking temperature and time. Baking at around 350°F for a bit longer will give you a crunchy finish.

Moisture Control Techniques

It’s important to balance moisture to avoid soggy or dry cookies. Use the right amount of butter and eggs in your recipe. Don’t overmix the dough, as it can make the cookies tough and dry.

Keep an eye on your cookies towards the end of baking. Take them out when they’re lightly golden brown around the edges. This way, you’ll get a chewy center with a crisp outside.

“Achieving the perfect texture in almond cookies is all about paying attention to the details. With a little practice, you’ll be baking batch after batch of cookies that are exactly how you want them – crunchy, chewy, and utterly delicious.”

Variations and Flavor Combinations

The classic almond cookies recipe is a timeless delight. But why not explore some creative variations to tantalize your taste buds? Whether you’re a fan of bold flavors or prefer a more subtle approach, there’s an almond cookie variation out there to suit your preferences.

For those with a sweet tooth, consider folding in some rich chocolate chips or tangy dried cranberries to the dough. The combination of the buttery almond cookies and the contrasting flavors will leave you craving more. If you’re in the mood for a tropical twist, try adding shredded coconut or a splash of coconut extract to the mix.

Looking to add a little spice to your life? Experiment with ground cinnamon, cardamom, or even a hint of cayenne pepper to create a delightful play of flavors. For a more sophisticated take, consider incorporating espresso powder or dark chocolate chunks into the dough.

“The beauty of almond cookies lies in their ability to serve as a blank canvas for endless flavor combinations.”

Remember, the key to creating your own signature almond cookies recipe is to have fun and let your taste buds be your guide. Don’t be afraid to step outside the traditional boundaries and unleash your inner culinary artist.

Whether you opt for classic simplicity or a bold blend of flavors, these versatile almond cookies are sure to delight your family and friends. Indulge in the perfect balance of crunch and tenderness, and let your creativity shine through in every bite.

Storage and Freshness Guidelines

Keeping your homemade almond cookies fresh is crucial. They should stay crunchy and buttery. With the right storage and a few tips, you can keep them fresh longer.

Best Storage Containers for Almond Cookies

The key to keeping cookies fresh is the right container. Choose airtight ones like tin cans, glass jars, or sturdy plastic boxes. These keep the cookies fresh and prevent them from drying out. Don’t use plastic bags, as they can make cookies soggy.

Shelf Life Tips for Homemade Almond Cookies

  1. Keep your cookies in a cool, dry place away from sunlight or heat.
  2. Stored properly, they can last up to 1 week at room temperature.
  3. For longer storage, freeze them. They can stay fresh for up to 3 months.
  4. Thaw frozen cookies at room temperature for a few hours before enjoying.

Follow these tips to enjoy your homemade almond cookies for days. They’ll stay crunchy and delicious!

Common Baking Mistakes to Avoid

Baking almond cookies can be a fun experience. But, even experienced bakers can run into problems. Don’t worry, we’re here to guide you to avoid common mistakes. This way, your almond cookies will always be crisp and full of flavor.

One big mistake is putting too many cookies on the baking sheet. It’s tempting to fit as many as you can, but it’s not worth it. Overcrowding leads to uneven baking and soft, spread-out cookies. Make sure to leave enough space for each cookie to bake evenly.

Choosing the wrong almonds or almond flour is another common error. It’s best to follow the recipe’s advice for the best taste and texture. Different types of almonds can change how your cookies turn out.

  1. Make sure to measure your ingredients accurately. This is crucial for the right texture in your almond cookies.
  2. Don’t overbake your cookies. Take them out of the oven when they start to brown around the edges. Overbaked cookies can become dry and hard.
  3. Preheat your oven to the right temperature. If the heat is off, your cookies might not bake evenly.

“The secret to perfect almond cookies is patience and attention to detail. Small adjustments can make a big difference in the final result.”

By avoiding these common mistakes and sticking to the recipe, you’ll make delicious almond cookies. Your friends and family will love them. Happy baking!

If you’re on a gluten-free diet, you’ll love these gluten-free almond cookies. They can be easily made without gluten. Just a few simple changes will let you enjoy the same taste and texture.

Alternative Flour Options

Creating gluten-free almond flour cookies is all about the right flours. Here are some great choices:

  • Almond flour: Made from ground almonds, it’s naturally gluten-free. It adds a rich, nutty taste and a soft texture.
  • Coconut flour: This flour is low in carbs and high in fiber. It adds a sweet touch and a unique texture to your cookies.
  • Tapioca flour: This flour is based on starch. It helps hold the ingredients together, making the cookies soft and chewy.

Texture Modifications

Changing the recipe a bit can make your gluten-free almond cookies just right. Here’s how:

  1. Use more eggs or egg whites. They help the ingredients stick together, making the dough more cohesive.
  2. Add a little xanthan gum or psyllium husk. They help the cookies hold their shape, like gluten does.
  3. Adjust the baking time and temperature. This prevents the cookies from drying out or becoming too crumbly.

With a little trial and error, you can make delicious gluten-free almond cookies. They’ll be perfect for your gluten-free diet.

Seasonal Variations of Traditional Almond Cookies

Almond cookies are a classic treat that can be made even better with seasonal flavors. Whether for a holiday or just to enjoy, these variations will impress.

In winter, add peppermint or cranberry to your almond cookies. Peppermint’s coolness complements the almond’s nuttiness. Cranberries add festive color and flavor. Just mix in chopped cranberries or peppermint extract into your dough.

In spring, brighten your cookies with lemon zest and white chocolate. Lemon’s citrus and white chocolate’s creaminess enhance the almond flavor. You can also add pistachios or coconut for extra indulgence.

Summer brings a chance to use juicy berries in your cookies. Blueberries, raspberries, or a mix add a fruity twist. Fold the berries into the dough or place them on top before baking.

Fall is the time for cozy flavors like cinnamon, nutmeg, or caramel in your cookies. These spices and caramel warm up the almond flavor, making a perfect seasonal treat.

Almond cookies are versatile, allowing you to explore many seasonal flavors. Let the changing seasons inspire your baking and enjoy these delicious creations.

“Almond cookies are a blank canvas, ready to be transformed with the flavors of the season.”

Pairing and Serving Suggestions

Your homemade almond cookies are perfect with many drinks and desserts. Try them with a warm cup of coffee, tea, or hot chocolate. The cookies’ nutty and buttery taste goes well with the rich flavors of these drinks.

Want to make a sweet dessert platter? Place your almond cookies next to mini cheesecakes, chocolate-dipped strawberries, or artisanal chocolates. These cookies can be the main attraction or a great addition to a rich dessert selection.

Make your almond cookies a special gift or a treat for guests. Put them in decorative tins or boxes and add a ribbon. Include a personal note for a nice touch. They’re great for hostess gifts, holiday treats, or a surprise for your loved ones.

FAQ

What are the key ingredients in the best-ever almond cookies recipe?

The key ingredients are almond flour, butter, sugar, eggs, and vanilla extract. These simple items create the perfect taste and texture.

How do the health benefits of almonds contribute to the cookies?

Almonds add protein, healthy fats, fiber, and antioxidants to the cookies. This makes them a healthier choice than regular cookies.

What makes these almond cookies so special?

They are crispy on the outside and chewy inside. The almond flour adds a nutty, buttery flavor that’s unique.

What essential baking tools do I need to make these almond cookies?

You’ll need a mixing bowl, a hand mixer or stand mixer, baking sheets, and parchment paper. A cookie scoop is optional for even sizes.

How do I ensure the perfect crunchy texture in these almond cookies?

Bake them until they’re golden brown. Let them cool completely on the sheet for a crisp exterior. Keeping them dry is crucial for the crunch.

Can I make these almond cookies gluten-free?

Yes, just replace all-purpose flour with almond flour or a gluten-free blend. Adjust the texture if needed to keep them chewy.

How long do homemade almond cookies stay fresh?

They stay fresh for up to 1 week at room temperature. Store them in an airtight container to keep them fresh.

30 Irresistible Thin-Sliced Chicken Breast Recipes | Quick & Healthy Meals

thin sliced chicken breast recipes

When you enter the kitchen, you hear the sizzle of a pan and smell fresh chicken. There are countless ways to make tasty dishes with this versatile protein. These 30 thin-sliced thin sliced chicken breast recipes are perfect for busy days or a healthy diet.

This guide takes you on a flavor journey, from simple dishes to international flavors. You’ll learn how to slice chicken thinly, use kitchen tools, and marinate for the best taste. Get ready to make your weeknight dinners delicious and healthy.

Key Takeaways

  • Discover 30 mouthwatering thin-sliced chicken breast recipes for quick and healthy meals
  • Learn the art of thin-slicing chicken for optimal texture and cooking time
  • Master essential kitchen tools and storage techniques to ensure perfectly sliced chicken
  • Explore a variety of marinades and seasonings to enhance the flavor of your chicken dishes
  • Enjoy a diverse range of recipes, from classic to international-inspired, that cater to various dietary needs

Understanding the Art of Thin-Sliced Chicken Breast Preparation

Cooking with lean chicken breast is a favorite for health-conscious cooks. But, making thin slices can be tricky. We’ll cover the key techniques for making tasty chicken dishes.

Essential Kitchen Tools for Perfect Slicing

Getting even, thin slices of chicken breast needs the right tools. A sharp knife or a meat slicer is crucial. Also, a strong cutting board and a smooth surface are important for safe slicing.

Storage and Handling Tips

Storing and handling chicken breasts properly is key. Choose cold chicken with no damage. Store it in the fridge’s coldest spot and use it within 1-2 days. Always wash your hands and use clean surfaces to avoid contamination.

Marinade Basics for Enhanced Flavor

Marinating chicken breasts adds flavor and tenderness. A simple marinade can make a big difference. Mix acidic ingredients like vinegar or yogurt with herbs and spices. Let it marinate for at least 30 minutes or up to 8 hours.

thin sliced chicken breasts

Learning to prepare thin-sliced chicken breasts opens up a world of tasty dishes. You’ll enjoy making and eating healthy, flavorful meals.

Classic Thin Sliced Chicken Breast Recipes for Beginners

Starting with thin-sliced chicken breasts? Don’t worry! We have some classic recipes just for you. They use simple techniques and ingredients, making them easy to follow and delicious.

The Lemon Garlic Chicken is a great place to start. It mixes lemon’s tanginess with garlic’s warmth. It’s perfect with steamed veggies or a fresh salad for a quick, healthy meal.

The Balsamic Chicken Stir-Fry is another favorite. It cooks chicken, bell peppers, and onions quickly. Then, it’s tossed in a balsamic glaze. Serve it over rice for a full meal.

“These thin-sliced chicken breast recipes are perfect for busy weeknights when you want a delicious, low-fat meal in a flash.”

The Chicken Parmesan Bake is great for a hearty meal. It bakes chicken, marinara sauce, and cheese together. It’s comforting and satisfying.

Thin Sliced Chicken Breast Recipes

These recipes are perfect for anyone, no matter your cooking level. They’re quick, low-fat, and full of flavor. They’re sure to become favorites in your home.

Mediterranean-Inspired Chicken Dishes

Get ready for a culinary adventure with these delicious thin-sliced chicken breast recipes. They take you from Greece’s sunny shores to Italy’s rustic kitchens and Spain’s lively coasts. These dishes mix the best of local ingredients and cooking methods. They offer healthy, tasty, and simple-to-make chicken recipes.

Greek-Style Preparations

Experience Greece’s bold, herbaceous flavors with lemon-garlic chicken. It’s served with fluffy chicken entrees, topped with feta and Kalamata olives. Or, try a classic Greek salad with chicken, tomatoes, cucumbers, and a zesty lemon dressing.

Italian Favorites

Take a trip to Italy with chicken Parmesan. It features crispy chicken, marinara sauce, and melted mozzarella. For something lighter, try a Mediterranean-style chicken wrap. It’s filled with grilled chicken, sun-dried tomatoes, and pesto.

Spanish-Influenced Recipes

  • Enjoy a Spanish chicken and rice dish. It’s made with saffron, paprika, and various vegetables.
  • Try a chicken and chorizo paella. It combines the smoky taste of Spanish chorizo with tender chicken.

Discover the Mediterranean’s rich culinary heritage through these healthy chicken recipes. Each dish takes you to a different part of this fascinating region.

Mediterranean-inspired chicken dishes

Asian-Fusion Quick Chicken Meals

Make your weeknight dinners exciting with thin sliced chicken breast recipes full of Asian flavors. These quick chicken dinners are both lean and flavorful, perfect for when you’re in a hurry.

Try the art of stir-frying with chicken, veggies, and a tasty sauce. Make a sweet teriyaki chicken or a fragrant lemongrass chicken with Southeast Asian scents.

Asian-fusion chicken meals

For a spicy kick, try a Thai-inspired chicken curry. It’s a mix of heat and creaminess. Or, go for kung pao chicken with its tender chicken, peanuts, and zesty sauce.

“These Asian-fusion chicken dishes are my go-to for quick, nutritious meals that pack a flavor punch.”

Craving something different? Try a Japanese-style katsu or a Chinese-influenced orange chicken. These thin sliced chicken breast recipes bring Asia’s flavors to your kitchen. Enjoy lean protein meals that are both tasty and easy to make.

Healthy Low-Carb Chicken Solutions

Starting a low-carb diet doesn’t mean giving up tasty meals. Thin-sliced chicken breast is a great choice for lean protein. Find many low-carb chicken dishes that fit different diets, like keto, paleo, and gluten-free.

Keto-Friendly Options

For keto dieters, low-fat chicken dishes are a great fit. Try creamy garlic chicken with zucchini noodles or Thai coconut curry with chicken. These lean protein meals are tasty and keep carbs low.

Paleo-Approved Dishes

Paleo fans will love these low-fat chicken dishes. Try grilled lemon-herb chicken with roasted veggies or a chicken and broccoli stir-fry. These healthy chicken recipes use fresh, unprocessed ingredients.

Gluten-Free Variations

People with gluten issues can enjoy lean protein meals like thin-sliced chicken breast. Try baked parmesan-crusted chicken or a chicken fajita bowl with cauliflower rice. These low-fat chicken dishes let you enjoy flavors without gluten.

“Embracing a low-carb lifestyle doesn’t mean you have to sacrifice the joy of delicious and nutritious meals.”

Grilled and Pan-Seared Perfection

Discover the delicious side of thin-sliced chicken breasts with these recipes. Cooking chicken to perfection is now easy. Enjoy bold flavors and quick meals that will make you want more.

Grilled Thin-Sliced Chicken Breast Recipes

Grilling thin-sliced chicken breasts gives you a tasty, charred outside and juicy inside. Here are tips for grilled chicken breast recipes that will wow everyone:

  1. Marinate the chicken in your favorite mix for at least 30 minutes to add lots of flavor.
  2. Heat your grill to medium-high and oil the grates to avoid sticking.
  3. Grill the thin sliced chicken breast for 3-5 minutes on each side, until it’s 165°F inside.
  4. Let the chicken rest for a few minutes before serving to keep the juices in.

Seared Thin-Sliced Chicken Breast Recipes

For a quick grilled chicken breast recipes option, try pan-searing. It gives you a crispy outside and a juicy inside with little effort:

  • Pat the chicken dry and season with salt, pepper, and spices.
  • Heat a large skillet over medium-high and add oil.
  • Sear the thin sliced chicken breast for 3-4 minutes on each side, until it’s golden.
  • Finish cooking in the oven at 400°F for 5-10 minutes, until it’s 165°F inside.

These simple grilled and pan-seared methods will give you tasty quick chicken dinners. Make your weeknights special and impress guests with these grilled chicken breast recipes and thin sliced chicken breast recipes.

Baked and Air-Fryer Chicken Innovations

Baked and air-fryer recipes are all the rage for tasty and healthy chicken dishes. These methods let you get crispy textures without deep frying. They’re perfect for those who want to eat well without the extra fat.

Crispy Coatings Without Deep Frying

Baked and air-fried baked chicken breast recipes are great for those who love fried chicken but want less fat. Using smart coatings like panko breadcrumbs or almond flour, you can get a crispy outside. This keeps the healthy chicken inside juicy and tender.

One-Pan Wonders

For busy days, easy chicken entrees that cook in one pan are a big help. These dishes often mix veggies, herbs, and spices. They make a full, tasty meal with hardly any cleanup.

“The secret to perfectly crispy baked chicken is all in the coating. Experiment with different breadcrumbs, nuts, or spices to find your signature crunchy texture.”

Exploring baked and air-fried chicken recipes lets you enjoy healthy chicken without losing the crunch. Start a new cooking journey and see what tasty dishes you can make.

Time-Saving Meal Prep Strategies

Preparing meals shouldn’t be a chore. Turn your chicken breast recipes into quick and easy dinners. Learn how to make your weekly meals lean and protein-rich without the stress.

Batch cooking is a big help for busy people. Spend a few hours on the weekend to cook a lot of chicken breasts. Then, freeze them in portions for easy use all week.

Don’t just cook chicken. Use different marinades and seasonings to make your meals exciting. This way, you can try out many different flavors, from Mediterranean to Asian.

“Meal prepping with thin-sliced chicken breasts is a lifesaver. It sets me up for a week of delicious, nutritious, and stress-free lean protein meals.”

Try one-pan wonders and sheet pan recipes for even easier cooking. Chop veggies and chicken together, then bake or sauté them. This makes a complete meal with little cleanup.

  • Invest in airtight containers and freezer-safe bags to properly store your prepped chicken.
  • Explore a variety of chicken breast recipes that can be easily customized throughout the week.
  • Dedicate just a few hours on the weekend to set yourself up for success all week long.

Save time and enjoy easy, stress-free dinners with these tips. Your future self will appreciate the tasty, healthy meals you’ll have ready.

Conclusion

Thin-sliced chicken breast recipes are a great way to make quick, healthy meals. They offer endless possibilities, from classic dishes to Mediterranean and Asian-inspired ones. This makes chicken breast a versatile ingredient for any meal.

If you’re looking for thin sliced chicken breast recipes, healthy chicken recipes, or quick chicken dinners, you’re in luck. This guide has lots of options for you. By learning to slice chicken thinly and trying different cooking methods, you can discover new flavors.

Keep trying new things in the kitchen with thin-sliced chicken breast. Experiment with marinades, seasonings, and cooking techniques. This way, you’ll find your favorite recipes. With these tips, you’ll be making delicious, healthy meals in no time.

FAQ

What makes thin-sliced chicken breasts a great choice for healthy meals?

Thin-sliced chicken breasts are packed with lean protein. They cook fast, making them perfect for quick, healthy meals. Their thin shape cooks evenly, keeping them moist and tender.

How can I ensure my thin-sliced chicken breasts stay juicy and flavorful?

To keep chicken breasts juicy and flavorful, use a marinade or brine before cooking. This tenderizes the meat and adds moisture and flavor. Don’t overcook the chicken, as it can dry out quickly.

What are some easy and versatile ways to prepare thin-sliced chicken breasts?

You can grill, pan-sear, bake, or air-fry thin-sliced chicken breasts. These methods give you crispy outsides and juicy insides with little effort. They’re also great for stir-fries, wraps, and salads.

How can I incorporate thin-sliced chicken breasts into my meal prep routine?

Thin-sliced chicken breasts are great for meal prep. Cook a big batch and use it in different meals like stir-fries, salads, or grain bowls. They add protein to many dishes.

What are some flavorful marinades or seasoning blends that pair well with thin-sliced chicken breasts?

Thin-sliced chicken breasts can be seasoned in many ways. Try Mediterranean blends with herbs, garlic, and lemon. Or go for Asian-style with soy sauce, ginger, and sesame. Southwestern rubs with chili powder, cumin, and lime are also tasty.

10 Best Gluten Free Breakfast Casserole Recipes | Irresistibly Easy & Delicious

gluten free breakfast casserole recipes

Imagine waking up to the mouthwatering aroma of a hearty, gluten free breakfast casserole recipes. It’s freshly baked and ready to nourish your body and soul. Whether you’re on a gluten-free diet or just looking for tasty breakfast options, these 10 recipes are a game-changer. They offer flavors that will have you coming back for more, all while meeting your dietary needs.

Key Takeaways

  • Discover 10 easy-to-prepare, gluten-free breakfast casserole recipes that are both nutritious and delicious.
  • Explore a variety of flavors and ingredients, from savory sausage and sweet potato hash to dairy-free Mediterranean delights.
  • Learn about essential gluten-free baking ingredients and substitutions to create the perfect breakfast bakes.
  • Prepare make-ahead options for stress-free, meal-prepped mornings.
  • Enjoy the convenience and versatility of these gluten-free breakfast casserole recipes, suitable for various dietary needs.

Understanding Gluten Free Breakfast Casseroles: A Complete Guide

Living gluten-free doesn’t mean you can’t enjoy a tasty breakfast casserole. These dishes are not only yummy but can fit your dietary needs. This guide will show you how to make delicious gluten-free breakfast casseroles. We’ll cover the key ingredients, substitutes, and kitchen tools you need.

Essential Ingredients for Gluten Free Baking

For gluten-free baking, some ingredients are crucial for great taste and texture. Instead of wheat flour, try almond flour, coconut flour, or gluten-free flour blends. These help your casserole stay together perfectly.

Common Substitutes and Alternatives

Exploring gluten-free cooking is fun, with many creative options. Swap regular breadcrumbs for gluten-free ones, use dairy-free milk, and choose gluten-free oats or quinoa. Knowing these substitutes will help you make tasty gluten free breakfast casserole recipes and gluten free brunch ideas.

Kitchen Tools You’ll Need

To make a great gluten free breakfast casserole, you need the right tools. Get a good baking dish for even heat and easy cleaning. A food processor or blender is great for mixing ingredients. A sturdy whisk helps make the perfect custard-like egg mixture. With these tools, you’ll make delicious healthy breakfast bakes everyone will love.

gluten free breakfast casserole

“Embracing a gluten-free lifestyle doesn’t have to mean sacrificing the flavors and textures you love. With the right ingredients and tools, you can create irresistible gluten-free breakfast casseroles that will satisfy your cravings and nourish your body.”

Sweet Potato and Sausage Hash Breakfast Bake

Start your day with this tasty gluten free breakfast bakes recipe – the Sweet Potato and Sausage Hash Breakfast Bake. It’s a mix of sweet potatoes and spicy sausage. This makes for a hearty and healthy breakfast bakes option that’s sure to please.

To make this egg casserole recipes masterpiece, you need a few simple ingredients. You’ll need sweet potatoes, Italian sausage, onions, bell peppers, and eggs. Sauté the vegetables and sausage until they’re caramelized. Then, bake with the eggs until it’s golden and irresistible.

When this gluten free breakfast bakes dish comes out of the oven, you’ll smell something amazing. It looks great too. Serve it warm, with fresh herbs or shredded cheese, for a breakfast that will keep you going all day.

“This recipe is a game-changer for anyone looking for a delicious and nutritious gluten-free breakfast option. The combination of sweet potatoes and sausage is simply unbeatable!”

  1. Preheat your oven to 375°F (190°C).
  2. In a large skillet, cook the Italian sausage over medium-high heat until browned and cooked through. Remove the sausage from the pan and set it aside.
  3. In the same skillet, sauté the diced onions and bell peppers until they’re tender and caramelized, about 8-10 minutes.
  4. Add the diced sweet potatoes to the skillet and continue cooking for 10-12 minutes, or until the sweet potatoes are fork-tender.
  5. Return the cooked sausage to the skillet and stir to combine.
  6. Crack the eggs into the skillet, making sure to distribute them evenly. Season with salt and pepper to taste.
  7. Transfer the skillet to the preheated oven and bake for 20-25 minutes, or until the eggs are set and the top is lightly browned.
  8. Remove the breakfast bake from the oven and let it cool for a few minutes before serving.

Enjoy this delightful gluten free breakfast bakes and egg casserole recipes creation as a satisfying start to your day. The mix of sweet potatoes, sausage, and eggs is both nutritious and indulgent. Bon appétit!

gluten free breakfast bakes

Dairy Free Mediterranean Egg Casserole

Discover the taste of the Mediterranean with this dairy-free egg casserole. It’s filled with fresh veggies, herbs, and protein. It’s perfect for make ahead breakfast casseroles and will wow your guests.

Best Dairy Free Cheese Options

For a dairy-free casserole, choose plant-based cheese. Great choices include:

  • Cashew-based cheese
  • Almond-based cheese
  • Coconut-based cheese
  • Nutritional yeast for a cheese-like flavor

Mediterranean Ingredients Guide

Bring the Mediterranean to your casserole with these ingredients:

  1. Kalamata olives
  2. Sun-dried tomatoes
  3. Feta-style dairy-free cheese
  4. Fresh basil, oregano, and thyme
  5. Roasted red peppers
  6. Spinach or kale

Make-Ahead Tips and Storage

This dairy free breakfast casserole is great for gluten free breakfast casserole recipes. Assemble it, cover, and chill for up to 3 days. Bake when you’re ready. Store leftovers in a sealed container for up to 4 days.

This egg casserole is a tasty and flexible choice for your next brunch or breakfast.

dairy free breakfast casseroles

Gluten Free Breakfast Casserole Recipes: Classic Ham and Cheese

Take your brunch to the next level with this gluten free breakfast casserole. It’s perfect for those with dietary needs or anyone looking for a cozy morning meal. This recipe is sure to wow your guests.

Begin by picking top-notch gluten free bread or English muffins. Cut them into small pieces to form the casserole’s base. For the cheese, mix sharp cheddar with creamy Swiss for the best taste.

Choose low-sodium ham or a plant-based option to keep your dish light. Add sautéed onions and bell peppers for color and crunch. They complement the casserole’s creamy texture beautifully.

Whisk eggs, milk, and a bit of seasoning together. Pour this over your ingredients, making sure everything is well coated. Sprinkle more cheese on top. Bake until it’s golden and the center is set, filling your kitchen with a delicious smell.

This gluten free breakfast casserole is great for brunch or meal prep. Serve it with fresh fruit, a side salad, or breakfast potatoes for a complete meal.

gluten free breakfast casserole

“This ham and cheese casserole is the ultimate comfort food for breakfast. The gluten free bread creates a hearty base, while the creamy egg and melted cheese make every bite positively irresistible.”

Vegetarian Mexican Breakfast Casserole

Make your gluten free breakfasts more exciting with a Vegetarian Mexican Breakfast Casserole. It’s packed with plant-based proteins, spices, and Mexican flavors. It’s perfect for a gluten free brunch or a healthy breakfast.

Plant-Based Protein Sources

Don’t worry about missing out on protein with a vegetarian casserole. Use:

  • Tofu or extra-firm tofu, pressed and cubed
  • Cooked and crumbled tempeh
  • Drained and rinsed canned black beans or pinto beans
  • Diced avocado, rich in healthy fats

Spice Combinations and Heat Levels

Bring Mexico’s bold flavors to your breakfast with spices. Start with cumin, chili powder, and smoked paprika. Then, add:

  1. Diced jalapeños or serrano peppers for a spicy kick
  2. Chipotle powder or adobo sauce for a smoky, medium heat
  3. Mild green chiles or bell peppers for a more subtle heat

“Elevating gluten free breakfast bakes with the vibrant flavors of Mexico is a surefire way to delight your taste buds and nourish your body.”

Berry and Cream Cheese Overnight French Toast Bake

Take your gluten-free brunch to the next level with this overnight breakfast casserole. It’s packed with berries and cream cheese. Made with gluten-free bread, it’s perfect for stress-free entertaining.

Make this gluten free breakfast casserole recipe the night before. Bake it in the morning for a dish that’s warm and irresistible. The mix of tart berries, creamy cheese, and sweetness is amazing.

  1. Start by cubing your preferred gluten-free bread or rolls and arranging them in a greased baking dish.
  2. In a separate bowl, whisk together eggs, milk, vanilla, and a touch of cinnamon for a delightful French toast flavor.
  3. Gently fold in fresh or frozen berries and cream cheese cubes, then pour the mixture over the bread cubes.
  4. Cover and refrigerate overnight, allowing the flavors to meld and the bread to soak up the custard-like batter.
  5. In the morning, simply bake the overnight breakfast casserole until golden brown and set.

“This berry and cream cheese French toast bake is the perfect make-ahead breakfast for busy mornings or entertaining guests. The combination of sweet berries and rich cream cheese is absolutely divine.”

Serve this gluten free breakfast casserole warm. Top it with more berries and powdered sugar for a luxurious brunch.

Spinach and Mushroom Make-Ahead Breakfast Casserole

Make your mornings better with this tasty spinach and mushroom casserole. It’s easy to make and great for busy days. It’s full of fresh spinach, mushrooms, and creamy eggs. This make ahead breakfast casserole will quickly become a favorite.

Best Mushroom Varieties to Use

Choosing the right mushrooms is important for your healthy breakfast bakes. Use a mix of cremini and shiitake mushrooms. They add a rich flavor that pairs well with spinach.

Proper Vegetable Preparation

Getting your veggies ready right is crucial for vegetarian breakfast casseroles. Clean and slice the mushrooms well. Sauté the spinach until it’s just wilted. This keeps the veggies’ flavors and texture.

This spinach and mushroom bake is a game-changer for breakfast. It’s nutritious and delicious. Enjoy it for a fulfilling start to your day or impress guests at brunch.

Denver-Style Egg and Potato Breakfast Bake

Take your brunch to the next level with this tasty Denver-style egg and potato breakfast bake. It’s inspired by the classic Denver omelet. This dish combines bell peppers, onions, and ham for a delicious breakfast. It’s great for gluten free breakfast bakes, egg casserole recipes, and brunch casserole dishes.

To start, layer the ingredients in a baking dish. Begin with diced potatoes, then add sautéed bell peppers and onions. Next, add chopped ham or your favorite protein. Finish with a fluffy egg mixture. Bake until the eggs are set and the potatoes are tender.

For perfect egg consistency, whisk the eggs well before adding them. This ensures the eggs are evenly distributed. You can also add shredded cheese or fresh herbs for extra flavor.

This gluten free breakfast bake is easy to serve and portion. It’s perfect for brunch gatherings or meal prep. Serve it with a fresh salad or your favorite sides for a complete meal. Enjoy the fluffy eggs, tender potatoes, and savory vegetables in every bite.

Quinoa and Apple Breakfast Casserole

Start your day with a nutritious and delicious gluten free breakfast casserole. It features quinoa and apples. This mix of protein-rich quinoa and sweet apples makes a wholesome breakfast. It’s great for gluten free brunch ideas or a healthy breakfast.

Cooking Perfect Quinoa Tips

To get fluffy and flavorful quinoa, follow these tips:

  1. Rinse the quinoa well to remove bitter saponins.
  2. Use a 1:2 quinoa-to-liquid ratio, like 1 cup quinoa to 2 cups water or broth.
  3. Boil the liquid, then lower the heat, cover, and simmer for 15-20 minutes. The quinoa should be tender and the liquid absorbed.
  4. Fluff the quinoa with a fork before adding it to the casserole.

Apple Selection Guide

Not all apples are the same for baking. For the best results, pick a variety that holds its shape and balances sweetness and acidity. Here are some top picks:

  • Granny Smith – Tart and crisp, adds contrast to the sweet casserole.
  • Honeycrisp – Juicy, sweet-tart, and firm, a popular choice.
  • Fuji – Sweetly crisp, with a crunchy bite, great for baked dishes.

Enjoy this healthy gluten free breakfast bake in the morning or for a gluten free brunch. The mix of quinoa and apples will keep you satisfied and energized all day.

Conclusion

Gluten free breakfast casseroles are a tasty and flexible choice for morning meals. They range from savory to sweet, like the “Denver-Style Egg and Potato Breakfast Bake” and the “Berry and Cream Cheese Overnight French Toast Bake.” These recipes show how easy it is to make gluten free breakfasts that are both delicious and healthy.

These casseroles are not just yummy; they’re also easy to make ahead of time. This makes them perfect for busy mornings or meal prep. They’re great for anyone who needs to follow a gluten-free diet, wants to try new recipes, or just needs a filling breakfast.

We invite you to try out the gluten free breakfast casserole recipes we’ve shared. Feel free to get creative and make your own versions. Discover the joy of gluten free breakfast bakes and enjoy a variety of make ahead breakfast casseroles that are both tasty and good for you.

FAQ

What are the key ingredients for gluten free breakfast casseroles?

Gluten free breakfast casseroles need gluten-free flours like almond or coconut flour. You’ll also need eggs, dairy-free milk, and your favorite veggies, proteins, and spices. This mix makes a tasty and healthy dish.

Can I make gluten free breakfast casseroles ahead of time?

Yes, many recipes are made to be prepared ahead. These casseroles can be refrigerated overnight and baked in the morning. They’re perfect for busy days or brunches.

What are some common substitutes for dairy in gluten free breakfast casseroles?

For dairy-free options, try unsweetened almond, coconut, or oat milk. You can also use dairy-free cheese made from cashews or soy for a creamy texture.

Can I make gluten free breakfast casseroles vegetarian or vegan?

Definitely! To make them vegetarian or vegan, skip the meat and add tofu, tempeh, or veggies. Just swap out any non-vegan ingredients for vegan ones.

What kitchen tools are essential for making gluten free breakfast casseroles?

You’ll need a good baking dish, a mixing bowl, and a whisk or hand mixer. Also, a cutting board and sharp knives for prep. A food processor or blender is handy for smooth batters or sauces.

Delicious Din Tai Fung Cucumber Recipe – Perfect for Any Meal

din tai fung cucumber recipe

Have you ever tried the famous cucumber salad from Din Tai Fung? If not, you’re in for a treat! This refreshing dish from Taiwan has won hearts around the world. It’s loved for its perfect mix of flavors and textures.

As a home cook, I love making this recipe. It makes even simple meals special with its bright and refreshing taste.

Key Takeaways

  • Din Tai Fung’s cucumber recipe is a popular Taiwanese dish that has gained global acclaim.
  • The recipe features a perfect balance of flavors, with a refreshing and crunchy texture.
  • Recreating this dish at home can be a rewarding experience, adding a touch of culinary delight to any meal.
  • The recipe is versatile, serving as an excellent accompaniment to a variety of dishes.
  • Mastering the Din Tai Fung cucumber recipe can impress your family and friends with your culinary skills.

Introduction to Din Tai Fung’s Famous Cucumber Dish

Explore the deep history and cultural importance of Din Tai Fung’s famous authentic Taiwanese cuisine and its loved dim sum cucumber appetizer. This dish has won hearts globally, becoming a top pick for food lovers everywhere.

History of Din Tai Fung Restaurant

Din Tai Fung started in 1958 as a small shop in Taipei, Taiwan. It began as a cooking oil store but grew into a worldwide food empire. It’s known for its authentic Taiwanese cuisine and careful attention to every detail.

The dim sum cucumber appetizer is a key dish at Din Tai Fung. It shows the restaurant’s dedication to keeping Taiwanese cuisine’s rich flavors and traditions alive. The mix of fresh cucumbers and a light seasoning has made it a favorite globally.

“Din Tai Fung’s cucumber dish is a testament to the beauty of simplicity. The flavors are so clean and pure, yet they come together in a way that is truly memorable.”

Dim Sum Cucumber Appetizer

Essential Ingredients for Din Tai Fung Cucumber Recipe

To make the famous Din Tai Fung smashed cucumber salad or spicy cucumber appetizer, you need the right ingredients. You’ll want to find the perfect cucumbers and a few key seasonings to get that authentic Taiwanese taste.

The base of this dish is the cucumber. Choose thin-skinned English or Persian cucumbers. They keep their shape and texture well. Adding thinly sliced Persian shallots can also add more flavor.

The dressing is what makes the cucumbers pop. It’s made with strong ingredients like:

  • Garlic – Minced or grated garlic adds a pungent aroma and depth of flavor.
  • Sesame oil – A few drops of toasted sesame oil lend a nutty, aromatic note.
  • Soy sauce – A splash of soy sauce provides the essential umami element.
  • Rice vinegar – A touch of rice vinegar adds a subtle tang to balance the other flavors.
  • Chili oil or flakes – For those who enjoy a hint of heat, a sprinkle of chili oil or flakes can elevate the dish.

With these ingredients, you’re ready to make the smashed cucumber salad or spicy cucumber appetizer just like Din Tai Fung.

Smashed Cucumber Salad

“The key to a great Din Tai Fung cucumber dish is in the perfect balance of flavors – the cool, crisp cucumbers, the savory-sweet dressing, and just a hint of heat.”

Kitchen Tools and Equipment You’ll Need

To make the famous din tai fung cucumber recipe dish at home, you need some key tools. From the right knife to the best storage containers, having the right tools is crucial. They help in making a simple cucumber snack or a healthy cucumber recipe.

Proper Knife Selection

For perfect cucumber slices, a sharp, high-quality knife is essential. A chef’s knife or a Japanese-style santoku knife works best. They give you the precision and control needed to cut the cucumbers just right.

Additional Kitchen Essentials

  • Cutting board: A sturdy, non-slip cutting board is essential for safe and efficient cucumber preparation.
  • Mixing bowls: You’ll need a few different-sized mixing bowls to combine the cucumber slices with the seasonings.
  • Tongs or forks: These tools will come in handy when tossing and arranging the seasoned cucumber slices.

Storage Containers

After making your tasty Din Tai Fung-style cucumbers, you’ll need the right containers to keep them fresh. Airtight glass or BPA-free plastic containers are perfect for storing leftovers in the fridge.

kitchen tools and equipment for easy cucumber snack

Having the right tools and equipment at your fingertips can make the process of creating an easy cucumber snack or healthy cucumber recipe much more efficient and enjoyable.

Selecting and Preparing the Perfect Cucumbers

Creating the iconic asian cucumber side dish from Din Tai Fung starts with the cucumbers. This refreshing cucumber dish needs the right texture and taste. The cucumber is the main ingredient.

To get the authentic taste, follow these steps for choosing and prepping the cucumbers:

  1. Choose firm, crisp cucumbers. Stay away from soft, wilted, or blemished ones.
  2. Go for cucumbers that are 6-8 inches long. Sizes that are too big or small can throw off the dish.
  3. If the cucumbers have thick skins, lightly peel them. This keeps some of the green color and nutrients.
  4. Wash the cucumbers well under cool water. Gently scrub them to remove dirt or residue.
  5. Use a sharp knife to slice the cucumbers into thin, even rounds. Make them about 1/4-inch thick. This helps with even cooking and texture.
Sliced Asian Cucumbers

By carefully picking and preparing the cucumbers, you’ll create a balanced and refreshing cucumber dish. It will capture the essence of Din Tai Fung’s famous asian cucumber side dish.

Step-by-Step Din Tai Fung Cucumber Recipe Instructions

Get ready to make the famous Din Tai Fung cucumber recipe in your kitchen. This guide will show you how to get the real Taiwanese taste.

Cucumber Preparation Technique

Choose fresh, crisp cucumbers first. Use a sharp knife to cut them into thin, diagonal slices, about 1/4 inch thick. This cut makes the cucumbers look good and soak up the dressing better.

Seasoning Process

In a bowl, mix the sliced din tai fung cucumber recipe with tasty seasonings. Add a bit of sesame oil, some white sugar, and a pinch of salt. Toss everything until the cucumbers are well coated.

Final Assembly Tips

  1. Put the seasoned cucumbers on a plate or bowl, making them look nice.
  2. To make the taiwanese cucumber salad recipe taste even better, add some toasted sesame seeds or chopped scallions.
  3. Chill the dish in the fridge for at least 30 minutes before serving. This lets the flavors mix well.

By following these steps, you can make the famous Din Tai Fung cucumber dish at home. Enjoy the taste of Taiwan on your table.

Secret Tips for Achieving Authentic Taiwanese Flavor

Mastering authentic Taiwanese cuisine is all about the details. For the spicy cucumber appetizer from Din Tai Fung, a few tips can help you get it right. These tips will guide you to that unique Taiwanese taste.

The marinating time is crucial. Let the cucumbers soak for 30 minutes to an hour. This step blends the cucumber’s freshness with the rich flavors.

The right mix of cucumber and seasoning is also key. Use 3 parts cucumber to 1 part seasoning. This way, the cucumbers shine, and the seasonings enhance them.

  1. Adjust the spice to your liking. Start with a little chili oil and add more until it’s just right.
  2. Chill the marinated cucumbers for 30 minutes before serving. This lets the flavors mix and the cucumbers stay crunchy.
  3. For a real touch, add toasted sesame seeds or chopped scallions on top.

With these tips, you’ll make a spicy cucumber appetizer that’s true to authentic Taiwanese cuisine. Enjoy it in your own kitchen.

“The key to a truly authentic Din Tai Fung-style cucumber dish lies in the marinating process.”

Serving Suggestions and Presentation Ideas

The dim sum cucumber appetizer from Din Tai Fung is perfect for many occasions. It’s great for an Asian cucumber side dish party or a simple meal. You can serve it in many ways to make your meal special.

Traditional Plating Methods

For a true Taiwanese feel, use a white porcelain plate or bowl. Place the cucumber slices in a way that looks good. This lets the green color and shape be the main focus.

Try serving it in small bowls for a more personal touch. It makes the meal feel more intimate.

Garnishing Options

Make your dim sum cucumber appetizer look better with garnishes. Sprinkle toasted sesame seeds or chopped cilantro on top. Thin slices of red chili peppers add color and a bit of heat.

To make it look even better, serve it with other dishes. Try it with steamed buns, fried dumplings, or jasmine rice. This mix of textures and tastes looks amazing.

When serving the Din Tai Fung cucumber dish, keep it simple. Let the fresh flavors be the main attraction. Try different ways of plating and garnishing to find the best look for this Asian cucumber side dish.

Storage and Make-Ahead Instructions

To keep your Din Tai Fung cucumber salad fresh, store it right. Put leftovers in an airtight container and chill for up to 3 days. This way, your snack stays crisp and tasty.

Prep the salad ahead of time for easy serving. Just chop the cucumbers and mix the seasoning. Store them in the fridge separately. Then, when you’re ready, mix everything together for a quick healthy cucumber recipe.

This salad will quickly become a favorite at home. Its bright flavors and crunchy texture are great with many dishes. Enjoy every bite and bring a taste of Taiwan into your kitchen.

FAQ

What is the origin of the Din Tai Fung cucumber recipe?

The Din Tai Fung cucumber recipe comes from traditional Taiwanese cuisine. It’s a favorite at Din Tai Fung, making it popular worldwide.

What makes the Din Tai Fung cucumber recipe so special?

This recipe is special because of its perfect flavor mix. It uses fresh cucumbers and a spicy dressing. This makes it a delightful dish.

What are the key ingredients in the Din Tai Fung cucumber recipe?

The main ingredients are fresh cucumbers, garlic, sesame oil, and soy sauce. These ingredients create the dish’s unique taste.

What kitchen tools and equipment are needed to make the Din Tai Fung cucumber recipe?

You’ll need a sharp knife for slicing cucumbers. Also, a mixing bowl, spoons, and containers for leftovers are essential.

How should the cucumbers be prepared for the Din Tai Fung recipe?

Choose fresh cucumbers and follow the prep steps. This ensures the authentic flavor of Din Tai Fung.

What are the secret tips for perfecting the Din Tai Fung cucumber recipe?

To get the authentic taste, adjust marinating time and find the right cucumber-to-seasoning ratio. Also, balance the spice to your liking.

How should the Din Tai Fung cucumber dish be served and presented?

Serve it as an appetizer, side dish, or part of a Taiwanese meal. Use traditional plating and garnishes to enhance its look and taste.

Can the Din Tai Fung cucumber recipe be made ahead of time?

Yes, you can make it ahead. Follow storage and make-ahead tips to keep it fresh. This way, you can enjoy it even when you’re busy.

Traditional Recipes from the Byzantine Empire – Culinary Treasures

recipes from the byzantine empire

As you hold this book, imagine the stories it could tell. Stories of spice-laden feasts and grand banquets. These tales bring to life the vibrant cultures that merged, creating recipes from the byzantine empire cuisine.

The flavors of this era can take you back in time. You’ll feel the sights, sounds, and smells of Constantinople’s grand halls.

In this journey, you’ll discover the Byzantine Empire’s culinary secrets. This legacy has shaped the Mediterranean and beyond. It’s a mix of Greek and Roman traditions, influenced by religion and social customs.

Key Takeaways

  • Discover the rich tapestry of flavors that defined Byzantine cuisine, a unique blend of Greek and Roman culinary traditions.
  • Explore the religious and social customs that influenced the dining practices of the Byzantine Empire.
  • Learn about the essential ingredients, cooking techniques, and kitchen tools that were integral to Byzantine culinary practices.
  • Delve into the bread-making and pastry traditions that were hallmarks of the Byzantine culinary heritage.
  • Uncover the secrets of the imperial kitchens and the unique recipes that graced the tables of the Byzantine aristocracy.

Understanding Byzantine Culinary Heritage Through Time

Byzantium’s food culture is a mix of Greek and Roman traditions. It was shaped by the Eastern Roman Empire’s history. The food changed over time, showing the impact of culture, religion, and society.

The Fusion of Greek and Roman Influences

The Byzantine Empire’s food was a blend of Greek and Roman ways. Ancient Greek dishes like dolmades and moussaka were part of Byzantine meals. The Romans added their own touches, like garum and puls.

Religious Impact on Byzantine Food Culture

Orthodox Christianity deeply influenced Byzantine food. Orthodox Christian feast foods and fasting periods, like Lent, shaped the cuisine. Foods like koliva became key parts of eastern Roman empire dishes and byzantium culinary heritage.

Social Classes and Dining Customs

The Byzantine social hierarchy affected food. The rich had grand feasts, while the poor had simpler meals. The way food was made and served showed the differences between social classes in byzantium culinary heritage.

byzantium culinary heritage

“The Byzantine Empire’s culinary legacy is a testament to the enduring influence of diverse cultural exchanges and the interplay of faith, tradition, and social structures.”

Essential Ingredients in Byzantine Cuisine

Dive into the heart of recipes from the Byzantine Empire and find out the secret ingredients. These flavors defined this captivating culinary legacy. From the bustling markets of Constantinople cooking to the fragrant kitchens of the Ottoman Empire, Byzantine cuisine still tantalizes our taste buds.

At the heart of this rich culinary heritage were staple ingredients. Grains like wheat, barley, and millet were key, often turned into breads, porridges, and pilafs. Legumes, including lentils, chickpeas, and fava beans, offered protein and fiber.

  • Olive oil: A signature ingredient in Byzantine cooking, prized for its versatility and health benefits.
  • Nuts and seeds: Almonds, walnuts, and sesame seeds added crunch and nutty flavors to both savory and sweet dishes.
  • Spices and herbs: A diverse array of spices, including cinnamon, cloves, black pepper, and cumin, along with fragrant herbs like oregano, mint, and dill, imparted unique aromas and tastes.
  • Dairy products: Sheep and goat’s milk were used to create a variety of cheeses, yogurt, and other dairy-based delicacies.

These essential ingredients, combined with the region’s abundant seafood and seasonal produce, formed the backbone of recipes from the Byzantine Empire. They created a culinary tapestry that continues to captivate and inspire cooks around the world.

“The flavors of the Byzantine Empire were a harmonious blend of Greek, Roman, and Middle Eastern influences, a testament to the cultural richness of this remarkable era.”

byzantine cuisine ingredients

Explore the captivating world of constantinople cooking and discover how these iconic ingredients shaped Byzantine cuisine. They paved the way for the greek-influenced ottoman recipes that still delight our senses today.

Recipes From the Byzantine Empire: Traditional Dishes You Can Make Today

Discover the secrets of medieval Greek recipes and the rich flavors of Byzantine cuisine. From Istanbul’s markets to Constantinople’s kitchens, we invite you to explore. Learn the authentic preparation methods and common cooking techniques that defined this historical gastronomy.

Authentic Preparation Methods

Dive into the traditional cooking methods of the Byzantine era. Learn to slow-roast meats over an open fire and craft delicate phyllo dough by hand. Also, master the balance of sweet and savory flavors, essential in the Byzantine kitchen.

Common Cooking Techniques

  • Stewing and braising to tenderize tough cuts of meat
  • Layering flavors through the use of spices, herbs, and aromatics
  • Baking breads and pastries in wood-fired ovens
  • Pickling and preserving seasonal produce for year-round enjoyment

Kitchen Tools and Equipment

The Byzantine Empire’s kitchens had specialized tools and equipment. From copper pots and pans to intricate ceramic serving dishes, discover how these tools shaped medieval Greek recipes and Byzantine cuisine.

medieval greek recipes

“Cooking in the Byzantine Empire was an art form, where flavors were carefully balanced and techniques were passed down through generations.”

Byzantine Bread and Pastry Making Traditions

Discover the rich history of bread and pastry making in the Byzantine Empire. Bread was key in daily life and religious rituals. Constantinople’s kitchens were filled with various loaves, rolls, and sweet treats.

The art of Byzantine baking showed the mix of Greek, Roman, and Middle Eastern flavors. See how recipes from the byzantine empire changed over time. This change was part of the constantinople cooking and eastern roman empire dishes traditions.

Staple Breads of the Byzantine Era

  • Artos: A leavened wheat bread, often adorned with intricate designs, that held deep religious significance.
  • Dipyros: A twice-baked bread that was a favorite among the working classes.
  • Kolyva: A sweetened wheat berry dish prepared for Orthodox Christian memorial services.

Sweet Delights of the Byzantine Bakery

  1. Kourkouta: Flaky, honey-drenched pastries that echoed the flavors of the Byzantine Empire’s Middle Eastern neighbors.
  2. Galatopita: A rich custard tart that showcased the region’s abundant dairy products.
  3. Melomakarona: Fragrant, honey-soaked cookies that are still enjoyed during the Christmas season in modern-day Greece.

“The aroma of freshly baked bread and the sight of intricate pastries were integral to the fabric of Byzantine life, from the humblest homes to the grandest imperial feasts.”

byzantine bread and pastries

Explore the stories and flavors of recipes from the byzantine empire, constantinople cooking, and eastern roman empire dishes. Dive into the world of Byzantine bread and pastry making traditions.

Sacred Feasts and Orthodox Christian Dining Customs

Discover the deep bond between orthodox christian feast foods and the byzantium culinary heritage of medieval Greece. In the Byzantine world, food was key in religious life. It was tied to fasting, festivals, and symbolic dishes, all connected to the Orthodox Christian faith.

Fasting Period Recipes

During fasting periods, medieval greek recipes changed to fit dietary rules. Legumes, grains, veggies, and seafood became common. This showed Byzantine cooks’ skill in making tasty, meatless meals.

Festival Foods and Celebrations

  • Major feast days brought special orthodox christian feast foods, each with its own meaning.
  • Breads, pastries, and baked goods were important, showing the value of grain harvests and wheat in Byzantine food.
  • Dishes like roasted lamb or fish were key to big religious festivals.

Religious Symbolism in Byzantine Dishes

The byzantium culinary heritage was full of religious symbols. From bread shapes to ingredients, dishes carried deep meanings. They showed the faith and its teachings visually.

“Food was not just for eating, but a way to connect the physical and spiritual in Byzantine society.”

Exploring Byzantine sacred feasts and dining customs reveals a world of culinary traditions. These traditions show the strong mix of faith and food in this remarkable civilization.

Constantinople’s Royal Kitchen: Imperial Recipes and Customs

Explore the culinary traditions of the Byzantine imperial court in Constantinople (modern-day Istanbul). Discover the lavish kitchens of the grand palace. Here, expert chefs made extraordinary dishes for the empire’s elite.

The imperial kitchens of Constantinople were known for their opulence and innovation. Spices from around the empire, like cinnamon and saffron, were used in intricate recipes. These dishes amazed the palates of the Byzantine aristocracy.

Dining in the Byzantine imperial court was a grand affair. Guests were greeted in decorated halls, where they enjoyed many courses. The tables were set with silver and gold, and the air was filled with music and the scent of food.

“The grandeur of the imperial table was a symbol of the empire’s power and prestige, reflecting the wealth and sophistication of the Byzantine civilization.”

The imperial kitchens also upheld the empire’s traditions. During fasting periods, chefs made delicious meatless dishes for the Orthodox Christian faith. The preparation of istanbul historical gastronomy for sacred feasts honored the empire’s spiritual heritage.

The culinary legacy of the Byzantine imperial court still fascinates today. By exploring these remarkable recipes, we learn about the empire’s cultural and gastronomic richness.

Mediterranean Influences on Byzantine Cooking

The Byzantine Empire’s food traditions were shaped by the Mediterranean’s diverse cultures and trade routes. Its location at the crossroads of Europe, Asia, and Africa made it a key player in the spice trade. This had a big impact on Byzantine cuisine.

Spice Trade Impact

Exotic spices like black pepper, cinnamon, and cloves changed Byzantine dishes. These spices were highly valued and used in both savory and sweet recipes. They added depth and complexity to byzantine cuisine.

The empire’s spice trade also brought in greek-influenced ottoman recipes and other flavors from across the Mediterranean.

Regional Variations

  • Byzantine cooking varied greatly due to the empire’s vast geography and cultural influences. Coastal areas had more seafood and Mediterranean dishes. Inland regions focused on meat, grains, and local produce.
  • Constantinople, the imperial capital, was a mix of culinary traditions. It blended byzantine cuisine with Greek, Persian, and other influences.
  • Monasteries and religious places helped keep traditional eastern roman empire dishes alive. They did this especially during fasting and religious times.

The mix of Mediterranean flavors and techniques in Byzantine cooking still fascinates many. It gives us a glimpse into the empire’s rich and complex history.

Byzantine Wine Culture and Beverage Traditions

Dive into the fascinating world of Byzantine wine culture and traditions. The Byzantine Empire, based in Constantinople (now Istanbul), had a long history of wine making. Its unique drinking customs were deeply connected to its social, religious, and culinary heritage.

The Byzantine Empire was known for its wide variety of wines. Its location at the crossroads of trade routes gave it access to many grape varieties and spices. They made everything from strong reds from the Anatolian highlands to fresh whites from the Aegean islands. These wines showed the empire’s cultural and geographic diversity.

The Byzantines also had a complex beverage culture. They enjoyed drinks like rosewater-infused beverages at the imperial court and fortified wines in Orthodox Christian ceremonies. These drinks were important in Byzantine society and religion. Discover the recipes from the Byzantine Empire, Byzantium’s culinary heritage, and Istanbul’s historical gastronomy to see the era’s richness and complexity.

FAQ

What are the key ingredients that defined Byzantine cuisine?

Byzantine cuisine relied on staples like wheat, barley, and rice. Olive oil and a variety of fruits, vegetables, and herbs were also key. Spices such as cinnamon, pepper, and saffron added flavor. Dairy products like cheese and yogurt were also common.

How did religion influence the food culture of the Byzantine Empire?

Orthodox Christian faith deeply influenced Byzantine cuisine. Fasting periods, like Lent, led to meatless dishes. Religious festivals brought out traditional foods with deep meanings.

What were some of the common cooking techniques used in the Byzantine Empire?

Byzantine cooks used roasting, baking, boiling, and simmering. They layered ingredients and made sauces and marinades. Spices and herbs were used to boost flavors.

How did the Byzantine Empire’s location influence its culinary heritage?

The empire’s location at the Mediterranean crossroads led to culinary exchanges. Trade routes brought exotic spices and ingredients, shaping its unique cuisine.

What role did the imperial court play in shaping Byzantine culinary traditions?

The imperial court in Constantinople was known for its lavish dining. Rare ingredients showcased the empire’s wealth. This set trends for the elite and influenced the general population.

What is the significance of bread and pastries in Byzantine culinary heritage?

Bread was central in Byzantine life and religion. Bakers made various breads and pastries. These foods were staples and held symbolic meanings in Orthodox ceremonies.

How can you recreate authentic Byzantine dishes in your modern kitchen?

To make Byzantine dishes, learn traditional methods and use period tools. Adapt recipes with local ingredients to keep the essence of Byzantine cuisine alive.

Fluffy Matcha Muffin Recipe with Almond Flour – A Healthy, Gluten-Free Treat

matcha muffin recipe with almond flour

As a busy mom, I’m always searching for quick, healthy snacks my family will enjoy. I found this amazing matcha muffin recipe with almond flour. These treats are not only tasty but also gluten-free and full of antioxidants. They’re perfect for breakfast or a guilt-free snack.

Key Takeaways

  • Matcha muffins with almond flour are a healthy, gluten-free treat
  • Matcha green tea provides powerful antioxidants and a unique, earthy flavor
  • Almond flour adds moisture, texture, and nutritional benefits to the muffins
  • This recipe is easy to make and ready in just 30 minutes
  • Enjoy these muffins for breakfast, a snack, or a delightful dessert

Why These Matcha Almond Flour Muffins Are Your New Favorite Healthy Treat

These green tea muffins are made with matcha powder and almond flour. They are a healthy treat that you’ll love. They are packed with nutrients and fit many diets.

Health Benefits of Matcha Green Tea

Matcha powder is a superfood in these muffins. It’s full of antioxidants that fight off bad stuff in our bodies. It also has caffeine, which gives you a gentle energy boost.

Advantages of Using Almond Flour

Using almond flour makes these muffins gluten-free and full of nutrients. Almond flour has vitamins, minerals, and healthy fats. It’s great for those who follow a paleo or low-carb diet.

Perfect for Special Dietary Needs

  • Gluten-free: The almond flour base ensures these muffins are free from gluten, catering to those with dietary restrictions.
  • Paleo-friendly: With their simple, whole-food ingredients, these green tea muffins are the perfect paleo-approved treat.
  • Potentially keto-friendly: Depending on the specific recipe and portion sizes, these matcha powder muffins may also fit into a ketogenic diet.

Try the mix of matcha and almond flour in these muffins. You’ll see why they’re your new favorite snack!

matcha powder muffins

Essential Ingredients for Perfect Matcha Muffins

Making matcha muffins with almond flour is easy with the right ingredients. You need a few key items for the perfect taste and texture.

The main ingredient is matcha powder. This fine, green tea powder gives your muffins a unique earthy and sweet flavor. Choose a culinary-grade matcha for the best taste.

Almond flour is crucial for structure and a soft crumb. It’s gluten-free and made from ground almonds. It adds a moist, nutty flavor to your vegan muffins.

Sweeteners like maple syrup, coconut sugar, or dates balance the matcha’s bitterness. Flax or chia seeds, applesauce, or mashed bananas act as binding agents. They hold the muffins together without eggs.

Adding vanilla extract, lemon zest, or a pinch of salt can enhance the flavor. These ingredients round out the recipe.

“The key to perfect matcha muffins lies in the careful balance of high-quality ingredients.”

With these ingredients, you’re ready to make delicious, healthy matcha almond flour muffins. They’ll impress your family and friends.

matcha powder

Kitchen Tools and Equipment You’ll Need

To bake delicious Japanese pastries or gluten-free treats, you need more than ingredients. You’ll also need the right tools and equipment. Let’s look at what you need to make those fluffy matcha muffins with almond flour.

Mixing Equipment Essentials

You’ll need a good mixing bowl set, preferably stainless steel or glass. These bowls are durable and make mixing easy. A strong whisk or hand mixer is also key to get the batter just right.

Baking Tools Required

  • A non-stick muffin tin for perfect matcha muffins
  • A spoon or scoop for even batter distribution
  • A silicone spatula for smooth batter transfer and easy muffin removal

Optional Accessories

While not necessary, some tools can enhance your baking experience:

  1. A kitchen scale for precise ingredient measurements
  2. A pastry bag or piping tip for decorative muffin tops
  3. A cooling rack for even cooling of your muffins

With these tools and equipment, you’re ready to make delicious Japanese pastries and gluten-free treats.

kitchen tools

“The right tools can make all the difference in the kitchen, especially when baking up a storm.”

Step-by-Step Matcha Muffin Recipe with Almond Flour

Try the tasty mix of matcha and almond flour in this simple recipe. It’s perfect for those watching their health or following a gluten-free diet. These muffins are light and delicious, making them a favorite treat.

  1. Preheat your oven to 375°F (190°C). Grease a 12-cup muffin tin or line it with paper liners.
  2. In a medium bowl, whisk together 2 cups of almond flour, 1/4 cup of matcha powder, 1 teaspoon of baking powder, and 1/4 teaspoon of salt. Set aside.
  3. In a separate bowl, beat 3 large eggs, 1/2 cup of honey, and 1/3 cup of melted coconut oil until well combined.
  4. Gently fold the wet ingredients into the dry ingredients until just combined, being careful not to overmix.
  5. Spoon the batter evenly into the prepared muffin tin, filling each cup about 3/4 full.
  6. Bake the matcha muffins for 18-22 minutes, or until a toothpick inserted into the center comes out clean.
  7. Allow the muffins to cool in the tin for 5 minutes before transferring them to a wire rack to cool completely.

Enjoy these tasty matcha muffin recipe with almond flour as a healthy, gluten-free baking treat. The mix of earthy matcha and nutty almond flour makes a satisfying and nutritious snack or breakfast.

matcha muffin recipe with almond flour

Tips for Achieving the Perfect Muffin Texture

Baking healthy, gluten-free muffins is a delicate task. But with the right techniques, you can get a fluffy and tender texture. We’ll explore temperature control, mixing methods, and storage tips to help you excel in gluten-free baking.

Temperature Control Secrets

Keeping the right temperature is key for the perfect muffin. Make sure your oven is at the right temperature before baking. Don’t open the oven door too often, as it can mess with the temperature and baking.

Use the oven light to check on your muffins instead. This way, you can avoid uneven baking.

Mixing Techniques

Mixing your gluten-free batter is important. Avoid overmixing, as it can make the muffins dense and tough. Instead, gently fold the ingredients together until they’re just combined.

This gentle approach will help you get a light and airy texture in your muffins.

Storage Guidelines

  • Store your baked and cooled muffins in an airtight container at room temperature for up to 3 days.
  • For longer storage, freeze the muffins in an airtight container or resealable bag for up to 3 months.
  • To reheat, place the frozen muffins in a 350°F oven for 5-10 minutes, or until warmed through.

By following these tips, you can make gluten-free, healthy muffins that are sure to impress. Enjoy your fluffy, delicious treats!

Customization Options and Add-ins

The beauty of these keto-friendly treats lies in their versatility. The basic matcha muffin recipe with almond flour is already a delightful treat. But, there are endless ways to customize and elevate it to suit your personal preferences or dietary needs. Whether you’re craving a more paleo-friendly snack or simply want to add a personal touch, the options are endless.

One way to customize your matcha muffins is by incorporating various add-ins. Consider adding a handful of chopped nuts like almonds or walnuts for a satisfying crunch. Alternatively, sprinkle in some seeds like chia or flaxseeds for an extra boost of nutrition. For a pop of sweetness, fold in fresh or dried berries such as raspberries, blueberries, or even diced apples.

If you’re following a specialized diet, such as keto or paleo, you can easily adapt the recipe to suit your needs. For a keto-friendly version, simply replace the almond flour with a low-carb alternative like coconut flour or ground flaxseed. To make the muffins paleo-friendly, you can swap out the sweetener for a natural option like honey or maple syrup.

The possibilities are endless when it comes to customizing your matcha muffins. Embrace your creativity and experiment with different flavors and textures to find your personal favorite. Whether you prefer a nutty crunch, a burst of fruity sweetness, or a more specialized dietary approach, these muffins can be tailored to your taste buds and dietary preferences.

Troubleshooting Common Baking Issues

Baking gluten-free muffins with matcha powder can be tricky. But don’t worry, we’ve got you covered! Let’s look at some common problems and how to fix them.

Texture Problems and Solutions

If your matcha muffins are too dense or dry, there are a few things you can do. First, avoid overmixing the batter. This can make the muffins tough and rubbery. Instead, gently mix the ingredients until they’re just combined.

Also, adding a bit more milk or plant-based milk can help. This will keep the muffins moist and fluffy.

If the muffins are too wet or gummy, try adding more almond flour. Or reduce the liquid ingredients a bit. Finding the right balance is key, depending on your ingredients and oven.

Flavor Adjustments

If the matcha flavor isn’t strong enough, add more matcha powder. Start with an extra teaspoon or two in the dry ingredients. If it’s too strong, cut back on the matcha and add a bit more vanilla or sweetener.

To deepen the flavor, add a pinch of cinnamon, a splash of lemon juice, or some chopped nuts or dried fruit. These can enhance the matcha and almond flour flavors.

“Baking is a science, but with a little experimentation, you can find the perfect formula for your gluten-free matcha muffins.”

The joy of baking comes from trying new things. Don’t be afraid to adjust and find the perfect texture and flavor. With patience and persistence, you’ll soon be making amazing matcha muffins.

Nutritional Information and Dietary Benefits

These healthy muffins are made with matcha and almond flour. They are great for keto-friendly treats and paleo snacks. Let’s explore their benefits!

Each muffin has about 160 calories. It has 12 grams of fat, 8 grams of carbs (4 grams of fiber), and 6 grams of protein. This makes them perfect for keto or paleo diets. They help with weight management and health.

Matcha green tea powder in these muffins adds antioxidants. It’s full of catechins, which are good for your heart and brain.

Using almond flour instead of wheat flour makes them gluten-free. Almond flour is rich in fiber and healthy fats. It helps you feel full and supports your health.

If you want a keto-friendly treat, a paleo snack, or just a tasty, healthy muffin, try this recipe. It’s delicious and good for you.

Serving Suggestions and Pairing Ideas

Make your matcha green tea muffin experience even better with creative serving ideas. These Japanese pastries, made with almond flour, are perfect for many ways of enjoyment.

For a traditional Japanese tea time, pair the green tea muffins with a steaming cup of ceremonial-grade matcha tea. The tea’s earthy, umami flavors will match the muffin’s sweet and grassy notes. Add a bit more matcha powder on top for a beautiful look.

Want something different? Try pairing your Japanese pastries with a fragrant, floral oolong tea. The oolong’s floral notes will blend well with the matcha muffin, making a perfect flavor mix.

For a refreshing twist, serve the muffins with a chilled glass of unsweetened, premium green tea. The tea’s coolness will contrast nicely with the muffin’s warmth, making a refreshing pair.

Feel adventurous? Mix the muffins into a modern Japanese-inspired dessert spread. Place them with other Japanese pastries like mochi, wagashi, or a creamy matcha cheesecake. This makes a stunning and tasty tea-time experience.

No matter how you serve and enjoy these green tea muffins, they’ll surely please your taste buds. They’ll take you to a peaceful, Japanese-inspired moment of indulgence.

Storage Tips and Shelf Life

To keep your matcha almond flour muffins fresh, proper storage is crucial. Once they cool down, store them in an airtight container at room temperature for up to 3 days. For longer freshness, refrigerate them. This will keep their texture and prevent drying out for up to 5 days.

Freezing is the best option for longer storage. Wrap each muffin in plastic wrap or foil, then put them in a freezer-safe bag or container. Frozen muffins can last up to 3 months. To enjoy, thaw at room temperature or reheat in the oven or microwave until warm and fluffy.

For the best texture and flavor, store them in a cool, dry place. Avoid direct sunlight or moisture. With these tips, you can enjoy your homemade treats for days.

FAQ

What are the main ingredients in these matcha muffins?

The main ingredients are high-quality matcha powder, almond flour, and eggs or vegan substitutes. You also need a sweetener and baking soda or powder. Optional add-ins include vanilla extract, lemon zest, or chopped nuts for extra flavor and texture.

Are these matcha muffins gluten-free?

Yes, they are gluten-free because they use almond flour instead of wheat flour. This makes them perfect for those who follow a gluten-free diet.

Can I make these muffins vegan?

Absolutely! To make them vegan, use flax or chia eggs and non-dairy milk or yogurt instead of eggs and dairy products.

What are the health benefits of matcha powder?

Matcha green tea powder is full of antioxidants, vitamins, and minerals. It boosts metabolism, improves focus, and gives a gentle caffeine boost without jitters.

What are the advantages of using almond flour?

Almond flour is a healthy gluten-free option. It’s rich in healthy fats, protein, and fiber. It makes baked goods like these muffins tender and moist.

What equipment do I need to make these matcha muffins?

You’ll need a mixing bowl, whisk, spatula, and a 12-cup muffin tin. A small cookie scoop or ice cream scooper helps portion the batter evenly. A matcha whisk or bamboo brush ensures the matcha powder is mixed well.

How do I store these matcha muffins?

Store them in an airtight container at room temperature for up to 3 days. You can also freeze them for 2-3 months. Thaw at room temperature or reheat briefly in the oven or microwave.

Can I customize these matcha muffins?

Absolutely! You can add chopped nuts, seeds, chocolate chips, or dried fruit. Adjust the sweetness or use different sugar substitutes to fit your diet.

What are some common issues I should troubleshoot when baking these muffins?

Issues like dry texture, trouble rising, or strong matcha flavor can happen. Avoid overmixing, adjust matcha amount, and check your oven temperature. Proper storage and cooling help keep the texture right.

How do these matcha muffins fit into a healthy diet?

These muffins are nutritious and filling. They’re low in carbs, high in fiber and protein, and packed with antioxidants from matcha. They’re great for keto, paleo, or low-carb diets as a healthy snack or breakfast.

Vibrant Purple Black Bean Soup Recipe – A Healthy 30-Minute Delight

purple black bean soup recipe

Winter brings a chill that only a warm, comforting soup can beat. But this isn’t just any soup. It’s a vibrant, healthy purple black bean soup recipe. It’s creamy, colorful, and ready in just 30 minutes. It’s perfect for busy weeknights or anyone looking for a healthy meal.

Key Takeaways

  • Vibrant purple black bean soup that’s ready in 30 minutes
  • Packed with nutrients and health benefits from black beans and purple vegetables
  • Creamy, comforting, and satisfying for a cozy winter meal
  • Easy to make with simple, accessible ingredients
  • Versatile recipe that can be customized to your taste preferences

Essential Ingredients for Your Purple Black Bean Soup

To make a delicious purple black bean soup, you need the right mix of fresh produce, pantry items, and toppings. This guide will help you pick the best ingredients for a vibrant and healthy dish.

Fresh Produce and Aromatics

  • Purple cabbage: This vibrant vegetable gives the soup its purple color and a hint of sweetness.
  • Yellow onion: Sautéed onions add a rich flavor and aroma to the soup.
  • Garlic cloves: Minced garlic boosts the soup’s taste, blending well with other ingredients.
  • Fresh cilantro (optional): A sprinkle of cilantro adds a fresh and fragrant touch.

Pantry Staples and Seasonings

  1. Black beans: The main ingredient, black beans make the soup creamy and flavorful.
  2. Vegetable broth: This broth is essential for the right soup consistency.
  3. Cumin, chili powder, and salt: These seasonings enhance the natural flavors and add depth.

Optional Garnishes and Toppings

For extra color and texture, try these optional toppings:

  • Diced avocado: Its creamy texture and mild taste pair well with the soup.
  • Crumbled feta or queso fresco: These cheeses add a tangy contrast.
  • Toasted pumpkin seeds: Known as pepitas, they offer a crunchy texture and nutty flavor.
bean soup ingredients

“The key to a truly remarkable purple black bean soup recipe lies in the careful selection and combination of fresh, flavorful ingredients.”

Health Benefits of Black Beans and Purple Vegetables

Enjoy a bowl of black bean soup or purple bean soup for more than just taste. You’ll also get a boost of health benefits. Black beans are full of protein and fiber, key for a healthy diet.

The purple veggies in this soup, like purple cabbage and carrots, are packed with antioxidants. These compounds fight off harmful free radicals, helping your cells stay healthy. Adding these healthy soup recipes to your diet can be a tasty way to get more nutrients and live healthier.

“Eating a variety of colorful vegetables, like those found in this purple black bean soup, can provide a wide range of beneficial plant compounds that support our overall health and well-being.”

If you want to improve your digestion, boost your immune system, or just enjoy a nutritious meal, try this purple bean soup recipe. It’s a great choice for its vibrant colors and nourishing flavors.

Health Benefits of Black Beans and Purple Vegetables

Kitchen Equipment You’ll Need for This Recipe

To make the vibrant and flavorful purple black bean soup, you’ll need a few essential cooking tools and appliances in your kitchen. Let’s go over the must-have items to ensure your soup-making experience is a breeze.

Essential Cooking Tools

  • A large, heavy-bottomed pot or Dutch oven (at least 6 quarts in size) for simmering the soup
  • A sharp knife and cutting board for chopping the vegetables
  • A wooden spoon or spatula for stirring and scraping the bottom of the pot
  • A colander or mesh strainer for draining the beans
  • Measuring cups and spoons for accurate ingredient portioning

Optional but Helpful Appliances

While the basic cooking tools are essential, a few optional appliances can make the preparation even easier:

  1. An immersion blender for smoothing out the soup to your desired texture
  2. A food processor or blender for quickly pureeing the vegetables and beans
  3. A slow cooker or Instant Pot for hands-off simmering and tender bean cooking

With these kitchen essentials on hand, you’ll be well-equipped to whip up a delightful batch of how to make black bean soup or bean soup recipes in no time.

kitchen equipment for black bean soup

Step-by-Step Purple Black Bean Soup Recipe

Make this vibrant purple black bean soup recipe in just 30 minutes. It’s a healthy and tasty meal. Follow these easy steps to make it at home:

  1. Begin by sautéing the aromatic vegetables. In a large pot or Dutch oven, heat a tablespoon of olive oil over medium heat. Add the diced onions, minced garlic, and chopped celery. Sauté for about 5 minutes, or until the vegetables are softened and fragrant.
  2. Next, add the purple black beans to the pot. Pour in the vegetable broth and stir to combine. Bring the mixture to a boil, then reduce the heat and let the soup simmer for 15-20 minutes, or until the beans are tender.
  3. Once the beans are cooked, use an immersion blender to puree a portion of the soup, leaving some beans intact. This will help create a creamy texture while still maintaining the chunky consistency.
  4. Stir in the diced purple potatoes, cumin, and paprika. Season with salt and freshly ground black pepper to taste. Let the soup continue to simmer for an additional 5-10 minutes to allow the flavors to meld together.
  5. Finally, garnish your how to make black bean soup with your desired toppings, such as chopped cilantro, a drizzle of Greek yogurt, or a sprinkle of shredded cheese.

Enjoy this vibrant and nourishing purple black bean soup as a satisfying main dish or as a starter for your meal. The earthy black beans, the richness of the potatoes, and the aromatic spices create a truly delightful and comforting soup experience.

purple black bean soup

“This purple black bean soup is a true delight for the senses! The vibrant color and the blend of flavors make it a must-try recipe.”

Tips for Achieving the Perfect Soup Consistency

Making the perfect black bean soup is all about finding the right mix of texture and taste. Whether you like your soup thick and hearty or smooth and creamy, these tips will guide you. You’ll learn how to make the ideal purple bean soup.

Texture Adjustments

To change the thickness of your black bean soup, try these methods:

  • Blend some cooked beans to make a creamy base. Keep some whole for texture.
  • Thin the soup by adding more vegetable broth. Or simmer it longer to thicken it.
  • Mash some beans with a spoon or potato masher for the right thickness.

Seasoning Balance

Getting the flavors right in your bean soup recipes is key. Here’s how:

  1. Begin with lots of aromatic veggies like onions, garlic, and spices. They create a strong base.
  2. Try the soup and tweak the seasoning. Add salt, pepper, or herbs to taste.
  3. End with a bit of acid, like lime juice or vinegar. It brightens and balances the flavors.

By using these black bean soup tips, you’ll make a soup that’s both consistent and delicious. Your family and friends will love it.

“The secret to a great black bean soup is in the balance of flavors and textures.”

Make-Ahead and Storage Instructions

Preparing your purple black bean soup ahead of time can save you a lot of time on busy weeknights. This soup is not only hearty but also nutritious. It’s perfect for leftovers, letting you enjoy its flavors for days. Here’s how to make and store it easily.

Cooling and Storing Your Soup

Let the soup cool completely before putting it in airtight containers. This step is key to stop harmful bacteria from growing. You can keep the soup in the fridge for up to 4 days or freeze it for up to 3 months.

Reheating Leftover Soup

To enjoy your purple black bean soup again, just reheat it. You can do this on the stovetop or in the microwave. If it’s too thick, add a bit of broth or water to thin it out.

Always heat the soup until it’s hot all the way through. Make sure it reaches 165°F (74°C) to kill bacteria.

Tip: For best results, let the soup cool a bit before serving. It will thicken more as it stands.

Freezing and Thawing Tips

  1. Divide the soup into portions for easy access.
  2. Leave some space in the containers for expansion when freezing.
  3. Thaw the soup in the fridge overnight or use the defrost setting on your microwave.

By following these simple steps, you can enjoy your purple black bean soup whenever you want.

Nutritional Information and Dietary Considerations

Enjoy the vibrant purple black bean soup without feeling guilty. It’s packed with nutrients. This dish is not only tasty but also fits many diets, like vegetarian and vegan.

Caloric Content and Macronutrients

A serving of this soup has about 280 calories. It has a good mix of macronutrients. You get around 15 grams of protein, 40 grams of carbs, and 5 grams of healthy fats.

The black beans and purple veggies are full of fiber. Fiber helps with digestion and keeps you full.

Dietary Restrictions and Alternatives

  • Gluten-free: This soup is naturally gluten-free. It’s great for those with gluten issues or celiac disease.
  • Vegan: It’s fully plant-based. So, it’s perfect for vegans looking for a tasty, healthy soup.
  • Low-sodium: If you’re watching your sodium, you can make it lower. Just use less salt or low-sodium broth.

Looking for healthy, vegetarian, or vegan soup? This vibrant purple black bean soup fits the bill. It’s easy to adjust to meet your dietary needs.

Serving Suggestions and Pairing Ideas

Make your meal better by adding tasty sides to your black bean soup. Try these ideas to make your meal complete and enjoyable.

Bread and Rolls

  • Freshly baked crusty bread, such as sourdough or artisanal loaves
  • Warm cornbread or corn muffins
  • Flaky biscuits or buttery rolls

Complementary Sides

  1. A crisp green salad with a tangy vinaigrette
  2. Roasted vegetables like sweet potatoes, bell peppers, or zucchini
  3. A side of seasoned rice or quinoa

For a more filling meal, add grilled or sautéed protein like chicken, shrimp, or tofu. Top it with black bean soup toppings like diced avocado, crumbled queso fresco, or sour cream.

“The key to a satisfying soup is in the toppings and sides. They can really make the dish come alive.”

Try different bean soup recipes to find your favorite mix of flavors and textures. A little creativity can turn simple black bean soup into a memorable meal.

Common Recipe Variations and Substitutions

The “black bean soup” recipe is incredibly versatile. It’s perfect for “vegetarians” looking for meatless meals or “vegans” wanting to try new soups. You can easily make it fit your taste and dietary needs.

Protein Additions

Want a heartier meal? Add protein like shredded chicken or turkey, ground beef or pork, or crispy bacon. For a plant-based option, try tofu, tempeh, or plant-based meats. They all increase the protein.

Spice Level Adjustments

Change the spice level to your liking. Add cayenne pepper, diced jalapeño, or hot sauce for heat. For a milder taste, use less chili powder or cumin. Find the spice mix that excites your taste buds.

“The great thing about this “black bean soup” is that it’s endlessly customizable. Whether you’re looking to add more protein or adjust the spice level, the possibilities are endless.”

Troubleshooting Your Bean Soup

Making the perfect how to make black bean soup is a fun journey. But, sometimes, things don’t go as planned. Don’t worry! A few easy tips can help you fix any issues and enjoy a tasty bean soup recipes every time.

Adjusting Consistency

If your purple black bean soup is too thick, add more broth or water slowly. This will help you get the right consistency. If it’s too thin, simmer it for a bit longer. This will help the beans thicken the soup.

Enhancing Flavor

Is your soup not flavorful enough? No worries! Start by adding more salt and pepper. Then, try adding different herbs, spices, or a bit of lime juice or vinegar. This will make the flavors pop.

Ensuring Fully Cooked Beans

If your how to make black bean soup beans aren’t tender, let it simmer a bit longer. Keep an eye on it. You can also blend some beans to make it creamier and help cook the rest.

“With a little troubleshooting, you can turn any bean soup recipes into a culinary masterpiece!”

Remember, making a great purple black bean soup takes patience and flexibility. By following these tips, you’ll create a soup that looks amazing and tastes incredible.

Time-Saving Tips and Batch Cooking Methods

Efficiency is crucial when making the purple black bean soup recipe. Luckily, there are ways to make cooking faster and easier. These tips and methods help you enjoy this healthy soup even on busy days.

Preparing the beans ahead of time is a big time-saver. Cook a big batch of black beans and keep them in the fridge or freezer. This way, you always have the main ingredient ready, making the soup easy to make.

Chopping vegetables like onions, garlic, and carrots early also helps a lot. Put them in airtight containers in the fridge. This way, you can quickly put the soup together when you’re ready to cook. It saves you a few minutes.

FAQ

What are the essential ingredients for the purple black bean soup?

The purple black bean soup needs purple cabbage, onions, garlic, black beans, and vegetable broth. You’ll also need spices and seasonings. Add cilantro, avocado, and sour cream for extra flavor and look.

What are the health benefits of the ingredients in this soup?

Black beans are full of protein and fiber. Purple cabbage is packed with antioxidants. Together, they make the soup very nutritious and healthy.

What kitchen equipment do I need to make this recipe?

You’ll need a large pot, cutting board, and knife for the soup. An immersion blender helps with the soup’s texture, but it’s not required.

How do I adjust the texture and seasoning of the purple black bean soup?

For a thinner soup, add more broth. For thicker, simmer longer. Adjust spices, salt, and pepper to taste for the best flavor.

Can I make the purple black bean soup in advance and store it?

Yes, you can make it ahead and store it. Cool it down, then put it in an airtight container. Refrigerate for 4 days or freeze for 3 months. Reheat when you’re ready.

What are some common variations and substitutions for this recipe?

Try adding chicken or tofu for more protein. Change the spice level or bean type. You can also make it fit dietary needs by swapping ingredients.

How can I troubleshoot any issues that may arise when making the purple black bean soup?

If it’s too thick, add more broth. Too thin? Simmer longer. Taste and adjust seasonings to get the flavor right.

What are some time-saving tips for making this soup?

Use pre-cooked or canned beans to save time. Prep ingredients ahead. Double the recipe for leftovers. An Instant Pot can also speed up cooking.